How a Bread Machine Works and Why You Might Need One
Sneak Peek: Learn how a bread machine works and why you may or may not need one. We’ll compare a bread maker and a stand mixer when it comes to making bread.
As an Amazon Associate, I earn from qualifying purchases.
Are you wondering if a bread machine or bread maker is worth the money? Will you use it enough to earn its keep in your kitchen? Do you already have a stand mixer, and how does that play into your decision?
If you must choose between a stand mixer or a bread maker, which suits your abilities and needs better?
Note: I receive no compensation from any appliance company for what I say or don’t say here. These are my opinions based on 35+ years of experience with various brands of bread machines and stand mixers.
How Does a Bread Maker Work?
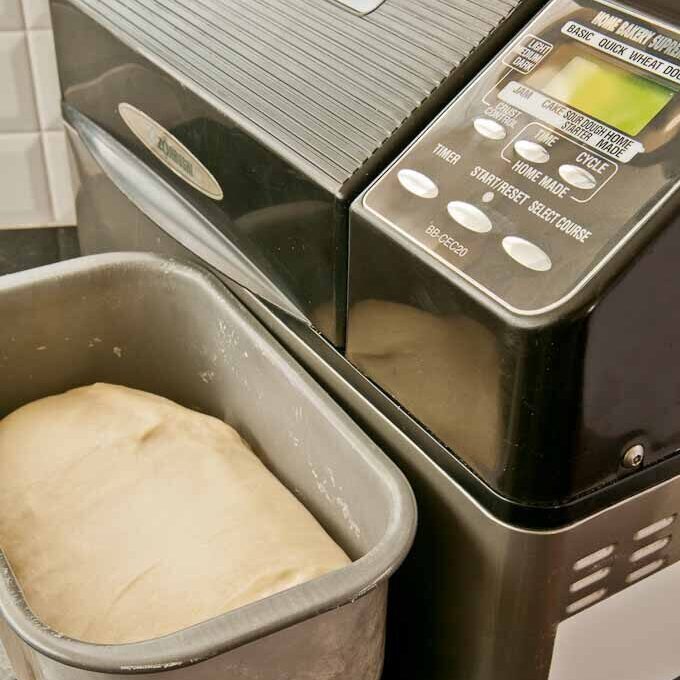
A bread machine simplifies bread-making: add all ingredients at once, set the right program and crust finish, and press START. In about three and a half hours, you’ll have a freshly baked loaf.
The machine comes programmed with preset time periods for pre-warming, mixing, kneading, rising, and baking.
The typical bread machine owner uses the machine to do every step, including baking. However, a large number of machines end up stored in basements, sold at estate sales, or donated to thrift stores. Why? We talk a lot about that on this website.
But it doesn’t have to be that way for you. There is more than one way to use a bread machine. Continue reading to find out more.
Who Might Benefit from Purchasing a Bread Machine?
- People with difficulty kneading dough due to pain
- Those who enjoy fresh bread for toast without much concern for appearance, crust, or texture (using the machine from start to finish)
- Individuals who are picky about their bread will find a bread machine’s kneading efficiency and timer highly advantageous. (That’s me!)
Can You Save Money by Making Bread?
1. Indeed, basic homemade loaves are cost-effective unless they’re not consumed quickly and spoil due to the lack of preservatives common in store-bought bread. However, homemade bread usually freezes well when wrapped appropriately.
2. These days, many people want to imitate loaves packed with whole grain flour, specialty flour, and seeds. Since these ingredients can be harder to find and more expensive when located, people are often surprised at how much a “healthy” loaf costs, even when made at home.
3. Beginning bakers often don’t realize how fast flour, particularly whole grains and yeast, go bad, impacting bread quality. Infrequent bread-making can make using a bread machine costly due to these perishable ingredients.
Five Reasons You Might Need a Bread Machine
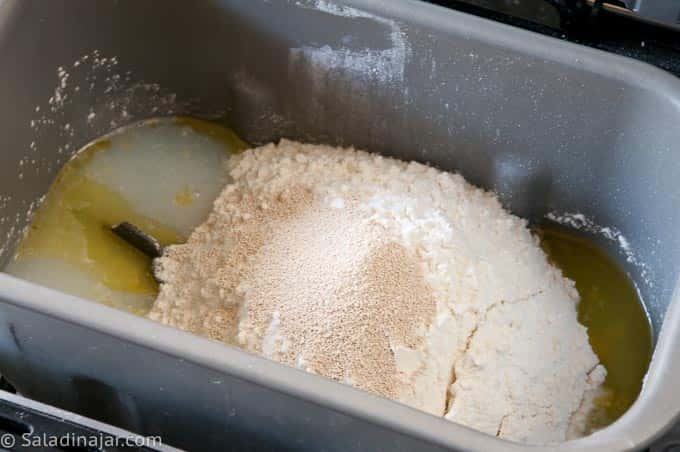
1. Simple assembly, simple clean-up
First, dump all ingredients in at once—no need to dissolve the yeast or heat the liquids. Then, close the lid, keeping the flour mess inside. The result? Only one pan and one or two paddles to clean. You can do this with almost any yeast bread recipe.
2. Shorter hands-on time than kneading by hand
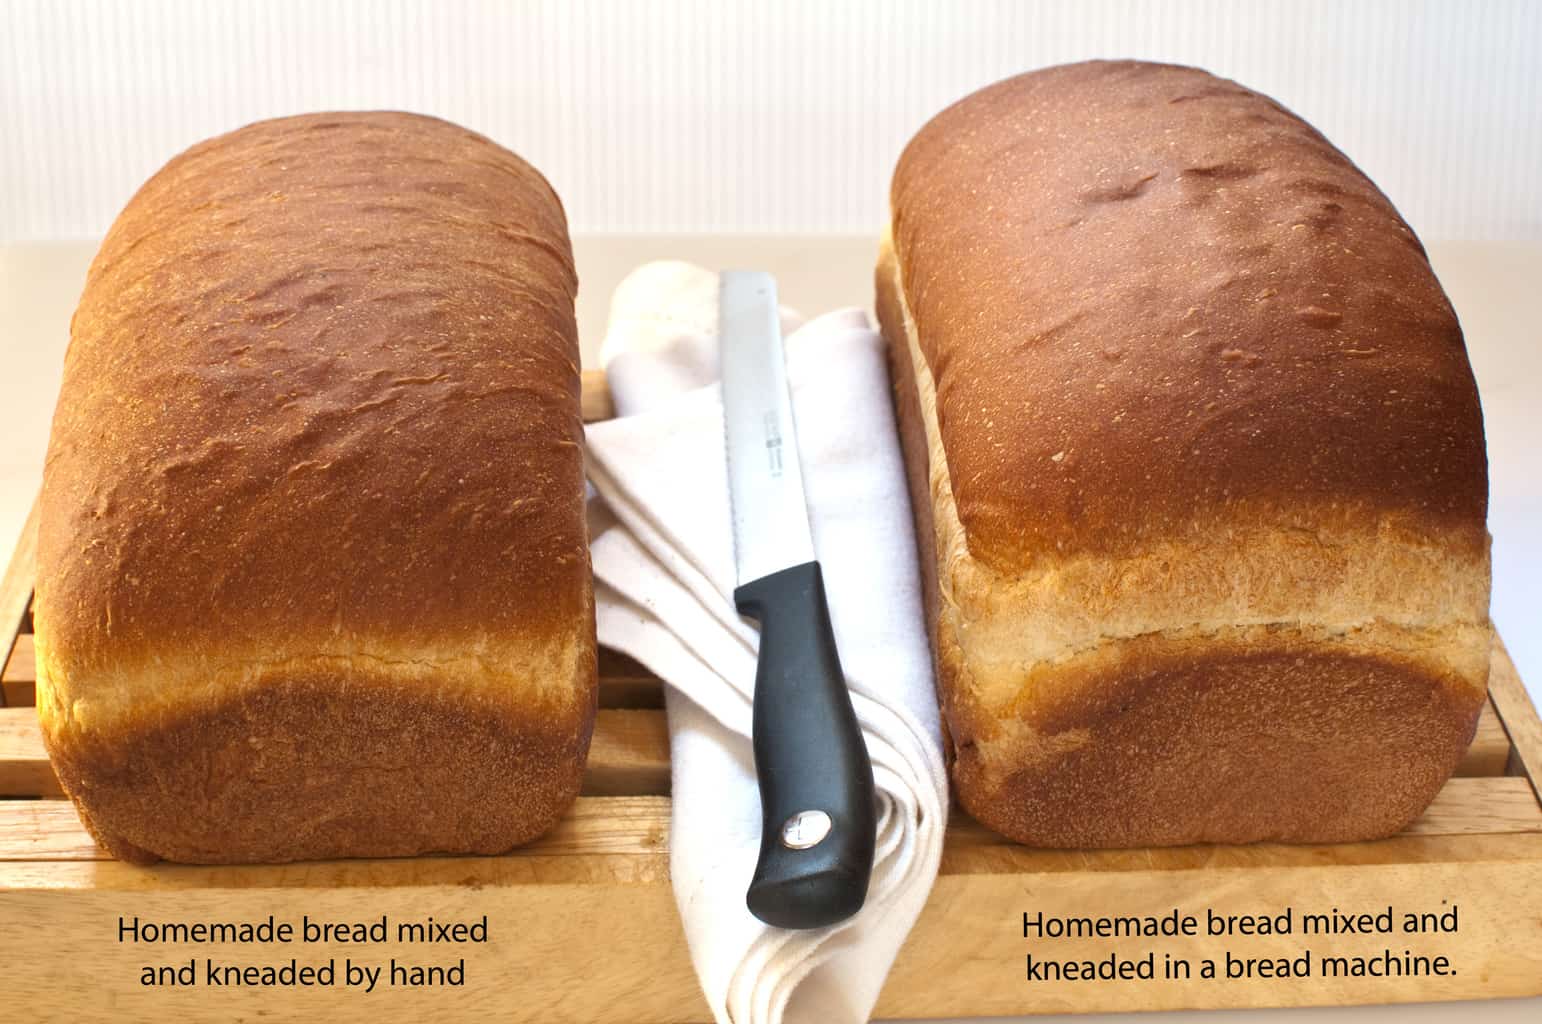
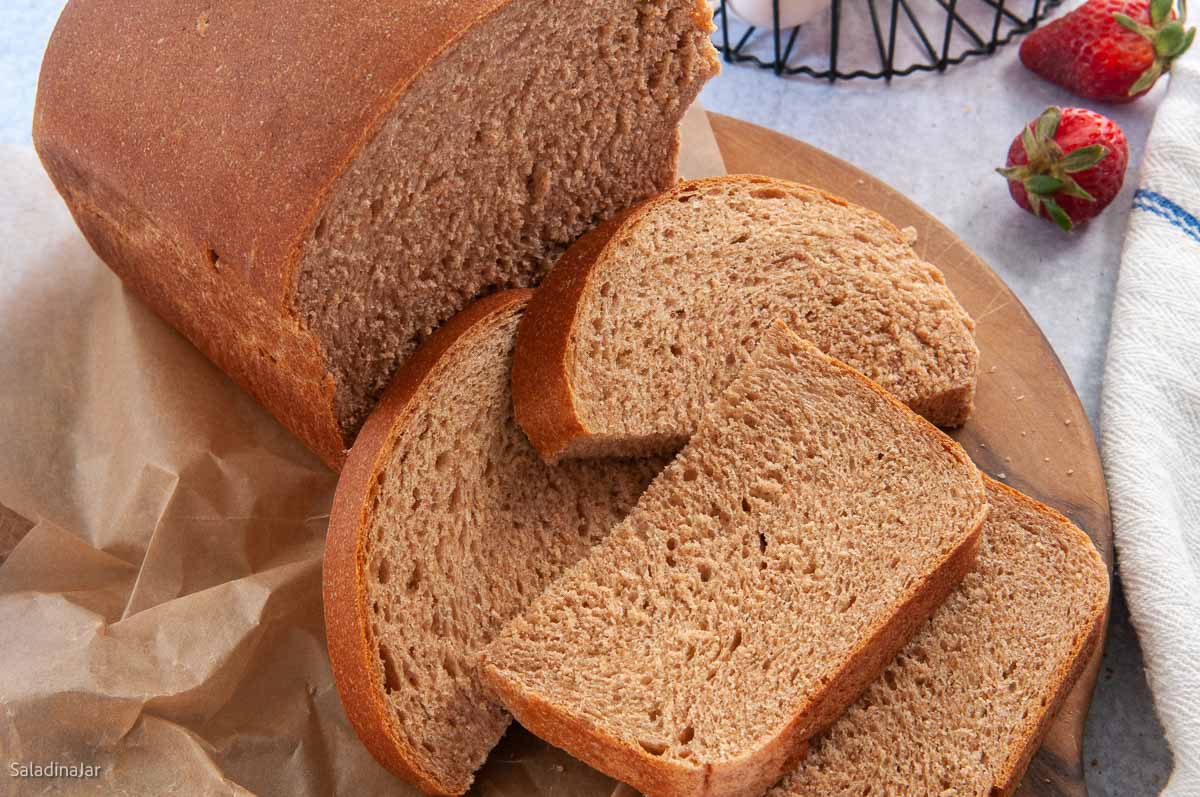
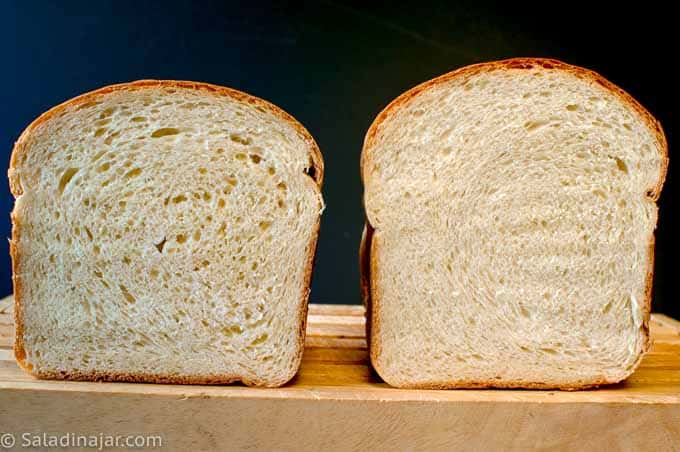
3. Bread rises higher, and the texture is more delicate when using a bread machine than when kneading by hand.
Compare the texture and rise of the two loaves of Condensed Milk Bread below.
4. Minimal attention to the dough-making process is required.
For this reason alone, I prefer a bread machine, although a stand mixer will do an excellent job once you get the hang of it.
Changing mixing speeds and blades is a non-issue with a bread machine.
You will no longer need to grease a bowl, find a cover, or look for a warm place for the proofing stage.
5. Bread machines have helpful timers.
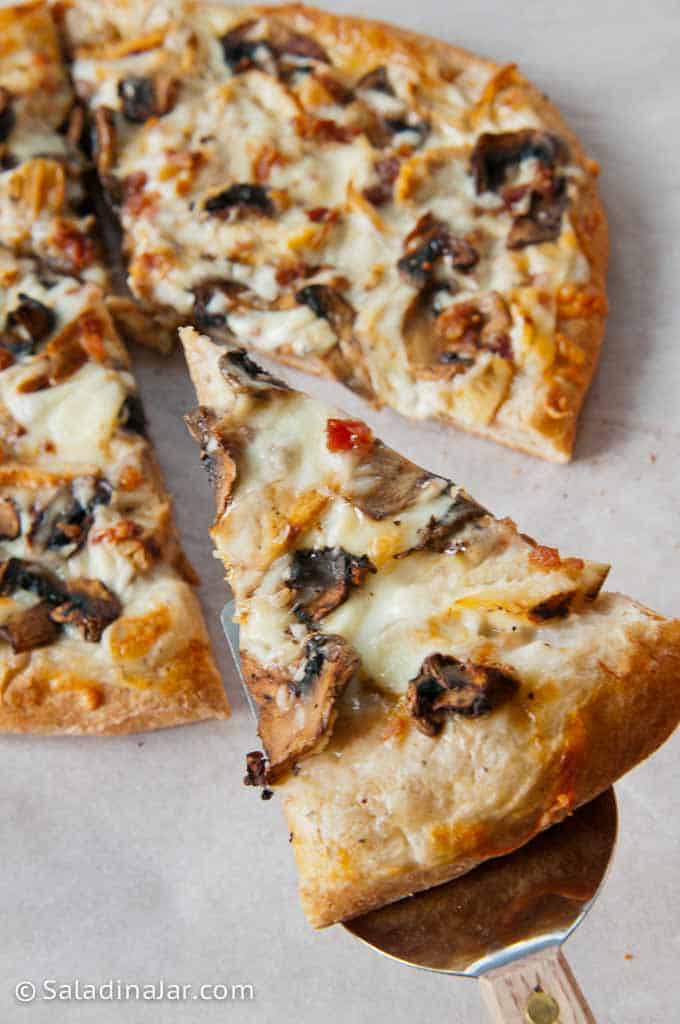
With a timer, you can do extraordinary things like having My Favorite Pizza Dough ready to roll out when you walk in the door from a long day at work.
Another example:
If you want inspiration and exclusive tips, add your email and press the button. (Don't worry. I won't sell your email.)
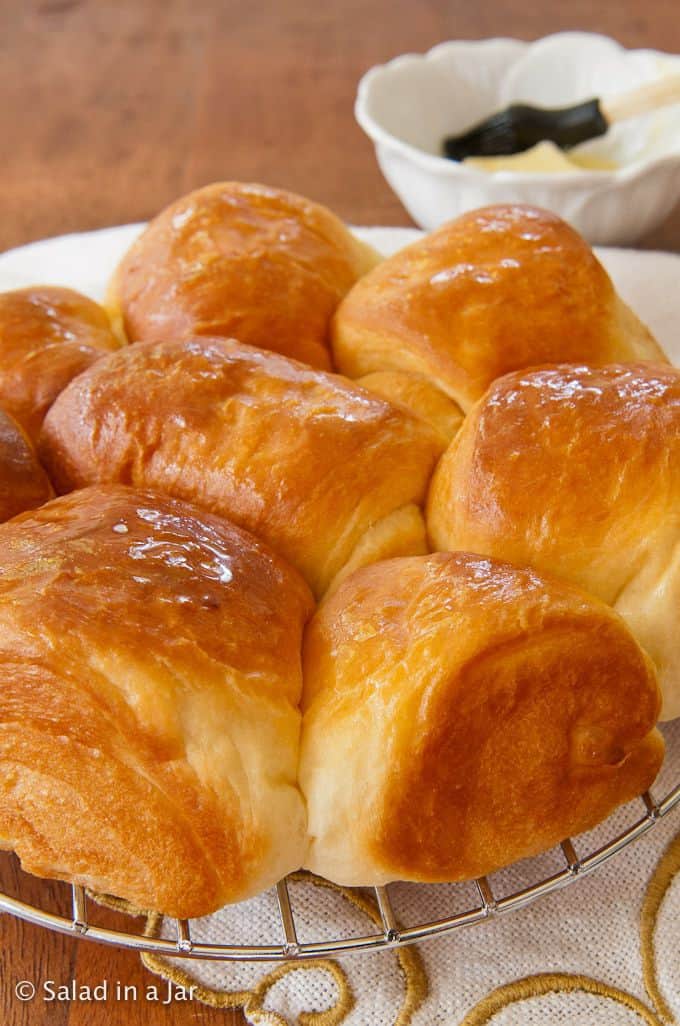
I often throw ingredients for My Favorite Dinner Rolls into the bread machine before church. Set the timer to start the DOUGH cycle. Upon arriving home 2-3 hours later, the risen dough is ready to form into the shape of my choice.
6. The DOUGH cycle has a warming feature to help your bread proof correctly during the first (and second) rise phase.
The warming feature works well unless your kitchen is overly hot or cold, especially if you want to start your bread and leave the house for a while. When the lid is down, the built-in heater will keep the dough at the right temperature until the end of the DOUGH cycle.
Features You Might Find in a Bread Maker
Bread makers offer the consumer a wide variety of cycles and options:
- The DOUGH cycle handles mixing, kneading, and rising the dough, typically once or twice. You then take over, making it ideal for pizza dough, cinnamon rolls, and, in truth, any bread you want to look and taste fabulous. It’s my preferred cycle and almost the only one I use. More details to follow.
- A delayed timer allows you to set the machine to start mixing later. This feature is handy when you want to schedule your bread to finish baking, even when you aren’t available. A few models will allow you to set the timer on the DOUGH cycle, which is worth the machine’s price in my book.
- A pre-heat phase brings all the raw ingredients in your bread recipe to the same temperature before starting. This phase is only helpful if you use the machine for baking your bread. It is unnecessary when using the DOUGH cycle.
- Most bread makers offer various settings for assorted bread with appropriate browning levels for the crust (e.g., whole wheat bread, sweet bread recipes, dark and light crusts, etc.)
- Many machines offer an “add-in” notification. When the machine beeps, you know it is time to add ingredients you don’t want to be pulverized, like nuts or raisins. The beeps usually sound in the last 5 minutes of the kneading phase.
- A SOURDOUGH STARTER cycle enables you to make a specific type of sourdough starter in the machine and allows it to sit for days while it ferments to perfection. Unfortunately, you can’t use your bread maker for anything else during this time. This cycle is not for making sourdough bread. See the FAQ section for more information.
- GLUTEN-FREE BREAD cycles are becoming popular. See the FAQ section for more discussion about gluten-free bread and a bread machine.
- A CAKE cycle makes quick bread like banana bread, cornbread, or desserts like chocolate cake. Remember that the final product will conform to the shape of the bread pan. Making a 3-layer cake would require some extreme creativity.
- Some machines also offer a JAM or YOGURT cycle (designed for yogurt incubation).
- A few breadmakers offer HOMEMADE or CUSTOM cycles that allow you to create a specific combination of mixing, kneading, rising, and baking. Or, you can build a custom cycle strictly for baking, enabling you to make things like meatloaf. Unfortunately, I’m unaware of a bread machine that allows you to choose the baking temperature, so you’re stuck with the default bread-baking temperature.
Which Options are the Most Important? (My Opinion, of Course)
- Look for a good timer and a DOUGH cycle. I wouldn’t buy it if it didn’t have a DOUGH cycle.
- Choose a bread machine with clear, easy-to-understand labels and user manuals. Some of the cheaper models have confusing instructions for American users.
- Look for the ability to set custom cycles if you are an advanced bread baker.
Bread Machine vs. Stand Mixer
My readers often wonder if a bread machine is essential when they have a stand mixer, especially if they can only fit one in their kitchen. They ask for advice on which to buy.
1. Bread machines are the best dough kneaders in town.
Bread machines, especially those with two paddles, do a superb job of kneading all kinds of dough. Use it for standard pizza dough, basic bread, whole grain loaves, sticky ciabatta, brioche, or rye dough.
The only bread recipe inappropriate for a bread machine is a no-knead or refrigerator dough. In both cases, the gluten develops with the help of a high percentage of liquid, so there is no reason for a bread machine.
2. Mixers will do many other baking tasks besides making bread dough.
There is no end to what you can make with a stand mixer. If you don’t have a mixer and want to do a lot of baking, I would choose a mixer first.
While bread machines offer cycles for making jam, cake, and other baked goods like meatloaf, the bread machine would not be my first choice for making anything but yeast bread.
It’s nice to have the option if you don’t have access to a conventional oven, don’t want to use it (summer?), or want to take your bread machine on a camping trip.
But, unfortunately, the posts at the bottom of the pan and the inability to control the baking temperature can be challenging. (I almost forgot the obvious—everything solid will bake in the shape of the bread pan.)
Clean-up is also more difficult whenever you bake in a bread machine. All the manufacturers I know about recommend against throwing a bread machine pan into the dishwasher. Scrubbing around the posts is a drag, especially if the paddle is stuck.
3. Bread makers limit the recipe size you can use.
Most 2-pound bread machines have a limit of 4½ cups of flour, although a few bread makers can make a three-pound loaf. If you are baking for a crowd, you either need to use more than one bread machine or make several batches of dough one after another. I don’t advise doubling a bread recipe when using a bread machine.
4. A stand mixer has more power.
That extra power comes in handy for bigger batches of dough. Depending on your stand mixer’s size, most can easily handle a recipe with 6-7 cups of flour.
However, that power can make it easy to over-knead the dough with a stand mixer (unlike a bread machine). Because you are in control, you must recognize when the dough is mixed and kneaded correctly. This decision can be a tough call for beginners.
5. Monitor mixers, but don’t ignore your bread maker.
With yeast bread, most recipes designed for a stand mixer begin with the mixing attachment, then ask you to change to a kneading attachment to build gluten.
Theoretically, a bread machine only needs you to add the ingredients to the pan and press “go.” That’s what most people imagine when buying a bread machine.
However, bread machine dough also needs love and attention after you start the machine.
(Bread machine manufacturers don’t advertise this, but it’s true if you want a fabulous product every time.)
📌Kitchen tip📌 After you dump the ingredients into a bread machine and push “START,” circle back again and lift the lid to ensure your dough’s moisture level is correct. Doing this will exponentially increase your chances of success with a bread machine.
What Size Bread Machine Should I Purchase?
- Consider the number of people you’re feeding. A two-pound machine, the most common, is versatile, making 1.25, 1.5, or 2-pound loaves. For one or two people, opt for a compact machine.
- Large families might need a three-pound machine, but note that small recipes don’t knead well in these larger machines.
- Avoid doubling recipes in a bread machine. Similarly, small recipes in a three-pound machine aren’t ideal due to inefficient kneading. Bread machines are not suitable for commercial use due to their size constraints.
Let’s talk about the elephant in the room…
Can I Make Bread that Tastes Fabulous with a Bread Machine?
Have you ever eaten bread made and baked in a bread machine? Were you impressed? What about the holes in the bottom and the cardboard crust?
While baking in a bread machine may produce bread good enough for toast or fill up hungry teenage boys, the final appearance and taste can be a gamble.
Making bread is not like making brownies. Just because you follow the recipe perfectly doesn’t mean your bread will be perfect.
–a Paula-ism
Why? Because making a fabulous loaf of bread is more complicated and less forgiving than making a pan of standard brownies. There are many more variables:
- Will your recipe work with the ambient temperature and humidity in your kitchen? (Don’t forget altitude differences.)
- Are your ingredients measured correctly?
- Is the moisture level of your dough where it should be?
- Will the ingredients available to you perform the same way as the ingredients the recipe author used?
- Did you choose the best bread recipe?
Despite the misshapen loaves, door stops, and thick crusts you may have experienced, there are ways to use a bread machine that make it quite useful, even when you have high standards for your bread.
Suppose you are willing to consider using a bread machine differently. In that case, you can avoid the complaints that come with strict adherence to the manufacturer’s instructions and recipe manuals.
Instead, I’ll teach you easy ways to correct the dough for the variables listed above and more. (Don’t forget to sign up for the free course below.)

Yes! You can make homemade bread that you’ll be excited to share with your family and friends. I’ll show you how! With a good recipe, a little practice, and some experience, you can expect excellent texture, height, flavor, and appearance in the bread you make with a bread machine.
Nine FAQs About Bread Machines
Using the automatic cycle on a bread machine from start to finish is fraught with pitfalls. Although you might get lucky, and it works, often, it doesn’t. I don’t care for the odds, so I take more control.
Use the DOUGH cycle for mixing, kneading, and the first rise. Next, remove the dough, shape it, let it rise again, and finally, bake the bread in a conventional oven.
Check out this post about choosing a machine: Choosing the Right Bread Machine.
On this website, you’ll find over 67 recipes for mixing bread in a bread machine. Also, you can make any of these recipes with a stand mixer. Find the directions in each bread recipe’s notes.
First, read this post for general tips about using a bread machine. Then, I would start with this recipe for Sweet-Milk White Bread. It’s a winner. If you prefer something more substantial, try this Cracked Wheat Berry Bread.
A stand mixer is the better option, in my opinion. Gluten-free flours are heavy. Properly mixing gluten-free dough can be challenging for bread machine paddles without help from a cook with a small spatula. Using paddles designed to build gluten seems pointless when there is no gluten to develop. If you are determined, check out these tips for gluten-free bread in a bread machine.
You can make sourdough bread with enough commercial yeast to make it rise in the same amount of time as a regular loaf of bread would rise and bake. Sourdough recipes that depend solely on a “wild-yeast starter” cannot be mixed and baked in a bread machine because the rise times can vary wildly. However, classic sourdough with no yeast can be mixed and kneaded on the DOUGH cycle, then manipulated and shaped by hand before baking in a conventional oven.
I recommend using the ingredients specified in the recipe to get the best results.
For example, instant yeast is the best yeast for a bread machine. Bread flour will provide a more robust rise than all-purpose flour. Vital wheat gluten is helpful when baking with whole wheat flour and other whole-grain flour like rye. For best results, don’t substitute, especially if you are a beginner.
This question is hard to answer with a blanket statement. It works fine in some machines. Others, not so much. You can usually get away with a 1½-pound loaf in a 2-pound machine. Consider buying a compact device if you rarely want more than a 1-pound loaf.
My favorite is the Zojirushi Home Bakery Supreme (paid link). I have three of them, but one of them only cost me $15 from a thrift store.
Don’t Take My Word for It
“I agree with you 100%, Paula. I use my bread machine for mixing and raising, then I hand-shape the final product. It’s such a non-fuss way to bake bread.”–JUDY
Parting thoughts: If you have a friend who is thinking about buying a bread machine, thank you for sharing this article.
If you have questions or suggestions, email me privately for a quick answer: Paula at saladinajar.com. Hope to see you again soon!
Paula Rhodes, owner
As a retired home economist, I created Saladinajar.com to share my belief that you don’t have to be a chef to find joy in creating homemade food worth sharing. Bread machines (used in an unconventional way), homemade yogurt, and quick microwave recipes are my specialty.