29 Questions and Answers About Homemade Yogurt
Sneak Preview: This is a collection of 29 questions and answers about homemade yogurt that you’ll dream about instead of yogurt that keeps you awake worrying about it.
As an Amazon Associate, I earn from qualifying purchases.
Did your yogurt project turn out differently than you hoped? I’m here to help you get to the bottom of the problem so that your next batch will be a delicious success.
Perhaps you are in research mode before you try your first batch of yogurt. It’s always good to know what kind of pitfalls might lie ahead. Keep reading.
If you don’t see your question here, send me an email for a personal answer to your question: paula at saladinajar.com
I am so glad I found your website! Using the microwave is so much easier and quicker. When I would make it (yogurt) on the stove it would take forever or scald the bottom. Thank you so much for your thorough information and troubleshooting!!
–Abbee
1. How do I make yogurt at home?
Making yogurt at home requires milk and a starter containing live bacteria to produce yogurt under the right conditions. The process is the same whether using cow’s or goat’s milk. Get the details on how to make the yogurt of your dreams.
If you want to make yogurt with non-dairy milk, you will need special yogurt cultures designed for that purpose.
2. Do I need a yogurt maker to make yogurt?
Yogurt makers usually work well, but they can be like cheap software: best for beginners who want things simple, but you may outgrow them quickly–especially those with individual serving-size jars. Using an Instant Pot to make yogurt is a popular option, although they can also be limiting regarding quantity.
3. How can I tell if my yogurt is set?
Shake or tap it gently. It should look like congealed Jello. Or, tip it gently. The yogurt should bulge on the side.
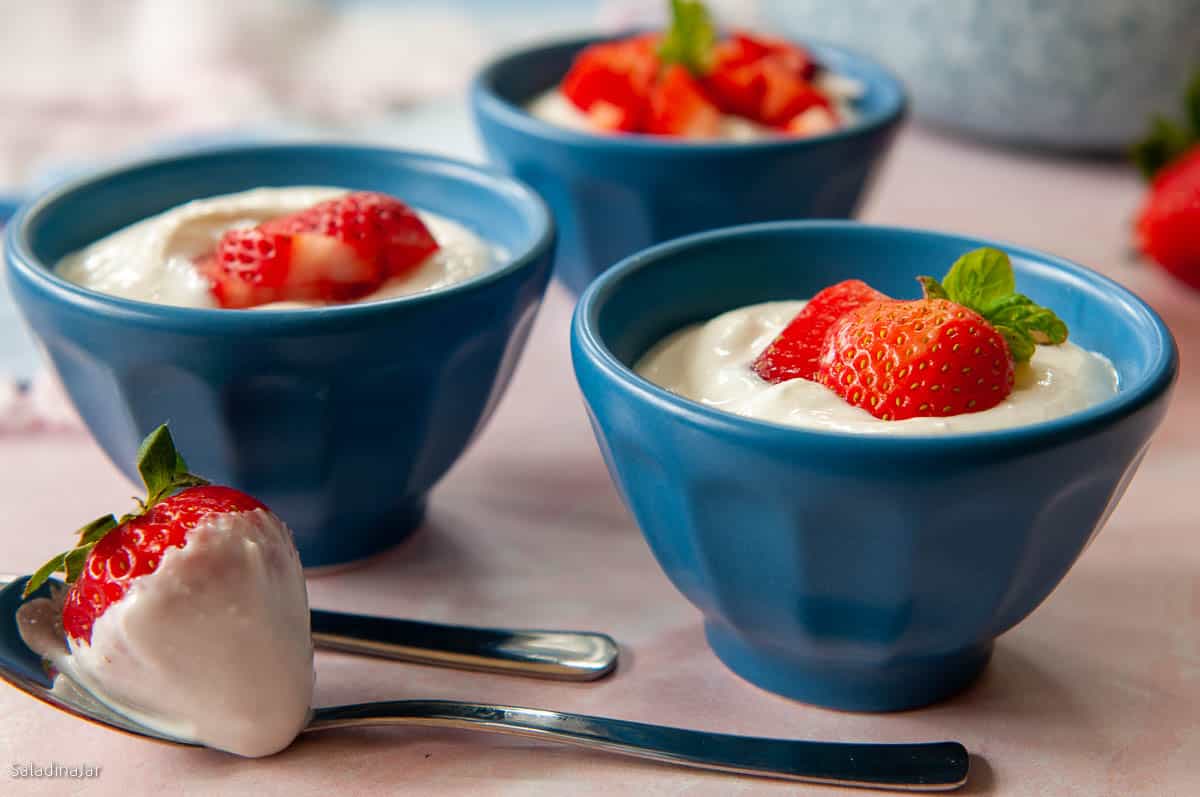
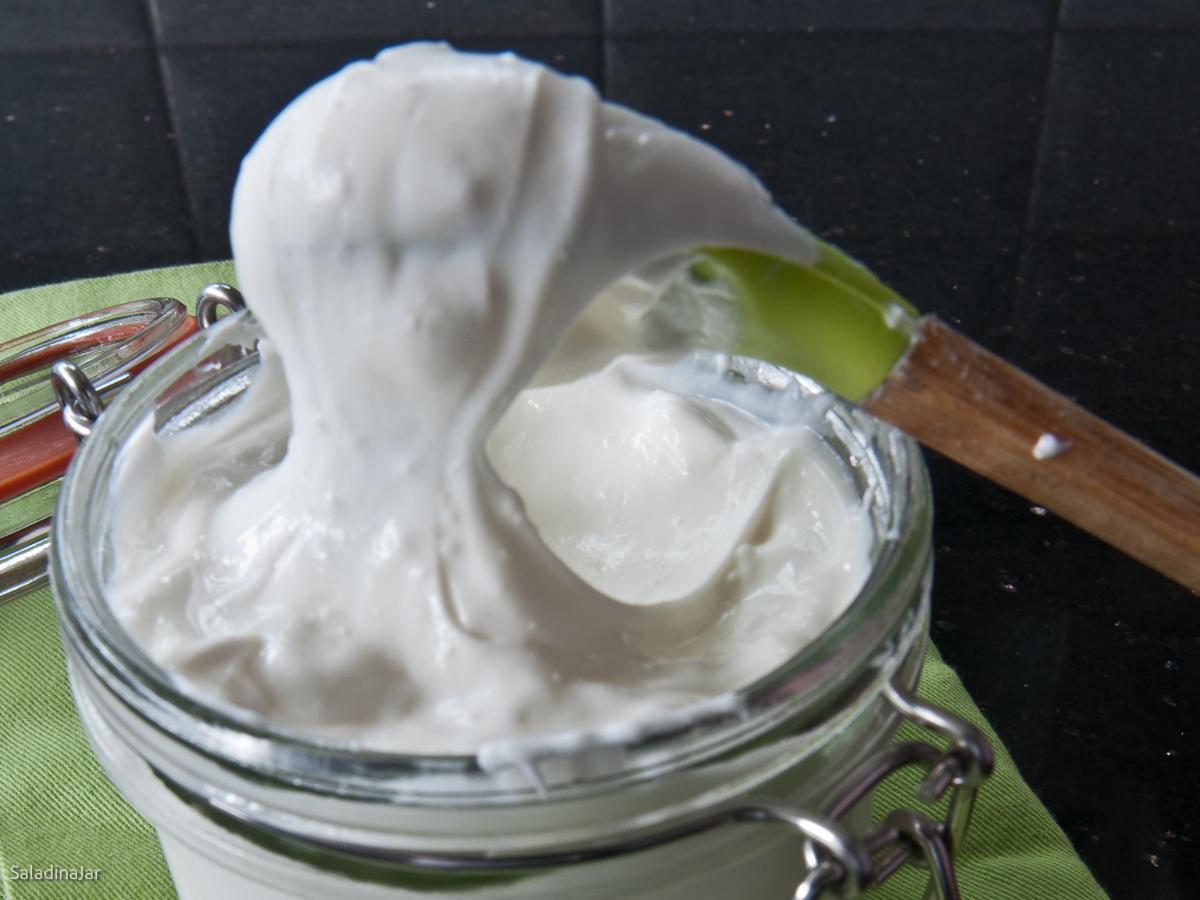
4. Why does my yogurt look watery?
When you dip a spoon into fresh yogurt, it is normal to see water or whey. Look closely under the spoon in the above picture, and you will see whey collecting. The longer you incubate, the more liquid you will see. When you chill your yogurt, you will see even more. Drain off the whey or stir it back into the yogurt according to how thick you want your yogurt.
5. Why didn’t my yogurt set? It still looks like milk.
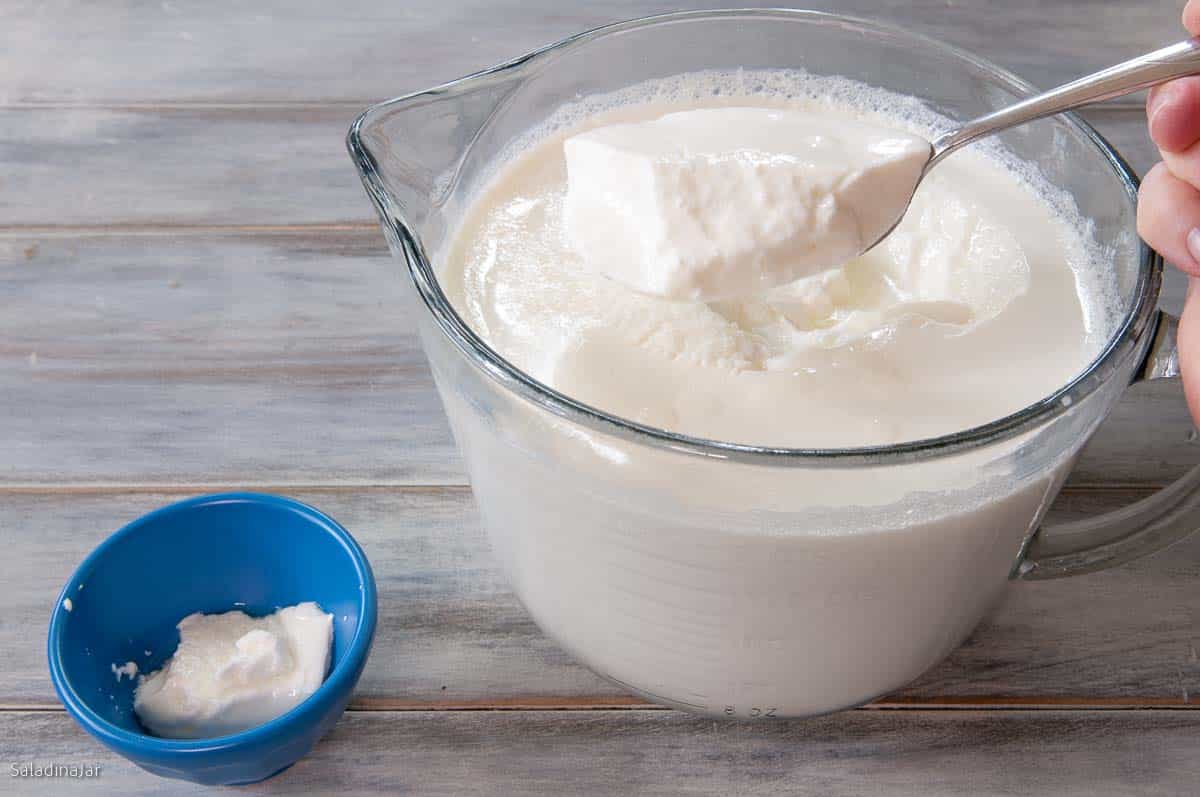
- Was the starter fresh (full of active bacteria)? Read more about the important details of using starter.
- Was the incubation temperature held steady between 100˚F and 110˚F? Use a quick-read digital thermometer to check. Yogurt makers and Instant Pots can lose their ability to hold the temperature steady as they age.
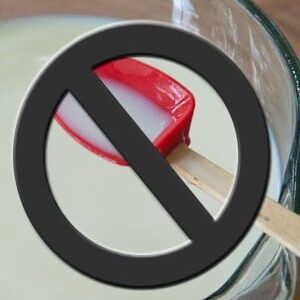
- Was the milk disturbed while incubating? Avoid putting a thermometer or spoon into the milk. Do not stir. I gently shake or tilt the bowl to check if the milk has set. Once you stir or pour it into a strainer, incubation is over.
6. Since my yogurt didn’t set, can I try again with the same milk?
Does it still smell good and look good? If so, see details for trying again in this post, “My Yogurt Didn’t Set. What Can I Do?”
If you don’t want to try again, consider these ideas for that milk:
- Refrigerate and use it as a substitute for buttermilk in baking.
- Make ricotta cheese using lemon juice or vinegar.

7. Is it necessary to heat the milk to 175-180 degrees since it has been pasteurized already?
Heating the milk is not to kill bacteria (because it has already been pasteurized). The high heat unravels the proteins so that the yogurt will be thick with a better texture. You can read a more scientific explanation here.
Alternative if you don’t want to heat and cool milk: Use the cold start method described here. You might find it easier. If you’re not sure, I wrote a post about the pros and cons of the cold start method vs. the traditional method here.
8. Can I make raw milk yogurt?
It’s possible, but the yogurt tends to be thinner, even after it’s strained. Read more about making yogurt with raw milk here.
9. What happens if you overheat milk when making yogurt?
We are talking about milk that was allowed to boil. It doesn’t help the texture of the milk. Once it happens, carry on. Some people claim it results in grainy yogurt, but I have been unable to replicate this in real life.
10. Can you microwave milk to make yogurt?
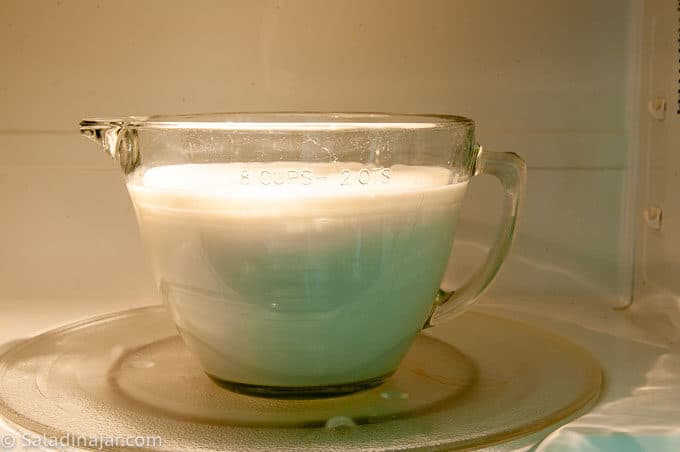
Yes. I highly recommend it. Once you know how long it takes your microwave to heat the quantity of milk you choose to 180˚F, it’s easy. No babysitting, no worries about boiling over, and no burnt milk. You will need a large microwave-safe bowl that fits in your microwave oven. Read more about how to microwave milk to make yogurt.
11. How long is the incubation time for yogurt?
When everything is set up right, yogurt can set in as little as 3-5 hours. If your yogurt has not set up after 8-10 hours, something is amiss. You could try adding more starter and putting it back into the oven. (Don’t reheat the milk.) This works sometimes but not always. It’s worth a try.
If you want inspiration and exclusive tips, add your email and press the button. (Don't worry. I won't sell your email.)
If you like yogurt with a more tart taste, incubate longer. If you prefer mild yogurt, remove it from incubation as soon as it sets. Some people claim that incubating for 24 hours will produce lactose-free yogurt. I am not qualified to advise you about the legitimacy of that claim or the process.
12. How can I make thicker yogurt?
- Heat the milk to 180˚F, as discussed in the previous question. Some people claim that holding the milk at 180˚ for 15 minutes makes the yogurt even thicker. This is a pain when heating milk on the stove, but it’s easy with a microwave. (Set your microwave on 20 or 30% power for 15 minutes.) I’m unconvinced that it makes that much difference.
- Strain it. (See question #12.)
- Experiment with different types of milk (fat content) and various brands. Whole milk is generally thicker than non-fat milk. Certain brands of milk seem to produce richer yogurt than others.
- Try a different type of starter–either a different brand of yogurt or a traditional freeze-dried starter. Even though freeze-dried starter makes thin yogurt in the first batches, it ramps up quickly and makes thick yogurt for me.
- Add dry milk or unflavored gelatin. I love the pure taste of fresh yogurt with no additives because additives can cause a pasty taste and a cooked flavor. Many people love to add dry milk. Try it and see what you think. That’s the cool thing about making yogurt. You get to do it how you want.
13. How do I strain yogurt?
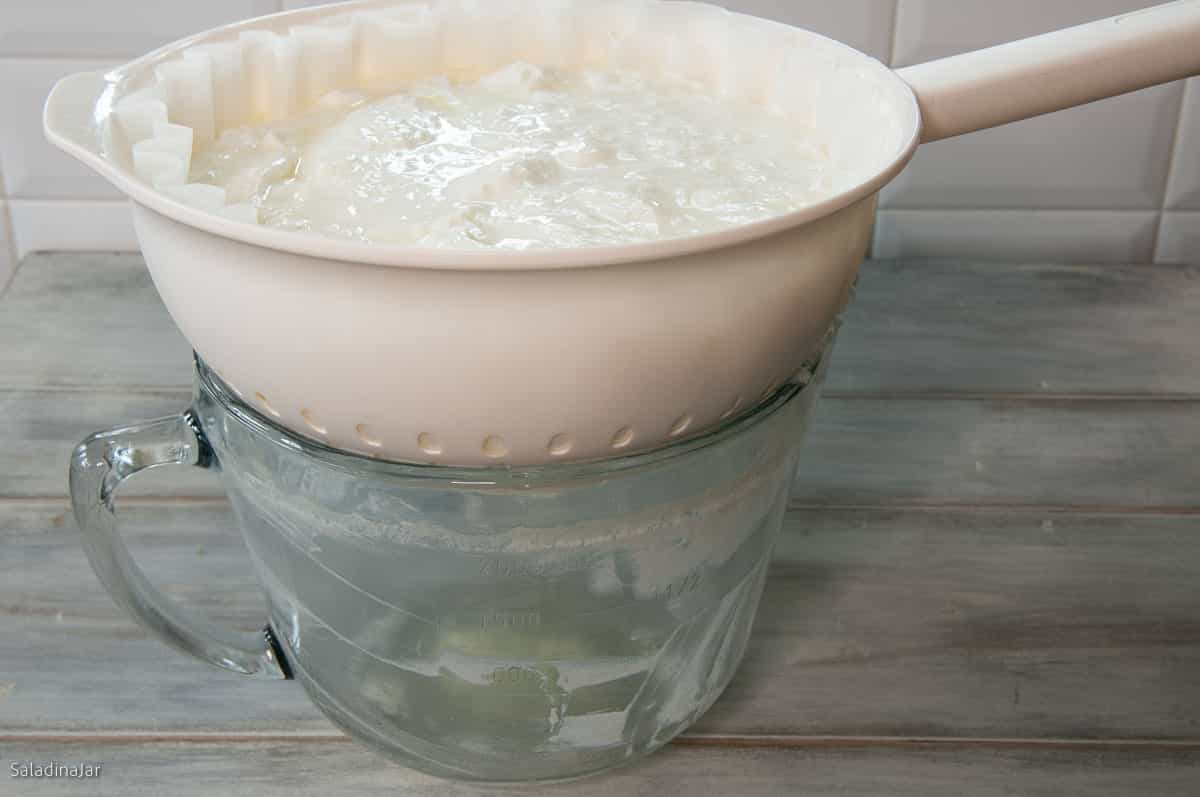
It’s not a big deal to skip the cheesecloth and try this method with a cheap colander and large coffee filters. You can also strain yogurt without coffee filters with this easy method.
- Skip the cheesecloth and try this method with a cheap colander and large coffee filters.
- Buy a good colander and strain yogurt without coffee filters with this easy method.
- Try a reusable yogurt bag. It’s another alternative for cheesecloth. It’s nice for large batches if you buy one large enough for a gallon of milk.
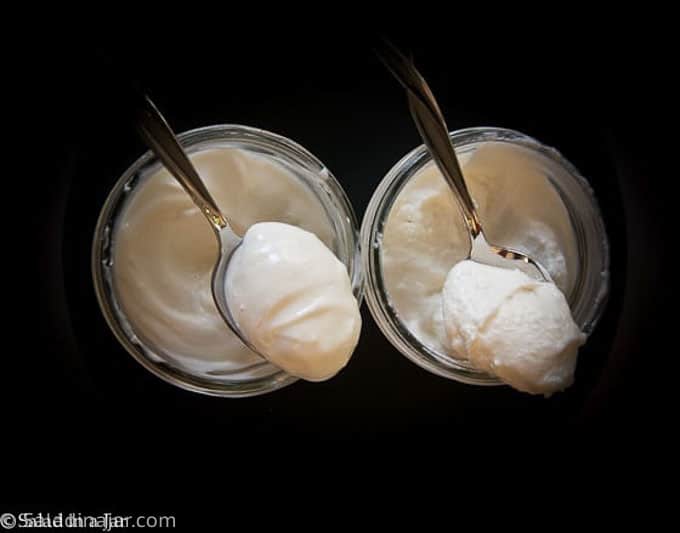
14. What is the difference between regular, Greek, and Icelandic yogurt?
They start with the same ingredients: milk and a starter full of live bacteria.
Regular yogurt is unfiltered or unstrained and contains all of the original whey. Greek yogurt is strained to remove much of the whey to make it thicker. Icelandic or Skyr yogurt, usually the thickest of the three, has even more whey strained out.
Many people prefer Greek or Icelandic yogurt because the straining process results in more protein per serving.
15. Does it matter what kind of milk I use?
Some people say you can’t make yogurt with fat-free milk, but that is untrue. I’ve made gallons and gallons over the years.
Yogurt can be made successfully with skim milk, 1%, 2%, and whole milk, even half and half and whole cream (cream fraiche). Some people use 100% powdered milk. I have never tried that myself.
Ultra-pasteurized milk is controversial. In my experience, some brands work better than others. If you are having trouble, try another brand or use regular pasteurized milk.
See the first question on this post about how to make yogurt if you want to make non-dairy yogurt. The rules are different.
16. What should I use for a starter?
Yogurt from the supermarket or traditional freeze-dried starter are the two most common types of starter used by home yogurt makers. Note: When I talk about generations, I’m referring to using the yogurt you made to start another batch.
1. Supermarket Yogurt:
Pros:
- Store-bought yogurt is easy and convenient.
Cons:
- Flavorings or additives are problematic.
- Live cultures in commercially-produced yogurt are prone to imbalance.
- Use for only 3-4 generations.
2. Freeze-dried Starter–Traditional:
Pros:
- Available online
- Good for unlimited generations (when used regularly)
- Inexpensive in the long run
Cons:
- More expensive initially
- Although the first batch is thin, subsequent generations are thick
- Easy to share with others
Think of it like hydrangea plants. Compare the blooming plants you buy in the grocery store to the transplants your neighbor gives you from his yard.
Grocery store hydrangeas are raised in a hot house, like store-bought yogurt. It’s beautiful when you buy it, but it only goes downhill. If you try to plant that hydrangea in your garden, its delicate upbringing can’t withstand the forces of nature.
However, the hydrangea you receive from your neighbor is already proven to withstand heat, irregular watering, and even disease. If it survives the transplant experience, it will only get better with age, like a traditional freeze-dried yogurt starter.
No matter which starter you choose, remember this:
No yogurt makes a good starter after 7-10 days (approximately) from the day it was made.
Yes, yogurt is OK to eat for at least two weeks. But just like humans, when it comes to reproducing, the younger the yogurt, the easier it happens. At a certain point, the yogurt bodies begin to die off, and there aren’t enough of them to produce good yogurt.
This is important if you don’t make yogurt very often. When your starter ages, the next generation can go sideways in a hurry.
17. What is the best supermarket yogurt to use for a starter?
Look at the label for three things:
- The date. The yogurt should be very fresh.
- No additives. Additives can cause graininess.
- No flavorings (not even vanilla yogurt, which usually has added sugar or sweetener). Please don’t confuse the little yogurt bodies with a diet of anything other than plain yogurt.
Hint: Cheap yogurt usually has additives to make it thicker. Look for a more expensive brand of yogurt.
18. How do I prevent the skin on top of my milk as it cools?
My best answer to this “problem” is loosely covering the heated milk as it cools. It prolongs the cooling process but requires no extra hands-on time.
I leave the hot milk uncovered and wait until the yogurt is cooled, then remove the skin quickly with a flat spatula before adding the starter.
19. Why is the texture of my homemade yogurt different from store-bought yogurt?
Many commercial products have additives we have become accustomed to but are impossible to duplicate at home.
Despite having expectations based on what we buy at the grocery store, if you make yogurt very much, you will soon be addicted to fresh, unadulterated, and customizable yogurt.
20. Why is my yogurt slimy?
The cause is likely related to an imbalance in your yogurt, often caused by:
- Wild yeast in the air
- Store-bought yogurt that is too many generations away from its roots
- Cross-contamination
Example of #3: I once put yogurt in a glass jar I once used to hold a sourdough starter. Although it appeared clean, I’m convinced there was just enough residue for the sourdough yeast to cause havoc with the yogurt. Read more in this post about the causes of sliminess and whether it’s safe to eat.
21. The consistency and texture were not what I expected when I strained my yogurt.
a. Is it grainy? If so, my research suggests several possibilities: Did your yogurt starter have any additives? Was the incubation temperature over 110˚F for a long time? See this post about grainy yogurt for more on the subject.
Some people claim that heating the milk too quickly can cause grainy milk. This may happen when heating the milk on a stove, but it does not happen with microwaved milk.
b. Is it lumpy? Try whisking. This will not help grainy yogurt, but it may help if the yogurt has been incubated too long.
22. Why does my yogurt look like cottage cheese?
- Too much starter. More is not better.
- The yogurt was stirred before it was chilled.
- The incubation temperature was too high.
- The incubation period was too long.
When making Greek yogurt, it is normal for the yogurt to look curdled when you pour it into a strainer. After much of the whey (clear yellowish liquid) drains out, whisk the yogurt well, and it should smooth out like a thick pudding. The more whey you drain out, the thicker and creamier it will be.
23. How do you fix curdled yogurt?
Strain out some of the whey. Whisk it like crazy by hand or with an electric whisk, or mix it with a portable mixer. Don’t use a blender. It’s too rough and will make your yogurt thinner.
24. What can I do with leftover yogurt whey?
Yogurt whey can be quite useful. Here are 18 ways to use yogurt whey you might not have thought of. Also, check the comments. People have written about all kinds of ingenious ideas in the discussion.
25. How long does yogurt last?
Homemade yogurt is good to eat for at least two weeks. If you are concerned, smell it. Look for a whitish-gray or light-pink mold around the edges. If your yogurt smells, looks, or tastes bad, throw it out.
Adding fruit or flavorings to your yogurt can cause it to go bad quicker. It’s best to wait until you’re ready to eat my yogurt before adding flavorings.
26. Can I use my homemade yogurt to make more yogurt?
Yes. This is one of the advantages of making it yourself.
- If you intend to use your homemade yogurt to make another batch, try to do it within seven days of the original batch. The yogurt bodies die from old age, even under refrigeration.
- Hold out a small amount of yogurt before you add any flavorings if you want to use it to make more.
- It is generally safe to do this for three to four generations of yogurt starting when the original starter was purchased. When using traditional or heirloom culture freeze-dried yogurt as the original starter, it’s possible to make an infinite number of additional batches of yogurt as long as you do it within 7-10 days of the previous batch. Read why in my Greek yogurt tutorial.
27. Can I use whey to make more yogurt?
Yes, you use whey if it’s fresh. Read more details in this post about using whey from straining yogurt to make more yogurt.
28. What can I do to make plain yogurt more interesting?
I have 26+ ideas for how to make Greek yogurt taste good.
My latest thing is making yogurt smoothies with a Creami appliance manufactured by Ninja Foodie. If you have one of these, you already know how easy it is to mix milk or a protein drink with homemade yogurt and a spoonful of sugar-free pudding. Sweeten to your preference with your favorite sweetener. After sitting in the freezer for 24 hours, spin it to make a soft-serve yogurt ice cream packed with protein.
29. Can I freeze homemade yogurt?
Yes. However, the texture will change as it separates and turns icy. I don’t recommend eating it by itself, but it’s still good to use in baking recipes and even as a starter if it’s not over a month old.
30. Can I freeze whey?
Yes, whey can be frozen, but it will start to lose its potency, so I wouldn’t store it for long. Those little yogurt-bodies will die of old age the longer they stay in the freezer. It’s hard to predict how long you can keep it in the freezer since the amount of antibodies when you put the whey into the freezer is difficult to quantify.
Parting thoughts: Making yogurt at home is so satisfying and addictive…once you learn to make it dependably and how you like it.
Just like making bread or anything with “live organisms,” following a recipe to the “T” is no guarantee. Working out the details in your kitchen with your equipment and the products (milk, starter, etc) available to you takes practice. Don’t give up. I’m here to help.
If you have questions or suggestions, email me privately for a quick answer: Paula at saladinajar.com. Hope to see you again soon!
Paula Rhodes, owner
As a retired home economist, I created Saladinajar.com to share my belief that you don’t have to be a chef to find joy in creating homemade food worth sharing. Bread machines (used in an unconventional way), homemade yogurt, and quick microwave recipes are my specialty.