Easy Bread Machine Cinnamon Rolls with a Secret Ingredient
Sneak Preview: These easy bread machine cinnamon rolls are traditional cinnamon rolls frosted with cream cheese icing. The secret ingredient (optional) is a pinch of cloves in the filling. It will remind you of pecan twirls.
As an Amazon Associate, I earn from qualifying purchases.
Do you remember the pecan twirls we used to eat for breakfast as kids? They came in a foil pan with round molded cups for each roll. As you slowly unrolled them, the pecans would fall out everywhere. What fun–unless you are the person who sweeps the floor.
I think I figured out the flavor that made those twirls extra delicious.
Six Reasons Why You Will Crave This Recipe
- The secret ingredient is ground cloves. One of my favorite readers calls ground cloves a bully. She’s right. Add only a tiny bit of ground cloves to the brown sugar filling. The cloves enhance and magnify the cinnamon flavor, in the same way, espresso powder intensifies chocolate flavors.
- This a simple recipe and good for beginners. It is a variation of my very popular classic dinner rolls.
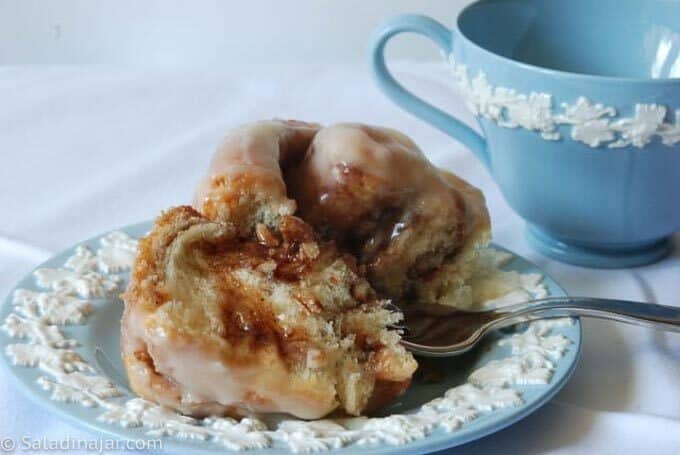
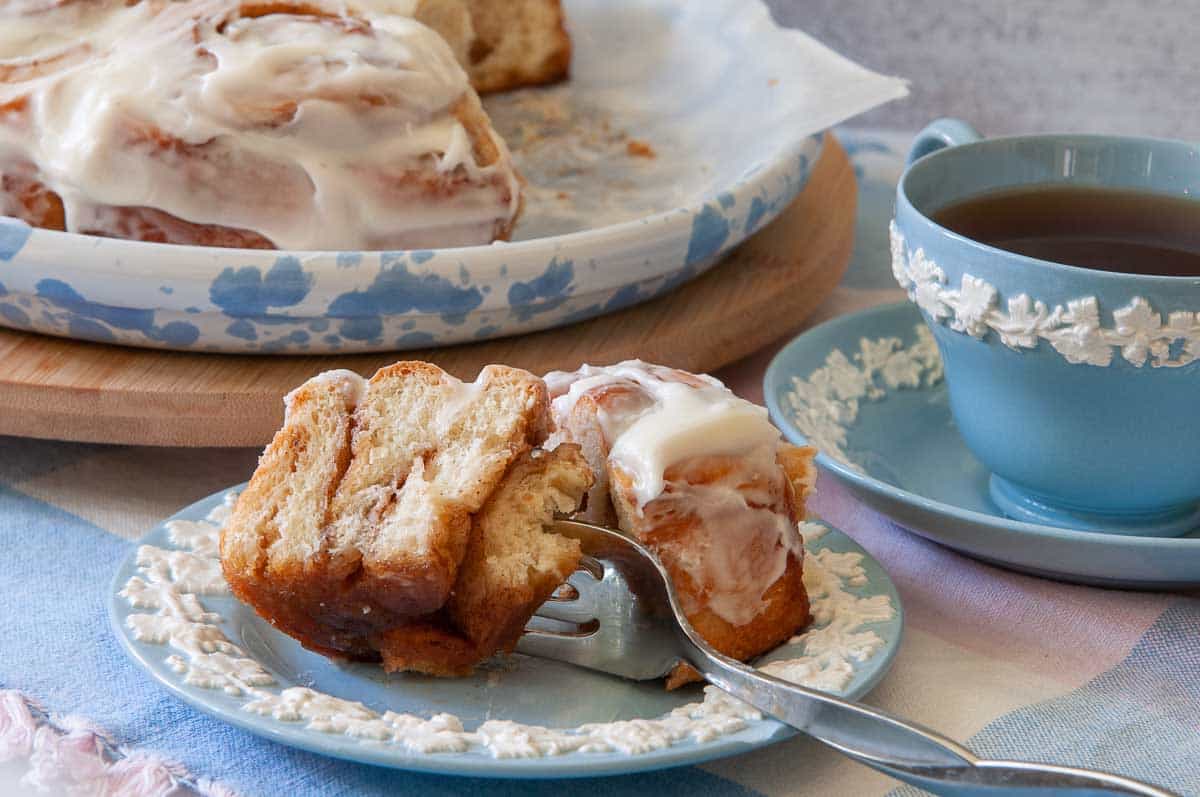
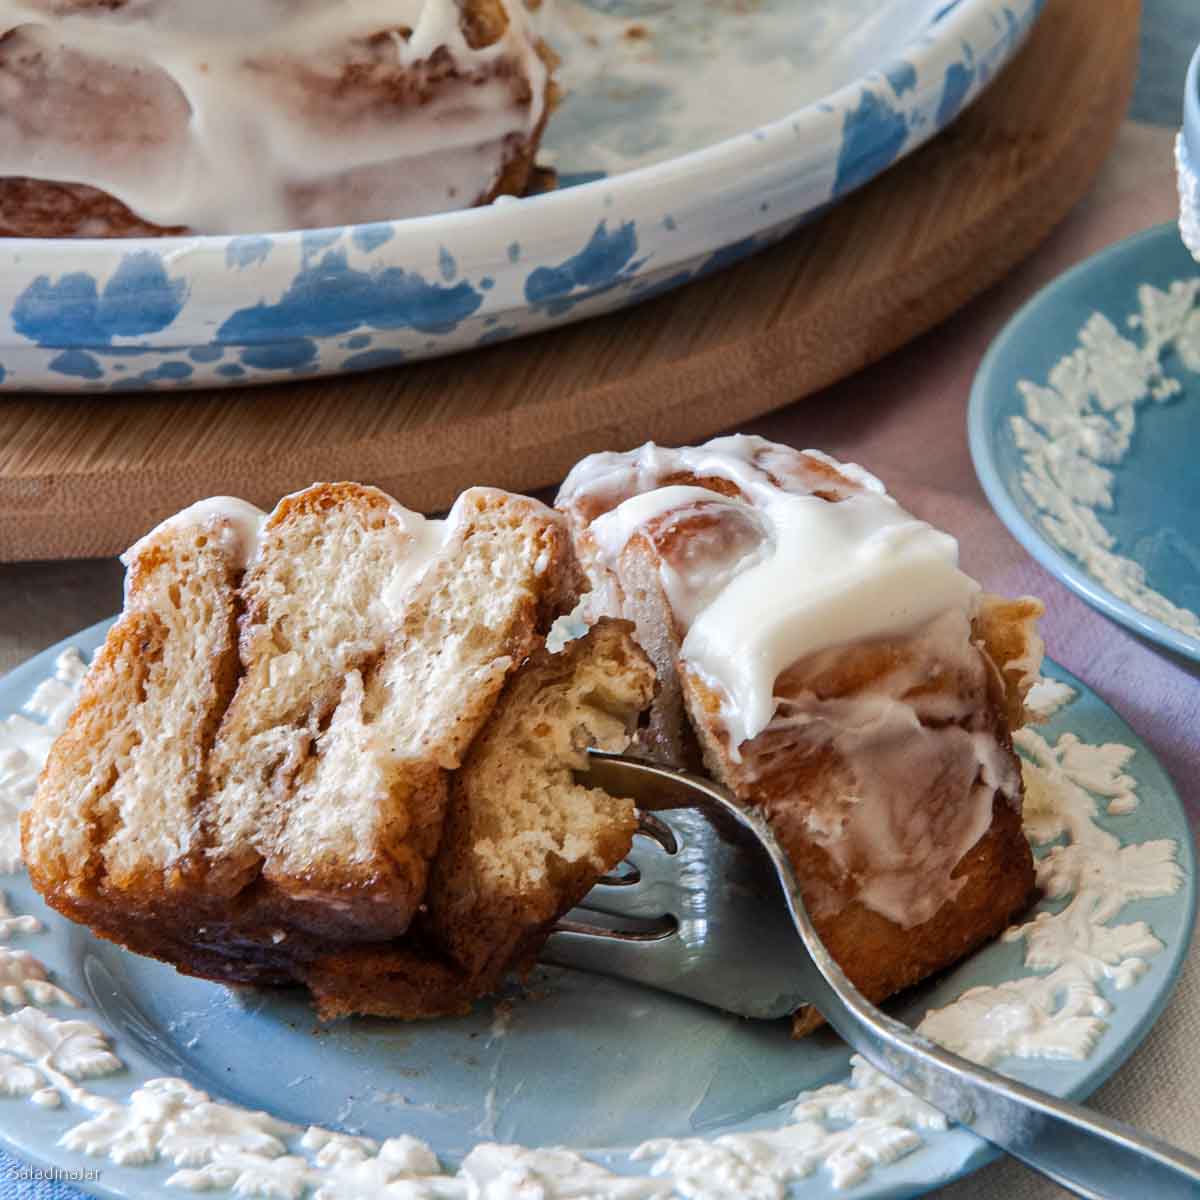
- The frosting is a delicious blend of powdered sugar, cream cheese, and coffee. None of the flavors is dominant, but together, they are memorable. Substitute milk for the cream cheese and coffee if you don’t have them.
- Make the dough the day before if you want. See the FAQs below for more information.
- Whip up this recipe using the DOUGH cycle of your bread machine. Shape them by hand, and bake the rolls in a conventional oven. If you don’t have an oven, see the FAQ below for alternate instructions for using your bread machine.
- This recipe is designed for mixing and kneading in a bread machine(paid link). However, you can also use a stand mixer or do it by hand. See the recipe notes.
Happy Bakers Speak Up
“Each and every recipe of yours I make is effortless and fun. The end results are always delicious! I have never made homemade cinnamon rolls, and I am so proud of the results. Thank you!“– CHELSEA D.
Ingredients and Substitutions
- MILK: Whole milk produces the richest rolls. However, low-fat or nonfat dairy milk will work. Or substitute non-dairy milk if you prefer.
- SUGAR: Granulated sugar is specified. Honey or maple syrup are possible replacements. You may have to add extra flour to absorb the liquid they will add to the dough. Wait until you mix the dough to assess the consistency. Read more about this surprising secret for making better bread with your bread machine.
- EGG: I always use large eggs (approximately 50 gr) in my bread recipes. If you use a smaller egg, you may need to add liquid. If you use a larger egg, more flour may be necessary. No need to warm the egg or milk.
- BUTTER: Unsalted butter is my first choice, but I also use salted butter if that’s what I have. I have not tried oil. Substitute margarine or vegan butter if you like. No need to warm the butter. I chop it up with a table knife. It will melt quickly as the paddles in your machine start to knead.
- FLOUR: The directions specify unbleached all-purpose flour. If you want chewier rolls, use bread flour. I prefer the tenderness of the lower protein all-purpose flour. Bleached all-purpose flour will serve the purpose, too.
- YEAST: Use a bread machine or instant yeast if you can get it. This yeast is perfect in a bread machine because you can dump it into the bread machine pan, and it mixes in without being dissolved. See my post about yeast in a bread machine if you only have active dry yeast.
- NUTS OR RAISINS: Optional. Use about one-half cup. Add them to the dough at the beep for add-ins, or sprinkle them over the dough with the brown sugar and cinnamon filling.

How To Mix and Knead Cinnamon Rolls Using a Bread Machine
Note: The liquid ingredients do not need to be warmed. Conveniently, the friction of the paddles will heat up the dough in a hurry.
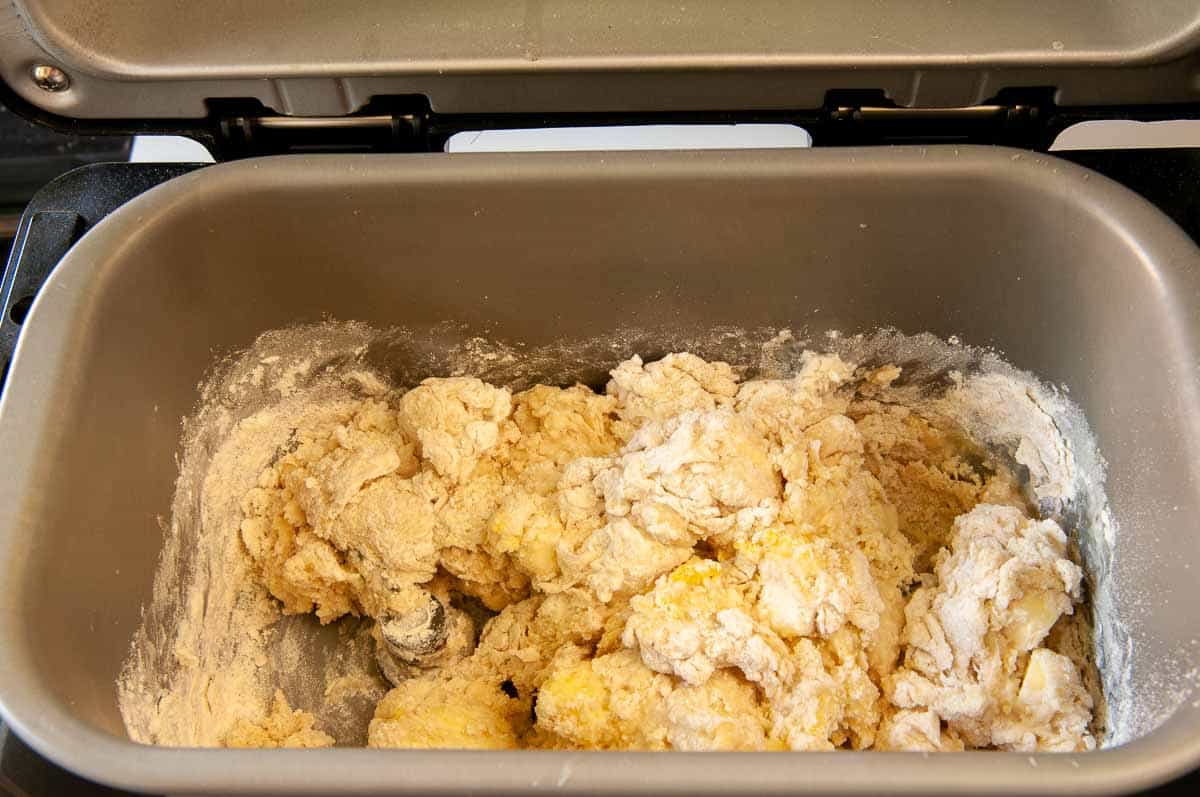
Open the machine after the first minute to ensure the paddles are engaged and working correctly. The dough should start to clump.
You may have inadvertently mismeasured if the dough looks like pancake batter or is dry and crumbly. Slowly add a small amount of flour or liquid until the dough clumps.
If it’s too dry and bouncing off the walls, add a tablespoon of liquid one tablespoon at a time, waiting a few minutes between each addition to allow the dough to absorb the flour. If the dough is too wet, do the same thing with flour until your dough looks like the dough in the video.
How To Shape Bread Machine Cinnamon Rolls

Try to make them equally sized. However, don’t worry if they’re not. There are always people who want the biggest one and the smallest one.
Preheat your oven to 375˚F (190˚C) for about 15 minutes before you think the rolls will be ready to bake.
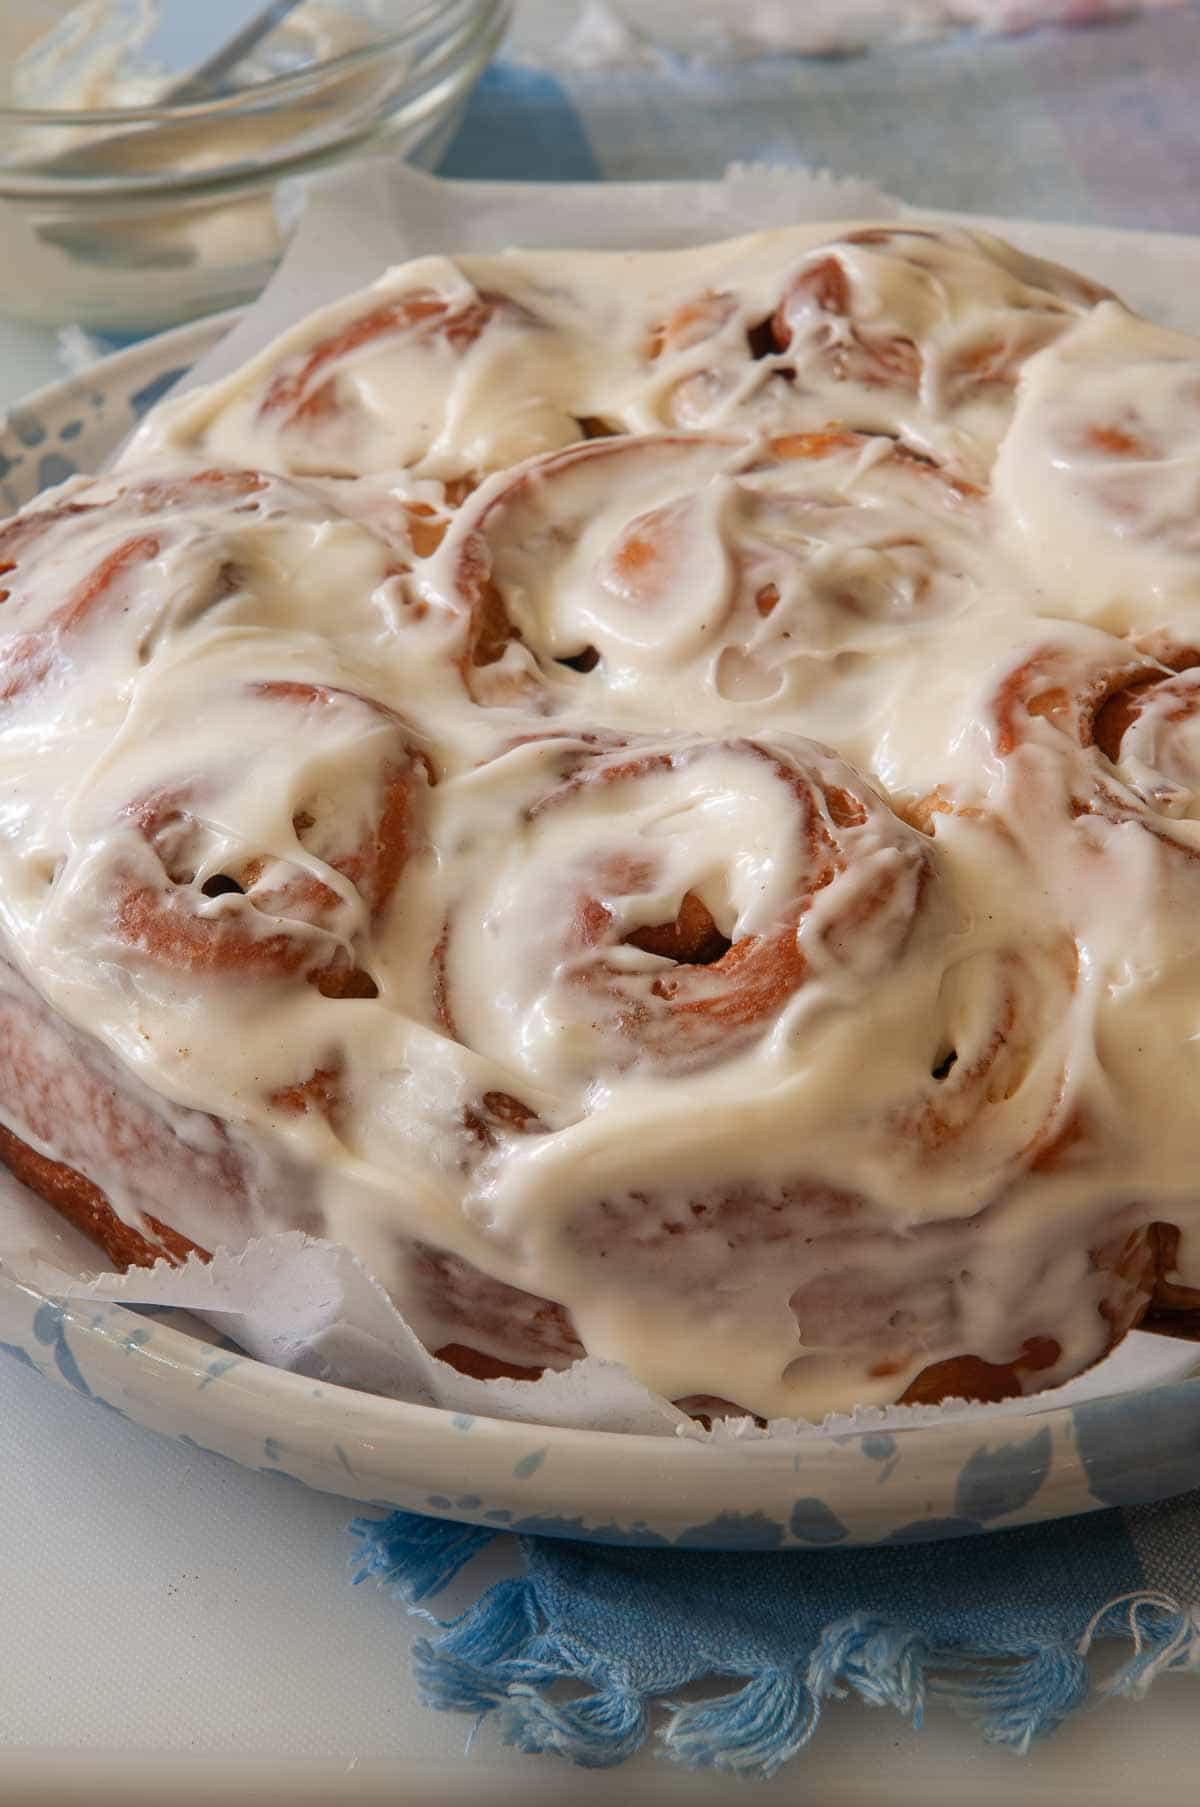
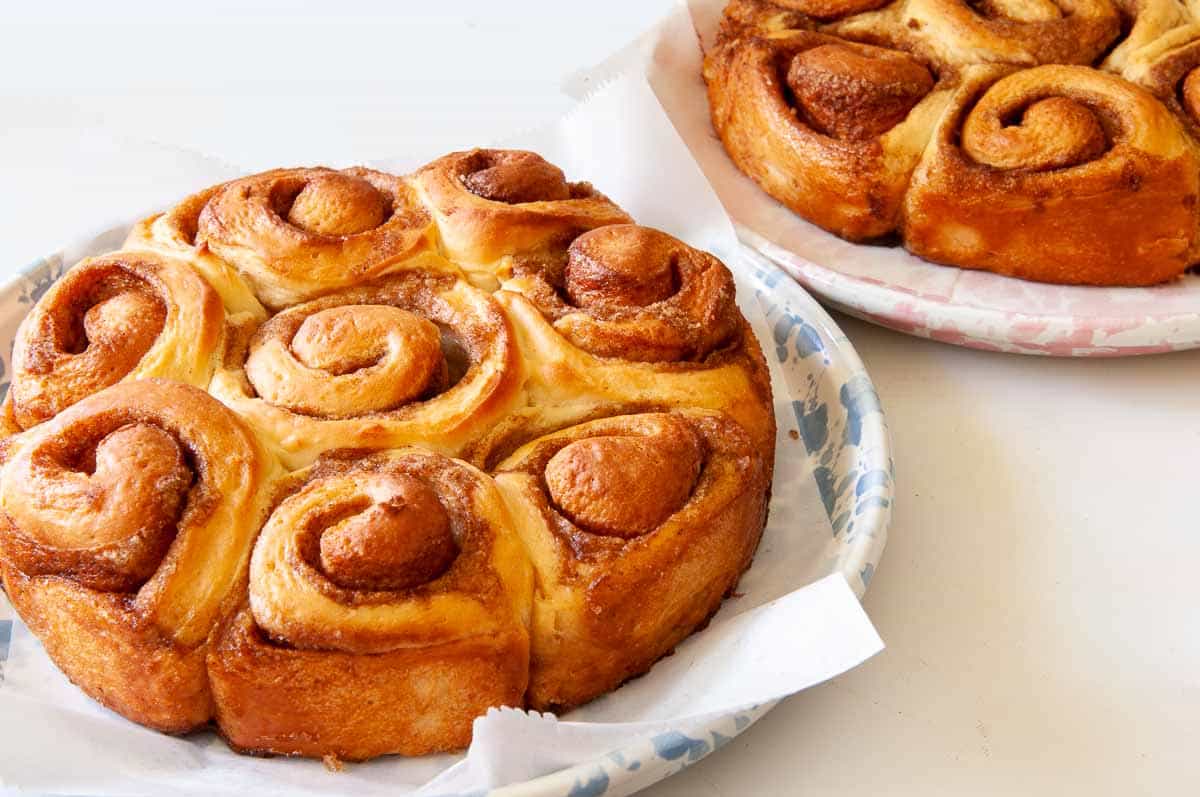
How To Bake and Frost Sweet Cinnamon Yeast Rolls
Frequently Asked Questions
Like donuts, cinnamon rolls are best right out of the oven and for the rest of the day. If you want cinnamon rolls that stay fresh for several days, try these Tangzhong Cinnamon Rolls you can make with your bread machine.
Yes. Freeze the unshaped dough as soon as the DOUGH cycle ends. Alternatively, freeze the shaped rolls before the final rise. Double wrap and store in the freezer for up to a month.
When ready to use, let the dough thaw and shape the rolls. Allow a final rise before you bake them. If you freeze shaped rolls, allow them to thaw and become puffy before baking them as directed.
Yes. Double-wrap them and eat them within a month. The rolls will taste good if you zap them briefly in the microwave and eat them immediately.
Yes. Select the regular cycle, not the DOUGH cycle. Remove the dough from the bread machine pan before the final rise. (Check your owner’s manual to figure this out.) Remove the paddles. Shape the cinnamon rolls quickly. Place the rolls back into the pan in rows and let the bread cycle continue. They should rise and then bake.
Yes. After making the dough with the DOUGH cycle, you have two choices. Put the dough directly into the refrigerator and shape it the next day. Or shape as soon as you remove the dough from the bread machine pan and place the pans of rolls (covered) into your fridge overnight.
The following day, make the dough into rolls and let them rise before baking. Or let the shaped rolls warm up and rise, then bake them as directed in the recipe.
Leave out the cream cheese and/or coffee. Instead, use a couple of tablespoons of butter and milk or cream. Add a teaspoon of vanilla extract. Mix until the frosting is creamy and spreadable.
Your pan may be too small. If this happens, carefully push the “middles” back down into the rolls when you remove them from the oven. Problem solved–for this time.
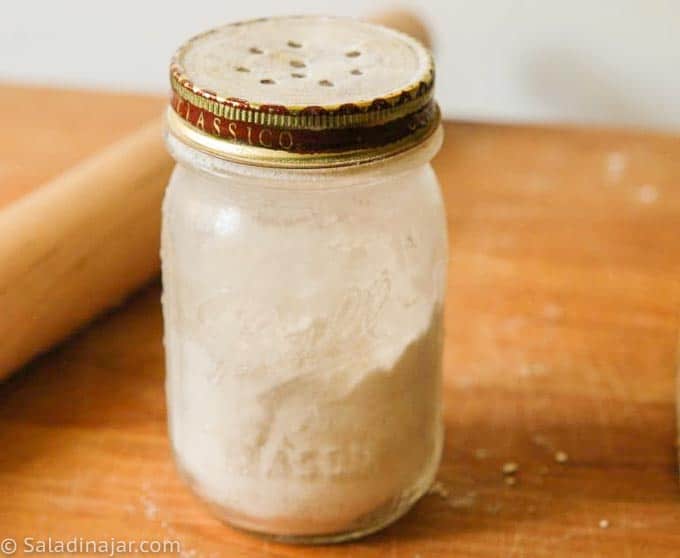
Bonus: How To Make a Homemade Flour Shaker
Parting thoughts: My mom used to buy pecan swirls at the day-old store. But, come to think of it…do they still have day-old bread stores? Oh, never mind, I’m starting to feel old. 🫣 I need a cinnamon roll to make me feel better.
If you decide to serve these rolls for brunch, think about adding Easy Sausage Kabobs to the menu. They’re easy to make and perfect with pancakes, waffles, or cinnamon rolls.
If you want inspiration and exclusive tips, add your email and press the button. (Don't worry. I won't sell your email.)
Help at Your Fingertips: For questions or suggestions, email Paula at saladinajar.com. If you need help, I’m happy to troubleshoot via email (faster than leaving a comment). Attach pictures and as many details as possible for the best advice.
Easy Bread Machine Cinnamon Roll Recipe
Rate this recipe
(5 stars if you loved it)
Video
Ingredients
Dough
- 1 cup (227 g) milk
- 1 teaspoon table or sea salt
- 1 large (50 g) egg
- 3 tablespoons (36 g) granulated sugar
- ¼ cup (57 g) butter (chopped into small pieces)
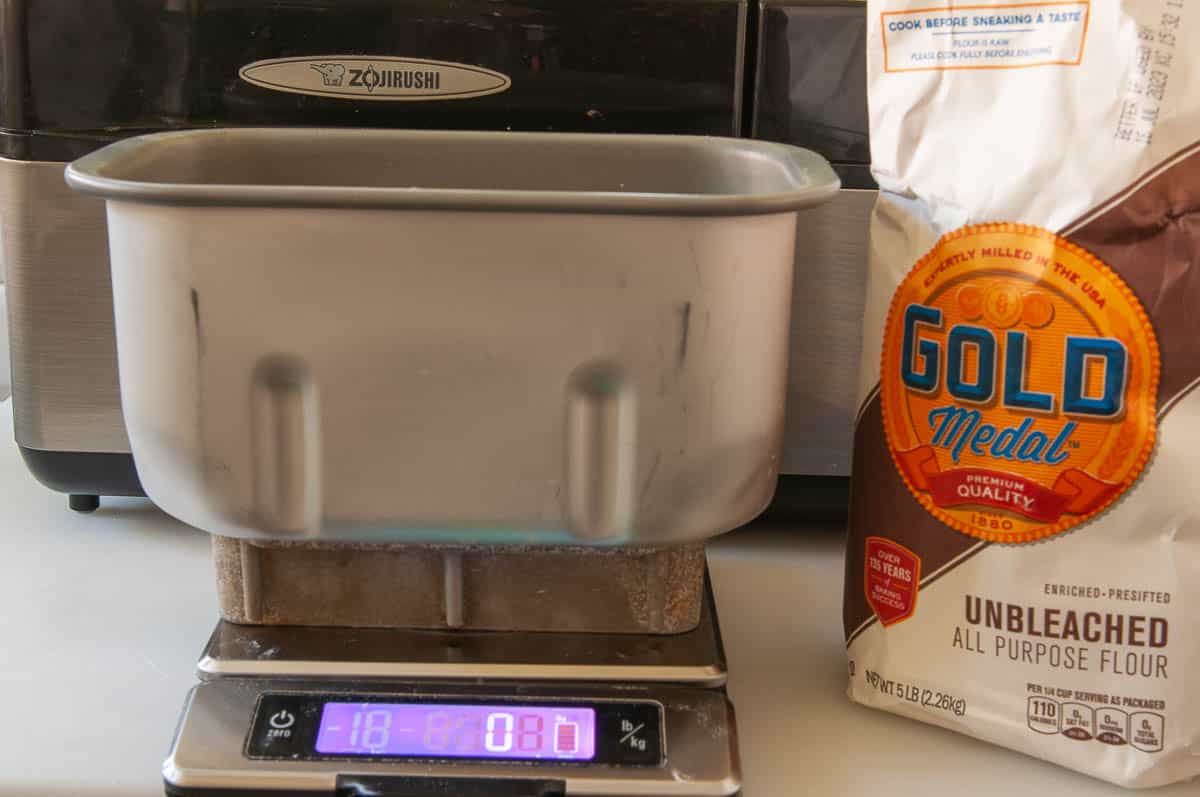
- 3 cups (360 g) unbleached all-purpose flour
- 2 teaspoons bread machine or instant yeast
Filling
- 4 tablespoons (56 g) softened butter for the filling
- 1 cup (213 g) brown sugar
- 2 teaspoons cinnamon
- pinch of ground cloves (optional)
- ½ cup (54 g) pecans toasted and chopped
Icing
- 2 cups (227 g) powdered sugar
- ¼ cup (57 g) cream cheese
- 2 tablespoons coffee or milk
Instructions
Dough:
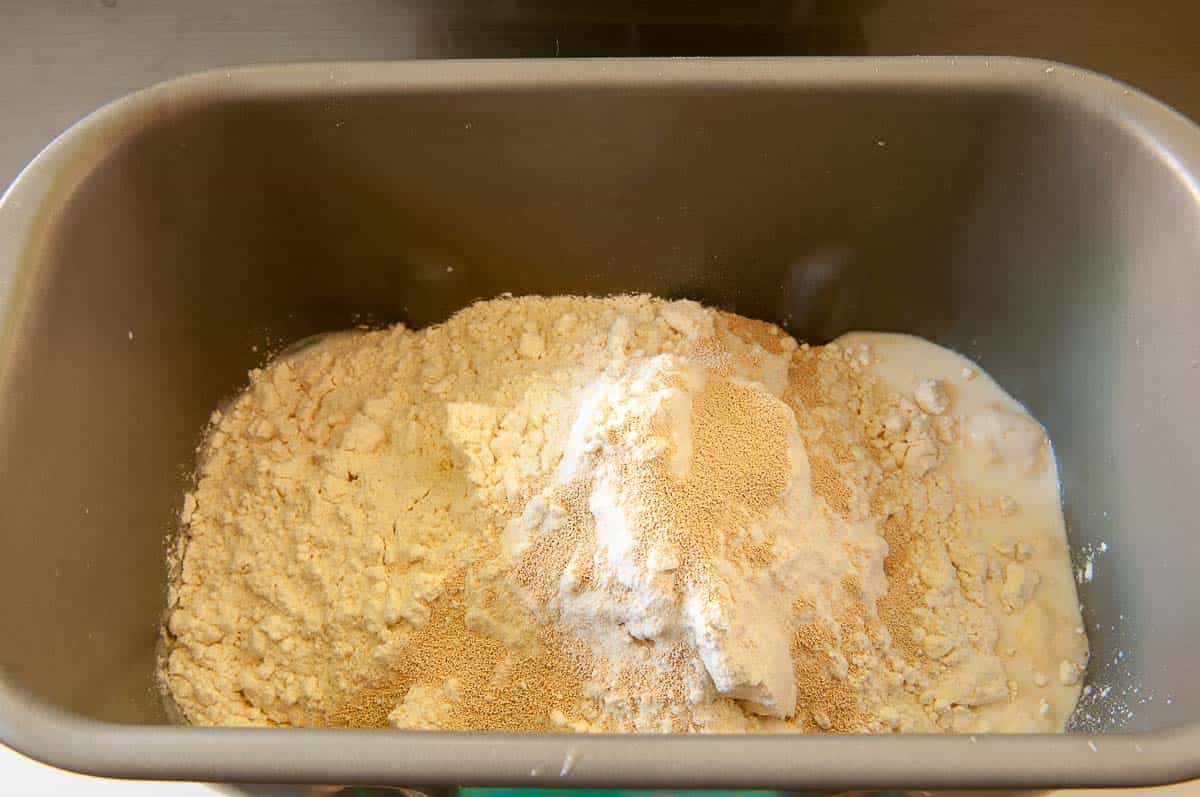
- Place all dough ingredients into the bread maker in the order listed: 1 cup (227 g) milk, 1 teaspoon table or sea salt, 1 large (50 g) egg, 3 tablespoons (36 g) granulated sugar, 1/4 cup (57 g) butter (chopped into small pieces), 3 cups (360 g) unbleached all-purpose flour, and 2 teaspoons bread machine or instant yeast Select the DOUGH cycle and press START.
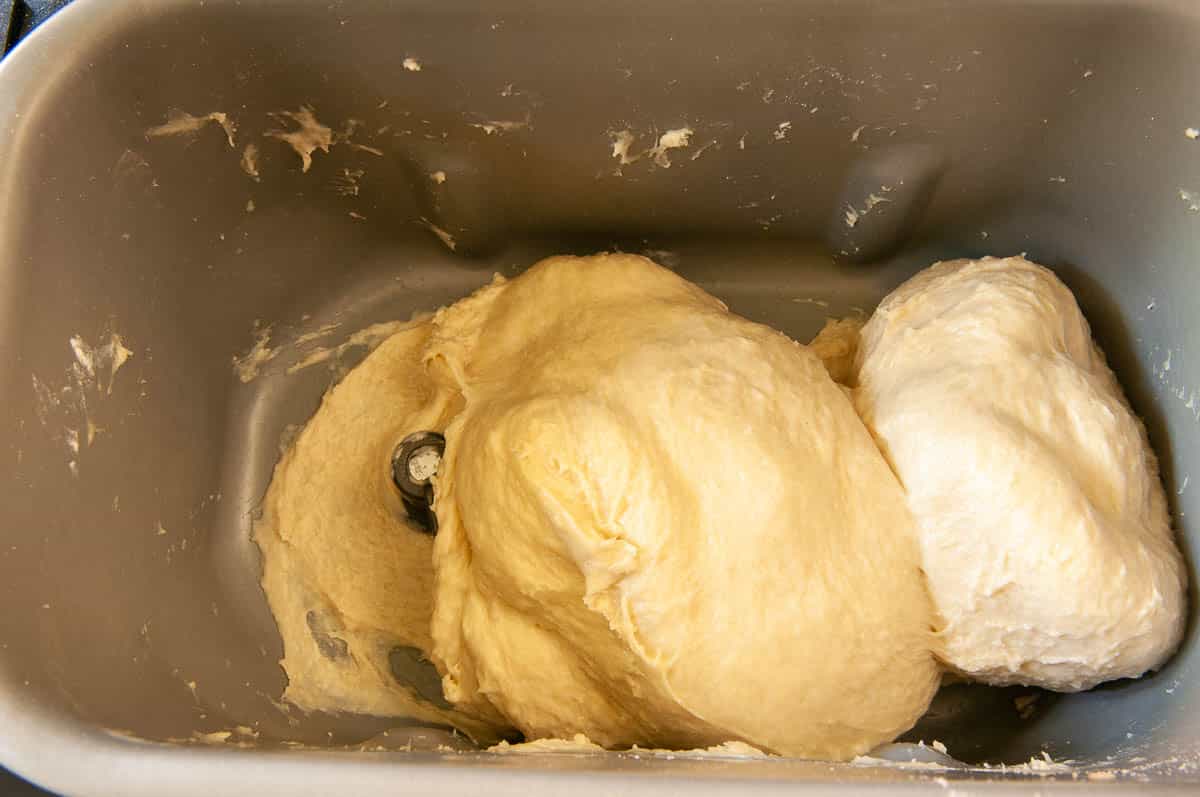
- Check the dough at least twice during the mixing and kneading phase by lifting the lid to take a peek. The first time, look immediately after the machine starts mixing to ensure the paddles are engaged correctly. Recheck 15 minutes into the DOUGH cycle to assess the consistency of the dough. The dough should stick to the side, then pull away cleanly.If your dough is too wet, add flour one tablespoon at a time.Conversely, if the dough is too dry, add one tablespoon of liquid at a time until the dough looks just right. Read more about this surprising secret to success with a bread machine here.
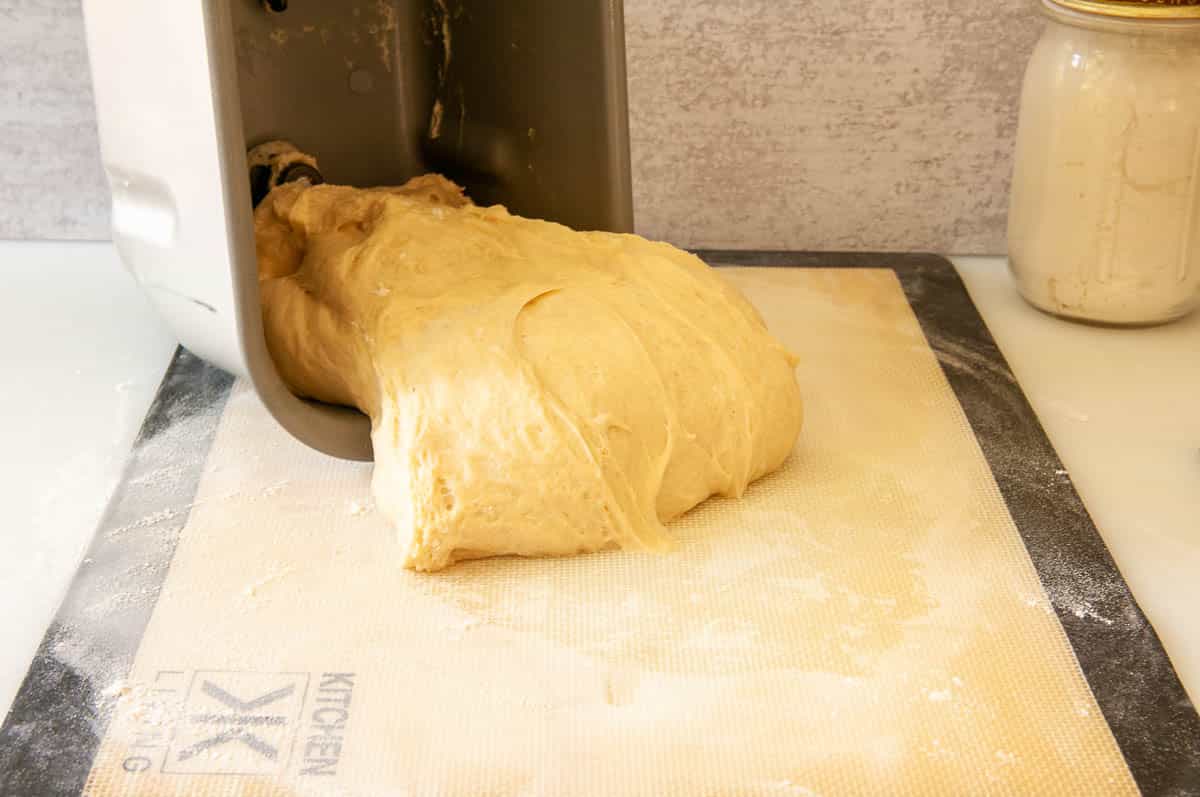
- When the DOUGH cycle is finished, if the dough has doubled in size, remove it from the pan to a floured surface. If the dough has not risen enough, leave it in the machine until it does before proceeding.
Shaping the dough into rolls:
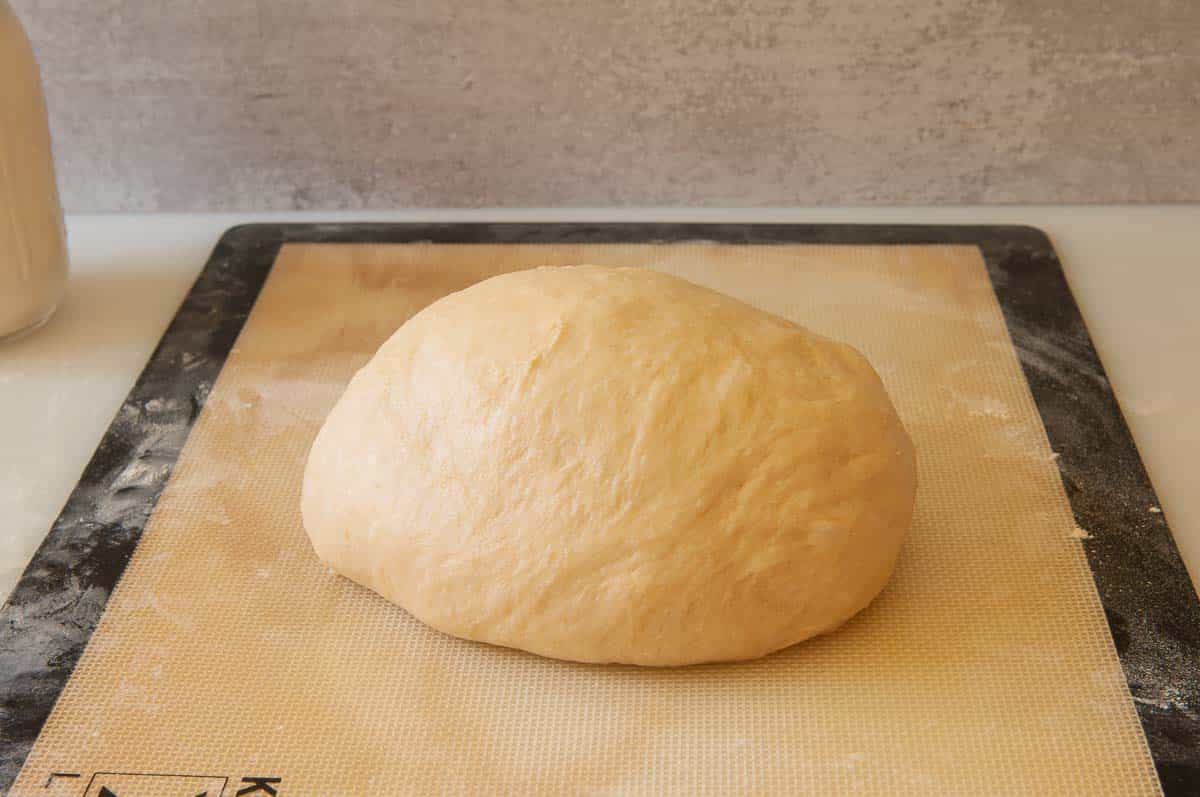
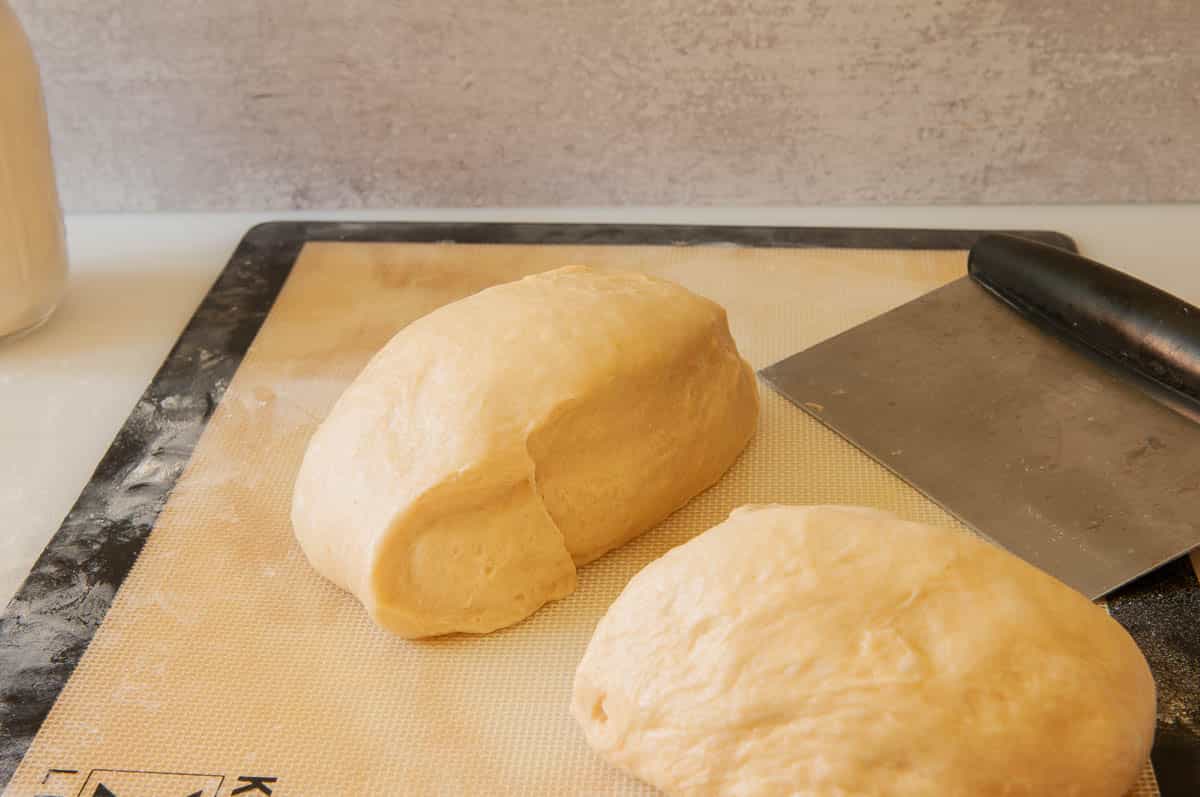
- After the dough has risen, remove it from the bread machine pan, push down gently and divide the dough in half.
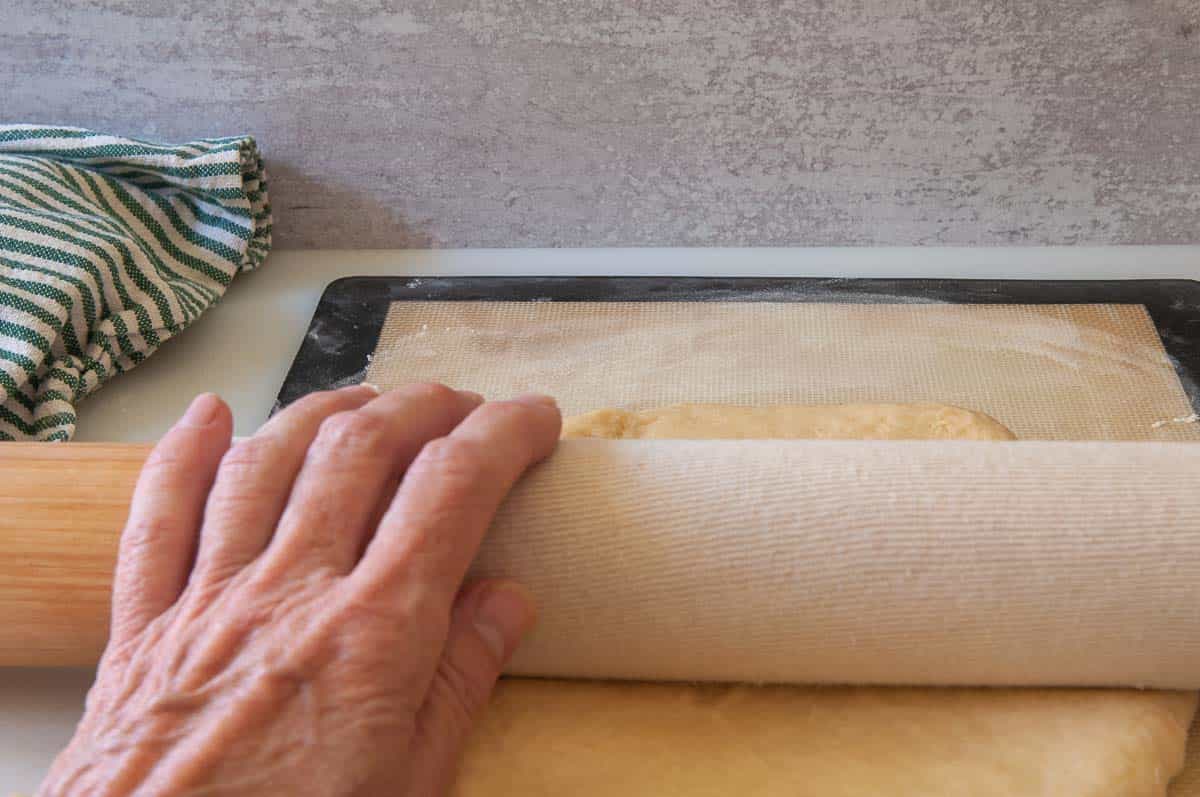
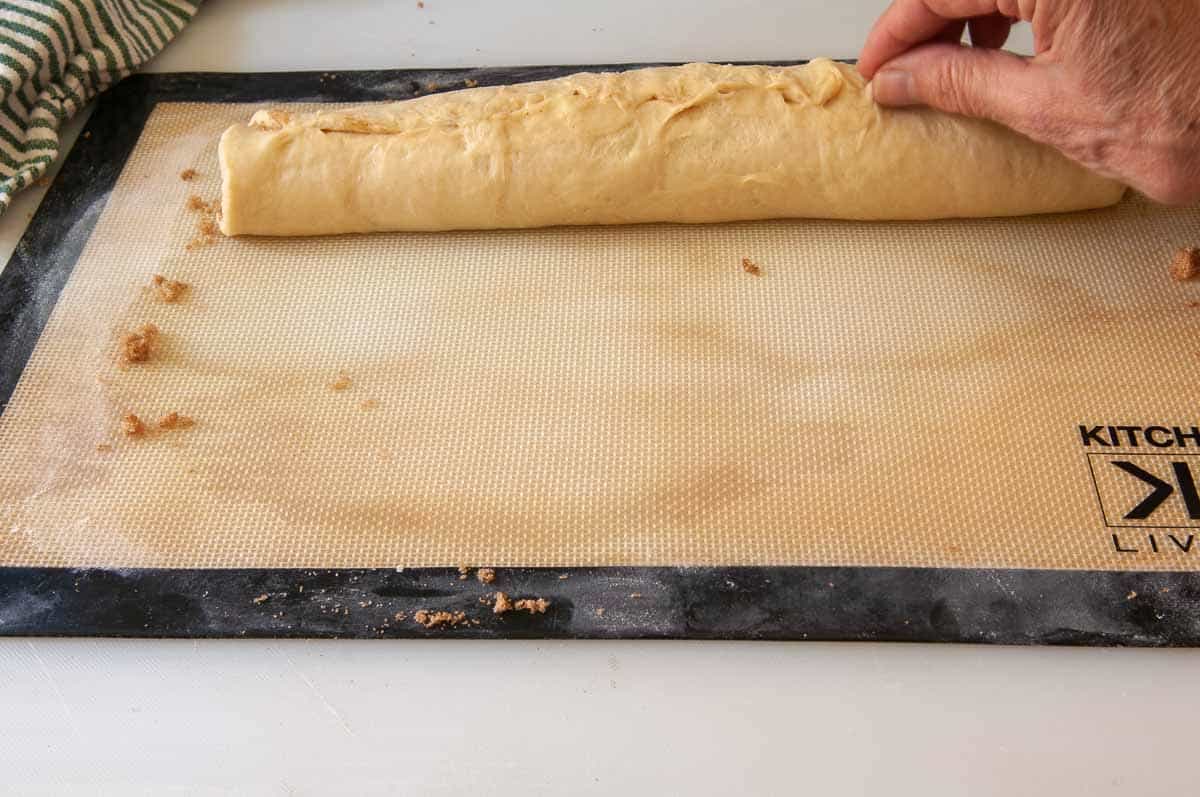
- On a generously floured surface, roll each half into a rectangle shape. The bigger, the better because it provides more surface to layer the good stuff, like butter, sugar, and cinnamon. Be careful not to roll it too thin, however, or it will tear and cause you all kinds of frustration.
Filling:
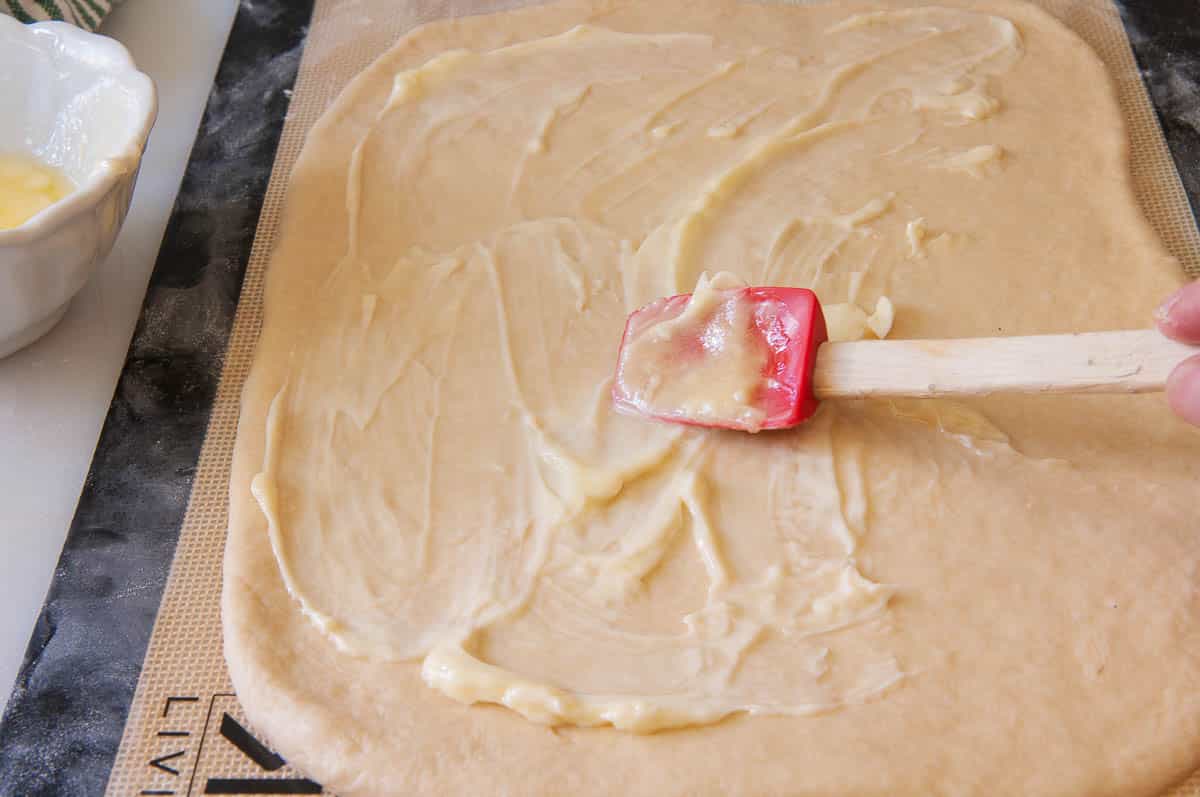
- Spread each rectangle with approximately 4 tablespoons (56 g) softened butter for the filling (divided in half).
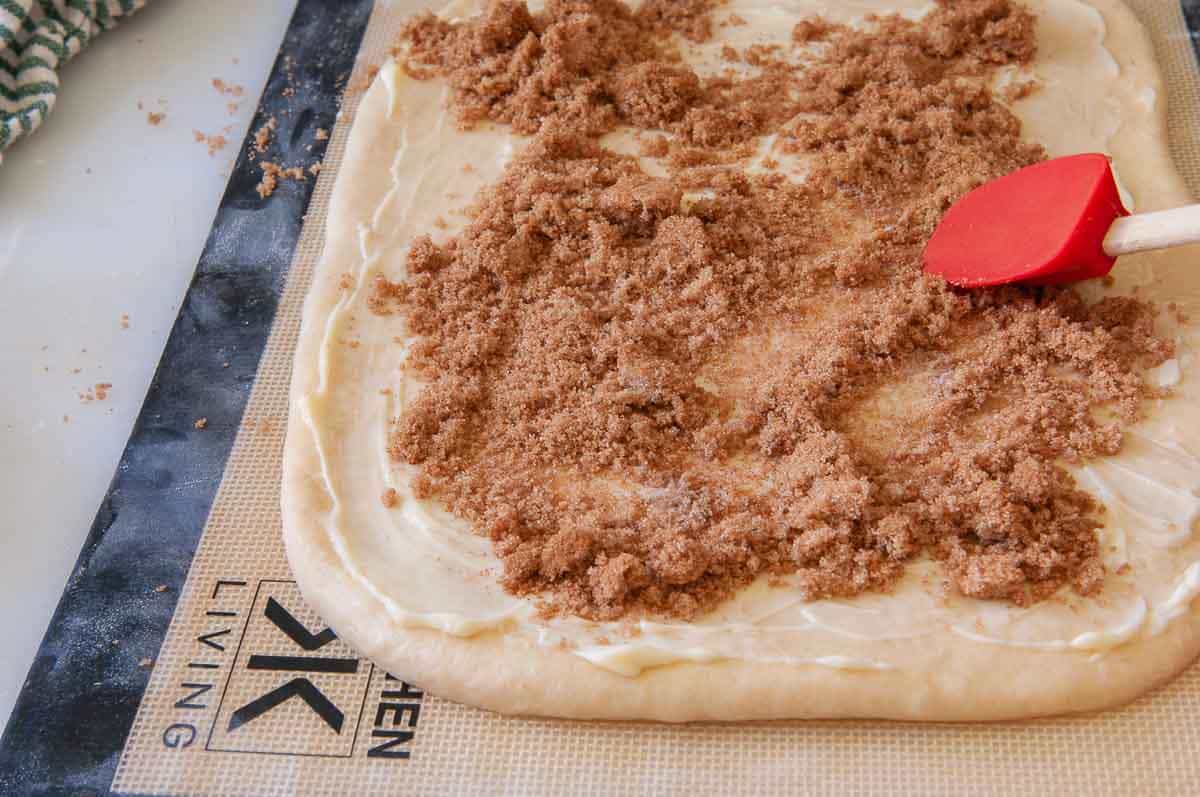
- Combine the 1 cup (213 g) brown sugar, 2 teaspoons cinnamon, and a pinch of ground cloves.
- Distribute half of the sugar mixture over the first rectangle and half over the second. Sprinkle about ½ cup (54 g) pecansover the brown sugar-cinnamon layer if using them.
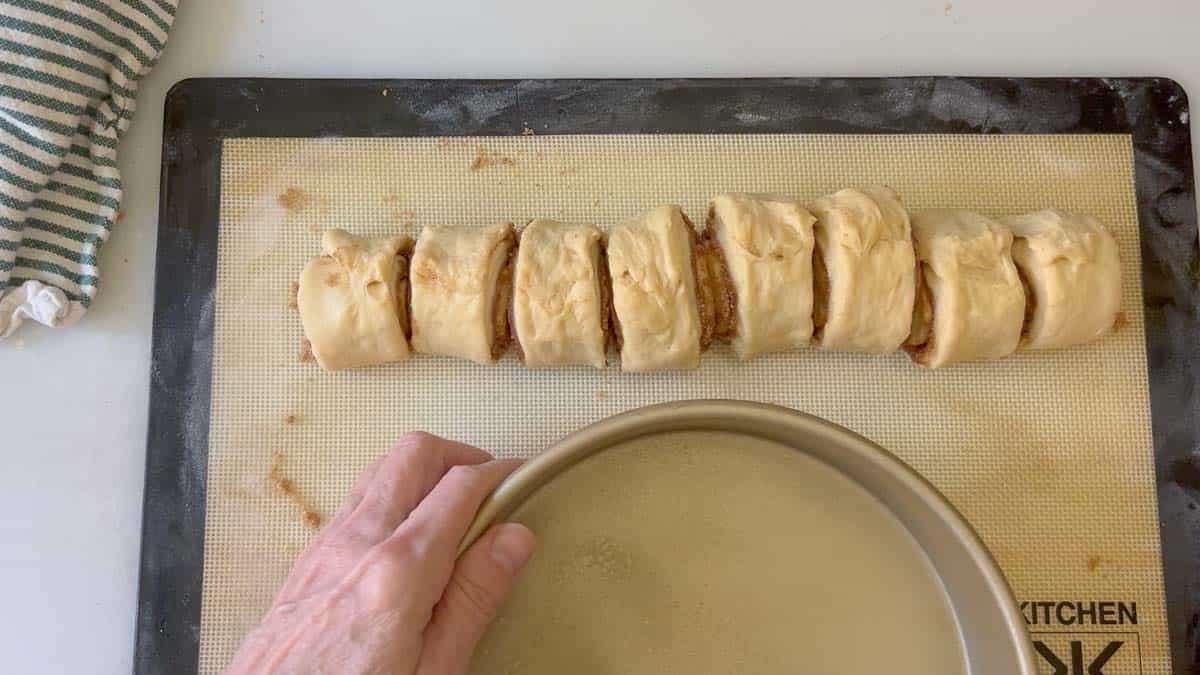
- Roll up the dough starting with the long edge closest to you. Slice into 8 equal pieces. Place cut side down in a greased 8 or 9-inch pan or glass dish. (I like to use one 8-inch pan and one 9-inch pan or two 9-inch pans. The rolls get too crowded if you use two 8-inch pans.)
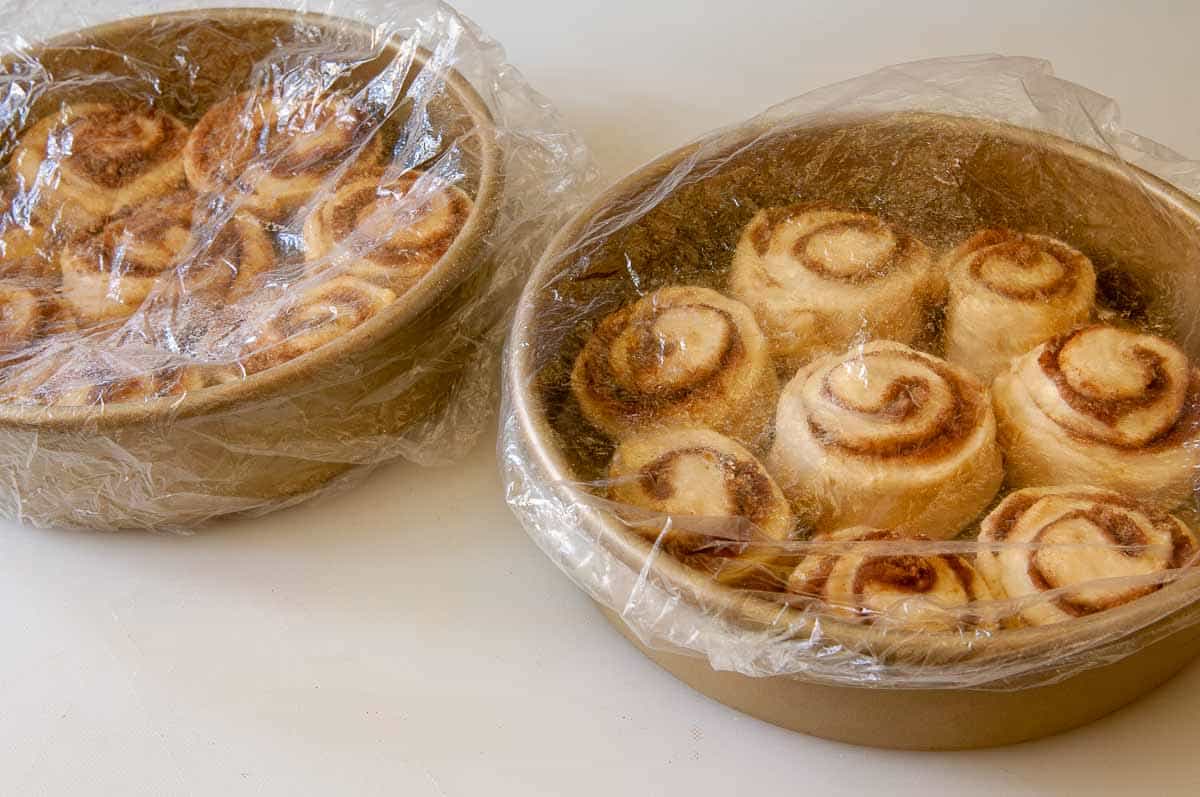
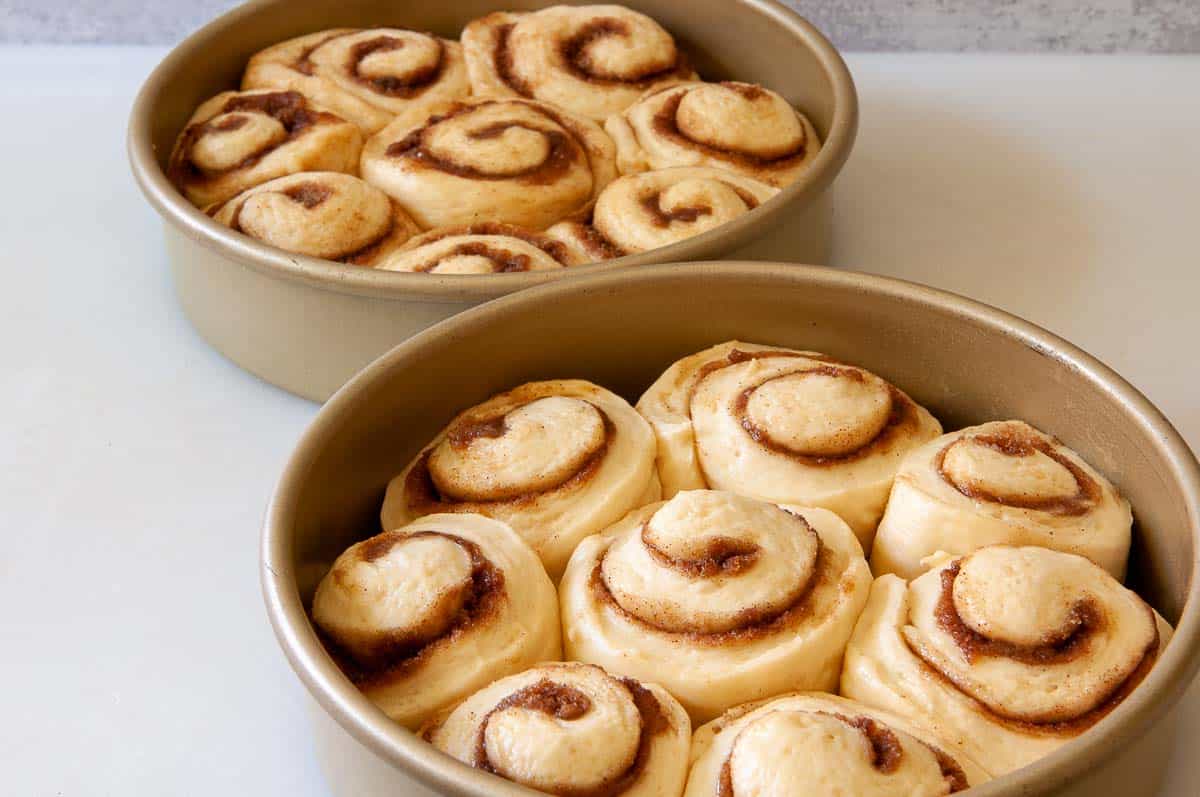
- Cover and let rise until double in a warm, moist place.
- Preheat the oven to 375˚F (190˚C). Bake rolls for about 20 minutes or until golden brown. The internal temperature should reach 190˚F (88˚C).
Frosting:
- Combine the 2 cups (227 g) powdered sugar, 1/4 cup (57 g) cream cheese, and 2 tablespoons coffee or milk. Depending on how thick you like your icing, you may need more or less coffee. Milk will substitute for coffee.
Notes
- To make this recipe in a heavy-duty stand mixer: Add ingredients to the bowl in the same order. Turn on LOW to mix until all ingredients are moistened. Then, using a dough hook, turn the speed to 2 or 3. Continue beating/kneading until dough becomes smooth and elastic (about 5-10 minutes). Cover and allow to rise in a warm place. Deflate dough gently and shape as indicated in the recipe.
- If making by hand: Combine all ingredients into a shaggy ball in a large bowl. Turn dough out onto a floured surface. Knead with your hands until the dough becomes smooth and elastic. Kneading will likely take 10-20 minutes, depending on your experience. Place the dough ball into a greased bowl. Cover and allow to rise until double. Deflate the dough gently and shape as indicated in the recipe.
- Please note: If you only have active dry yeast, use 1/4 teaspoon more than called for in the recipe. It no longer needs to be dissolved first, but you can if you prefer.
Equipment
Nutrition
All images and text ©️ Paula Rhodes for Salad in a Jar.com
Paula Rhodes, owner
As a retired home economist, I created Saladinajar.com to share my belief that you don’t have to be a chef to find joy in creating homemade food worth sharing. Bread machines (used in an unconventional way), homemade yogurt, and quick microwave recipes are my specialty.