White Whole Wheat Bread Recipe for Dinner Rolls: Bread Machine
Sneak Preview: This White Whole Wheat Bread Recipe for Dinner Rolls is made with 100% white whole wheat flour and the help of a bread machine. They are heartier and contain more fiber than a standard white-flour dinner roll but milder and softer than the average whole-wheat roll.

As an Amazon Associate, I earn from qualifying purchases.
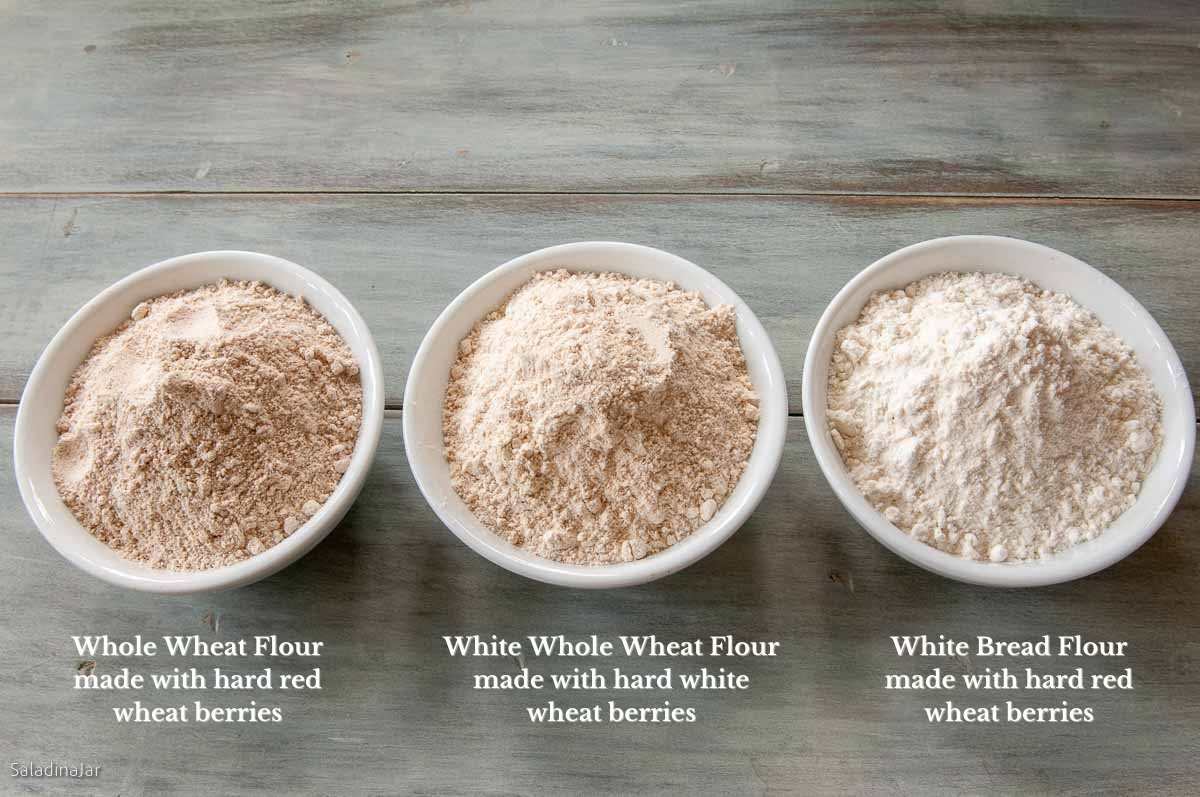
What if you could make 100% whole wheat bread that tasted and looked more like bread made with white flour? You can use White Whole Wheat Flour–a flour made from hard white wheat berries rather than red wheat berries traditionally ground to make whole wheat flour.
Don’t worry. You still get the nutrition of the whole kernel of wheat.
Three Reasons Why White Bread Lovers Should Try This Recipe
- If you were raised on white bread like I was, but desperately want to like whole wheat, try these rolls made with white whole wheat flour.
- The flavor and texture are milder than regular whole wheat but equally nutritious.
- Make these using the DOUGH cycle on your bread machine. This recipe was written for a bread machine. No worries if you don’t have one. See alternate directions in the recipe notes for using a stand mixer or mixing by hand.
Arguably, one of my best bread recipes is the first one I published, My Favorite Classic Dinner Rolls. I’ve made them at least a zillion times. That recipe was my inspiration and starting point for this one.
Happy Bakers Speak Up
“Wonderful! Light, soft and flavorful. definitely a keeper, thank you!” —DEBRA
Ingredients and Substitutions
- MILK: Milk enriches your bread and makes it softer. Milk with a higher fat content will make your rolls richer. Water can be substituted in a pinch. Neither warm milk (nor warm water) is needed. The friction of the kneading paddles will warm up the dough in a hurry.
- FLOUR: If you don’t have white whole wheat, substitute 2 cups of bread flour and 1 cup of whole wheat flour. Even though I don’t warm the liquid ingredients, 3 cups of flour straight from the fridge or freezer works better at room temperature (especially in the winter).
- YEAST: I only use instant or bread machine yeast. If using active dry yeast, add 1/4 teaspoon extra, as it can be a little slower-acting.
- EGG: All my bread recipes use large eggs (50 gr each). If you have smaller or larger ones, adjust the liquid accordingly.
- SUGAR: Granulated sugar is specified. Honey can be substituted–use two tablespoons + one teaspoon.
- BUTTER: Shortening is an OK substitute if you don’t have butter. If you chop it into small pieces, your butter does not need to be room temperature or soft.
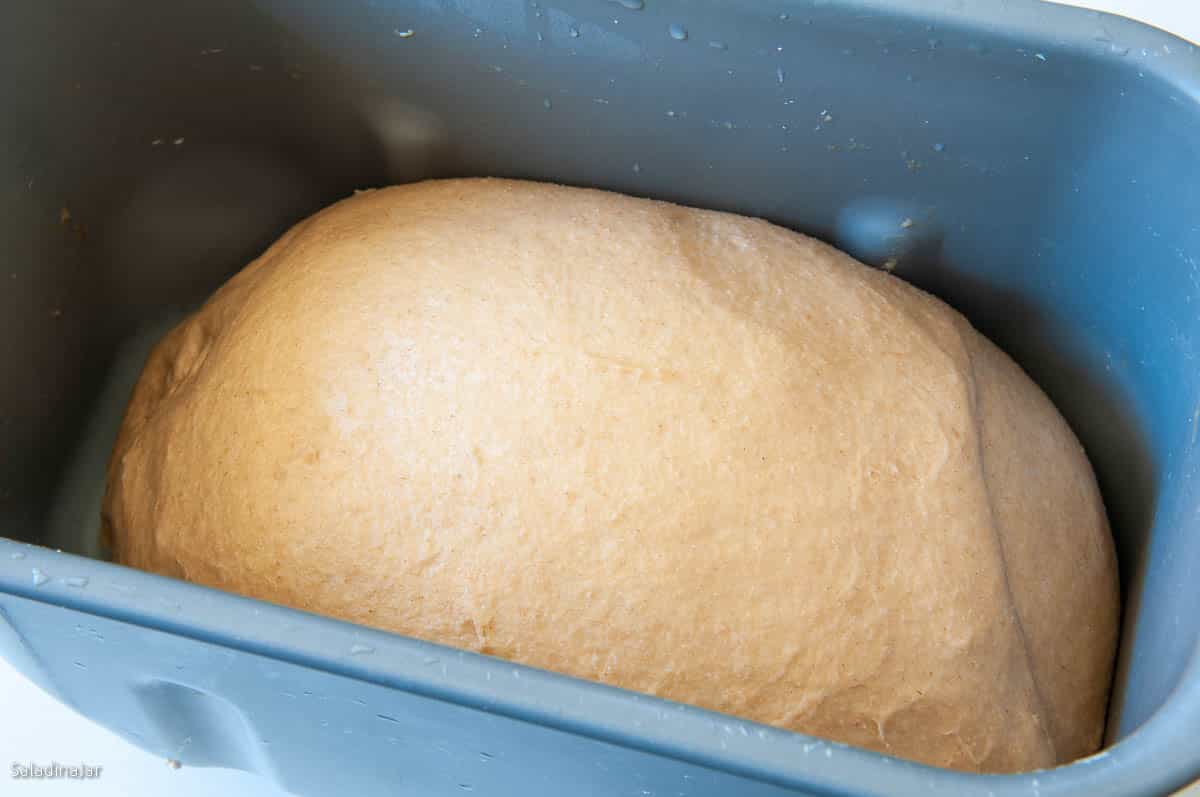
How To Make White Whole Wheat Bread Dough with a Bread Machine

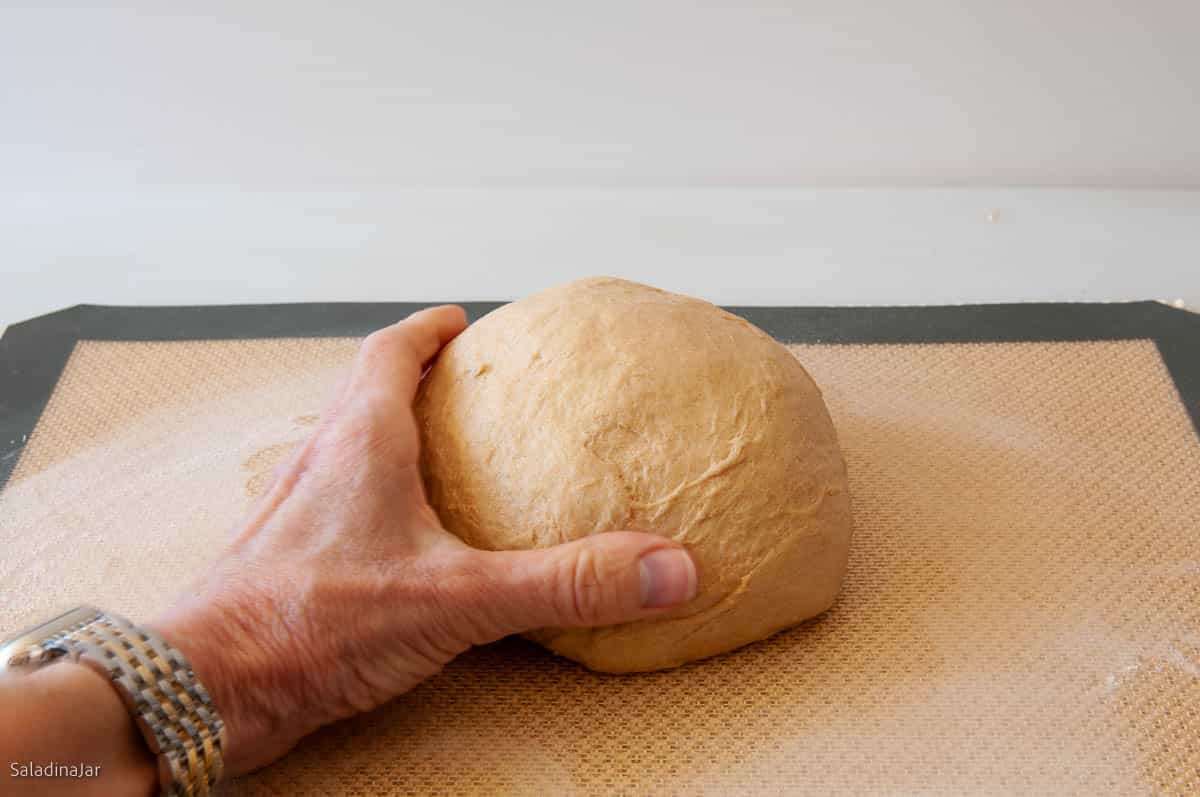
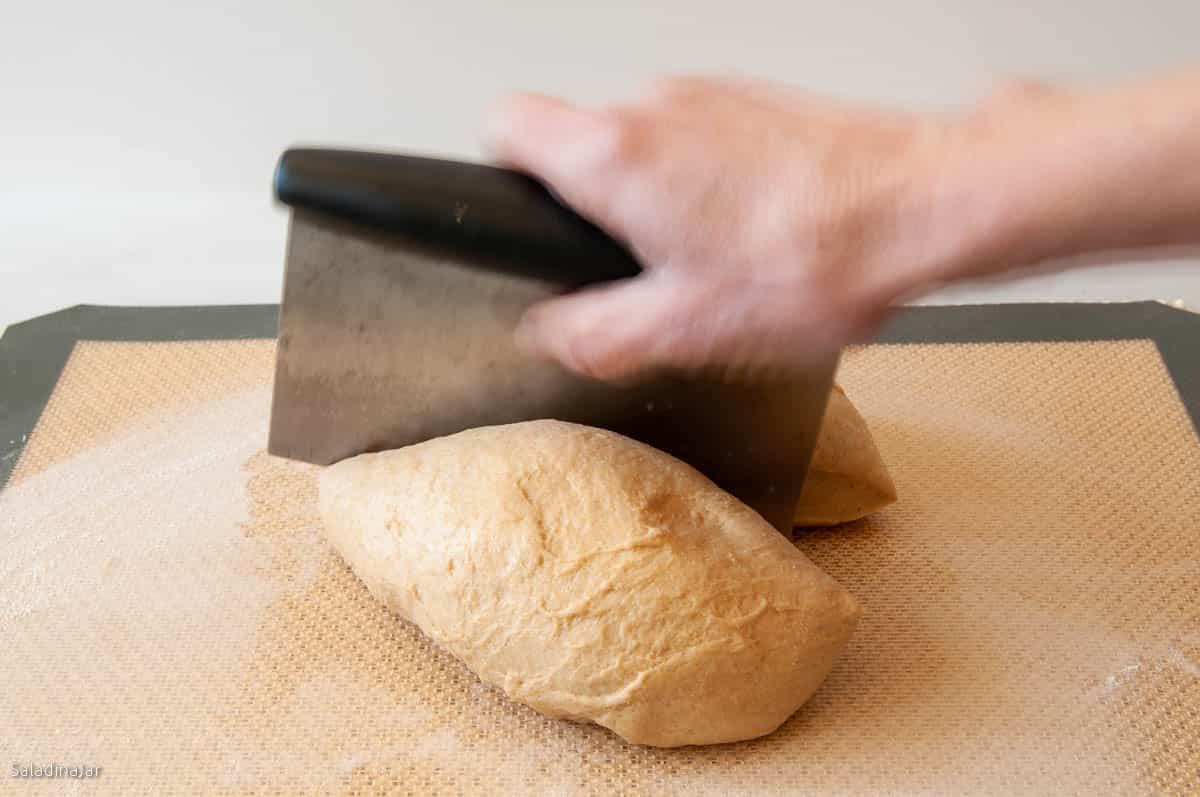
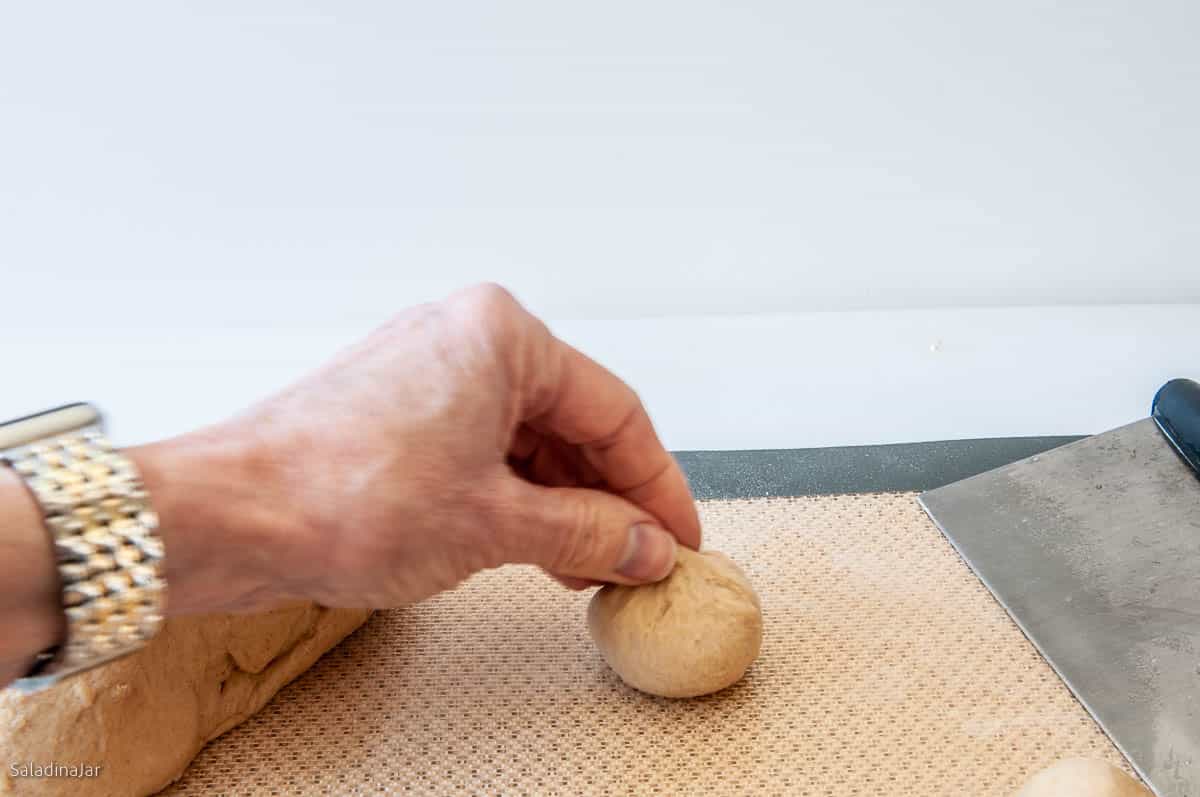
Shaping the Dough
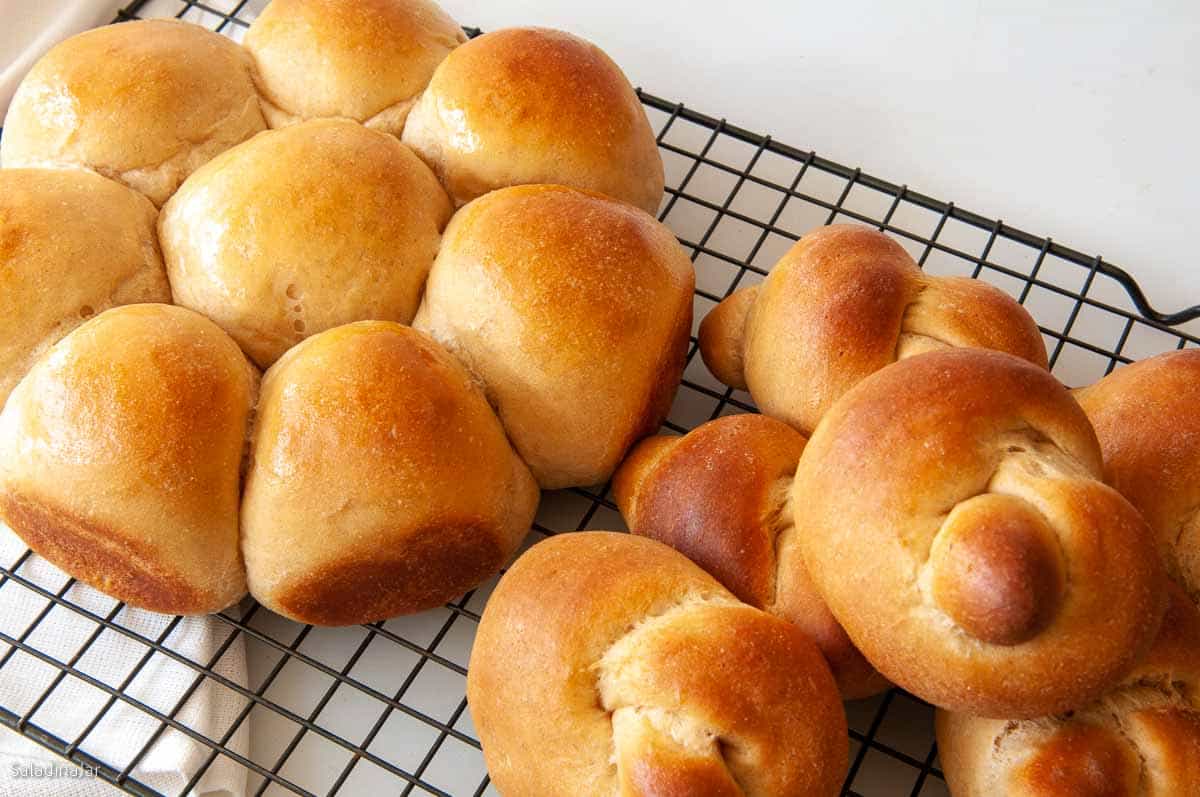
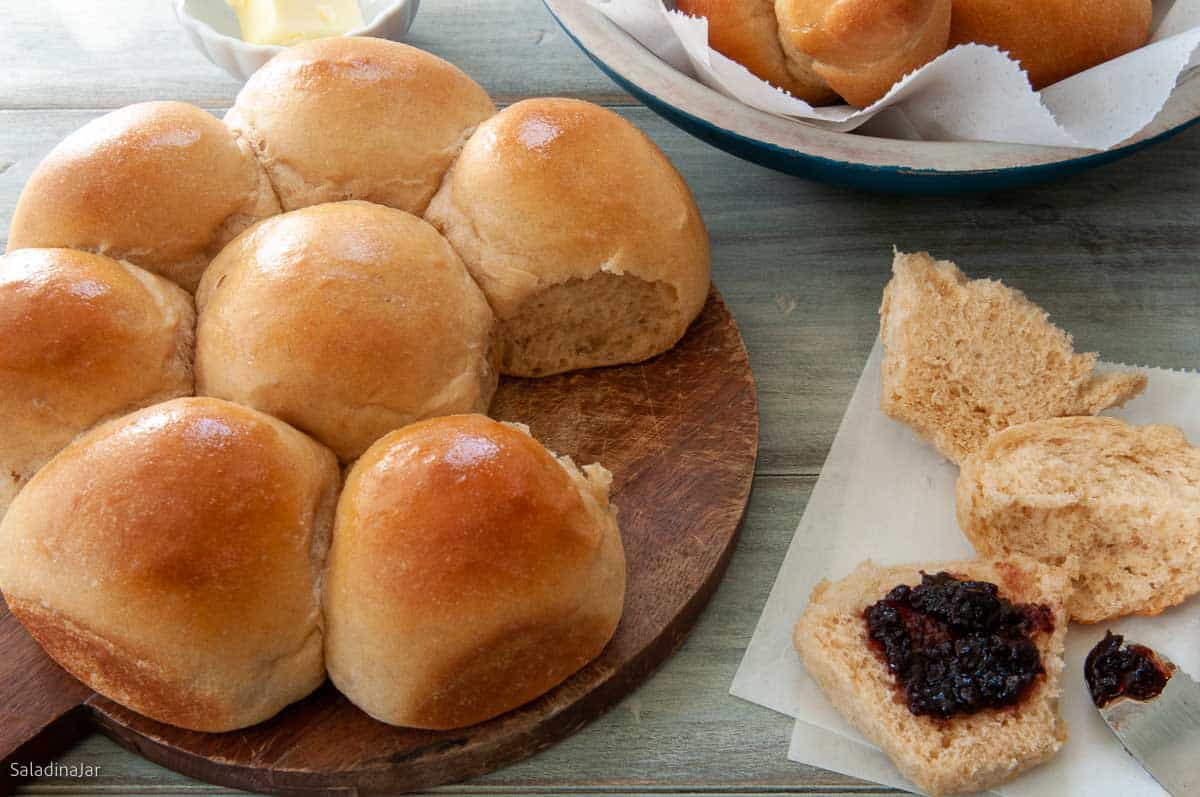
These round-as-a-baby’s-butt shapes are easy to make if you follow my video instructions. No rolling pin is required! With a little practice, you’ll be making beautiful rolls faster than (I Love) Lucy could stuff candy into her mouth.

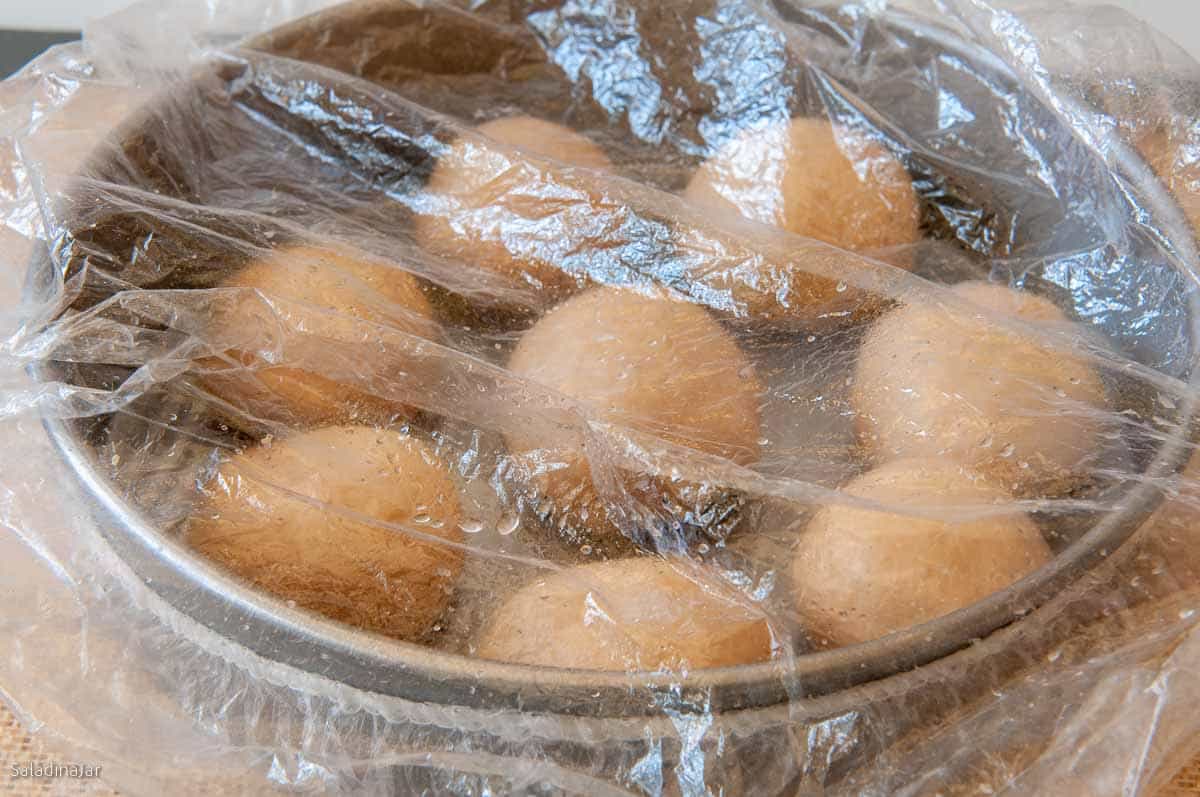
When the rolls have almost doubled in size and touch each other, bake them in a preheated oven at 350˚ for 10-12 minutes or until the internal temperature reaches 190˚F (88˚C).
Frequently Asked Questions
The texture will be slightly coarser and heartier. These characteristics will be even more pronounced when using 100% traditional whole wheat flour.
“White–whole wheat flour is every bit as nutritious as whole wheat flour (it contains the nutrient-rich germ and the fiber-rich bran), it just bakes better and tastes more like the unhealthy all-purpose flour. … Best of all, white whole wheat flour offers the same nutritional goodness of its darker cousin.”
—CleanCuisine.com
Store in a sealed container and refrigerate for up to 6 months. Freeze for up to a year. When left at room temperature, it tends to go rancid. Get more details about storing white whole wheat flour here.
You can make it the day before. Mix the dough, let it rise, and then form it into balls. Place in pans and refrigerate them overnight. Take them out of the fridge a couple of hours before you bake them for the final rise.
I have tried this, but the dough is too soft for a loaf, in my opinion.
That can be the hardest part of this recipe. I can find the King Arthur brand at my local Target. It’s also available online.
Happy Bakers Speak Up
“I made these with my Kitchen Aid Mixer and they turned out wonderful. So soft and fluffy even though they are whole wheat! I have always bought the Rhodes frozen rolls for ease, but I will now use your wonderful recipe as it wasn’t any more difficult.” —MINDI W.
Parting Thoughts: If you have been advised to eat more whole grains, these whole grain rolls are a wonderful way to stick your toes in the whole wheat flour waters. The mild taste and lighter color make the transition from Wonder bread to whole grains much easier.
If You Enjoy Making Bread, Check Out These Posts
Help at Your Fingertips: For questions or suggestions, email Paula at saladinajar.com. If you need help, I’m happy to troubleshoot via email (faster than leaving a comment). Attach pictures and as many details as possible for the best advice.

White Whole Wheat Flour Bread Machine Recipe for Dinner Rolls
Rate this recipe
(5 stars if you loved it)
Video
Ingredients
- 1 cup (227 g) whole milk
- 3 tablespoons (39 g) granulated sugar
- 1 teaspoon table or sea salt
- 1 large (50 g) egg
- ¼ cup (57 g) unsalted butter, chopped
- 3 cups (360 g) white whole wheat flour
- 1¾ teaspoons instant yeast
Instructions
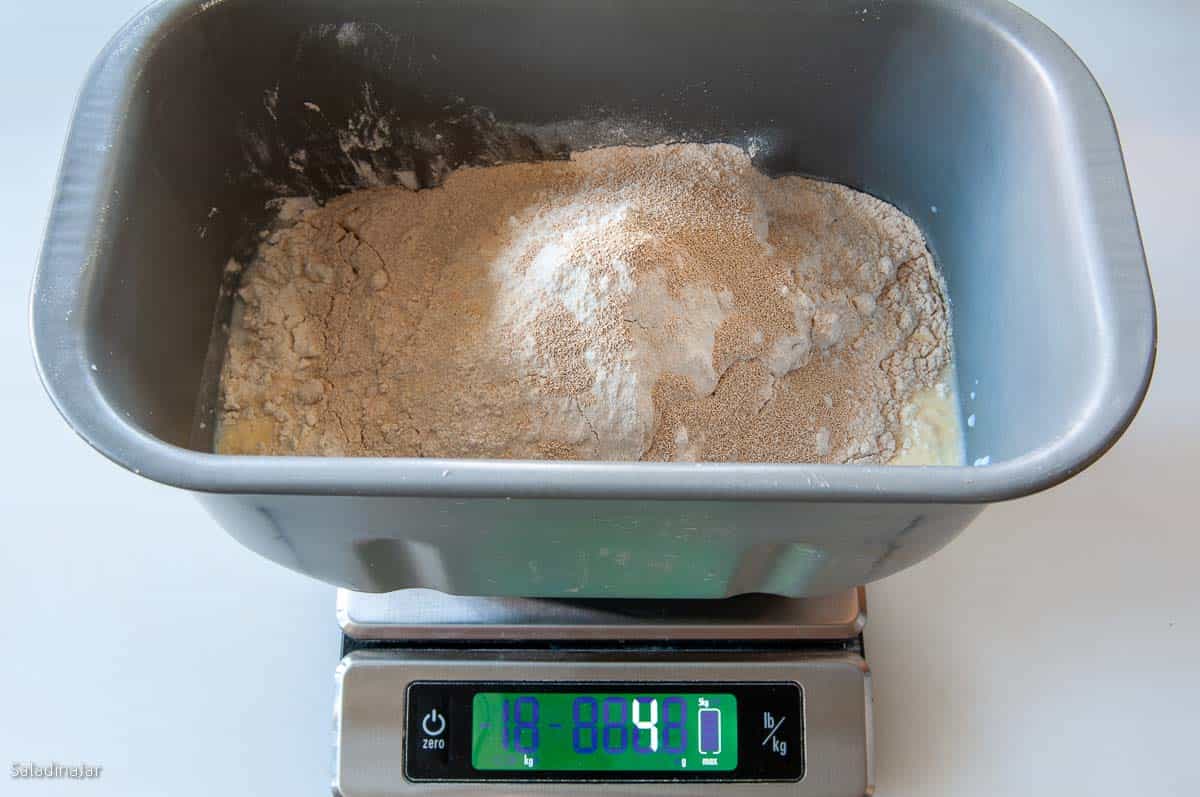
- Place all ingredients into the bread machine pan in the order given: 1 cup (227 g) whole milk , 3 tablespoons (39 g) granulated sugar, 1 teaspoon table or sea salt, 1 large (50 g) egg, 1/4 cup (57 g) unsalted butter, chopped, 3 cups (360 g) white whole wheat flour, and 1¾ teaspoons instant yeast
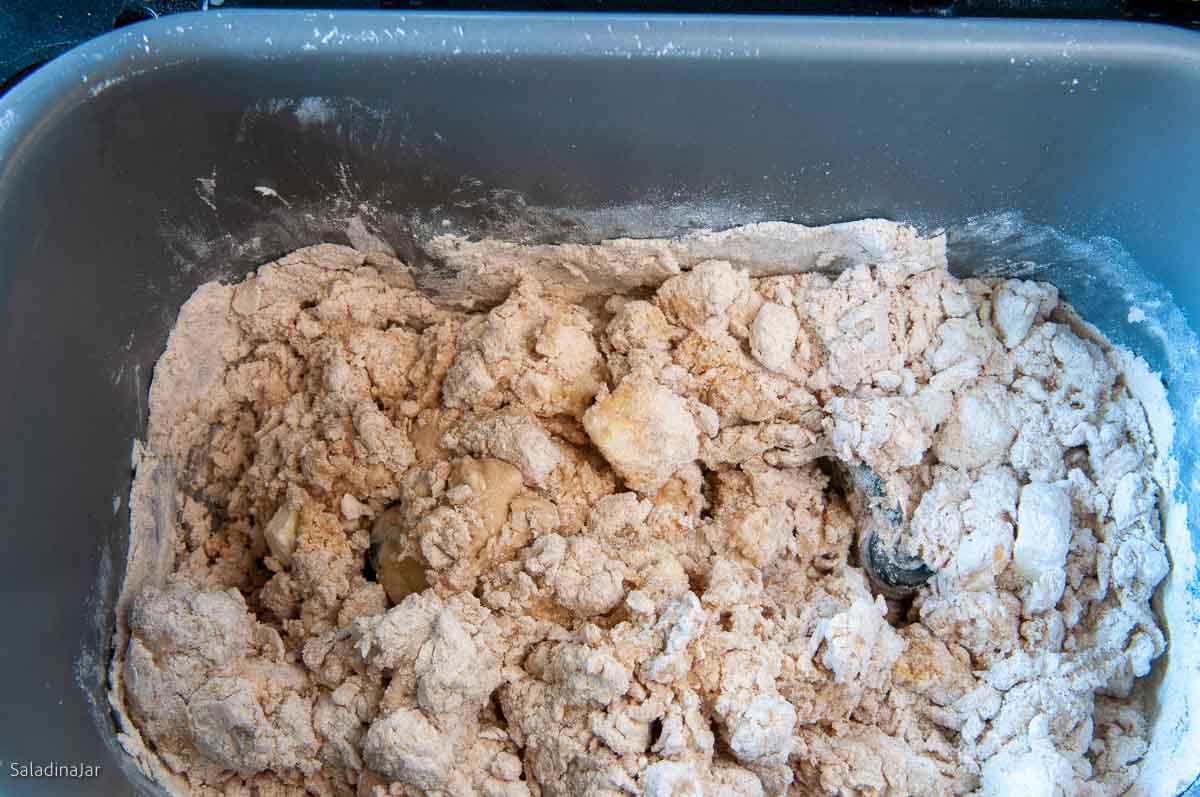
- Select the DOUGH cycle. After the first minute, open the lid and peek at the dough to ensure the kneading paddle(s) is engaged and the dough clumps.
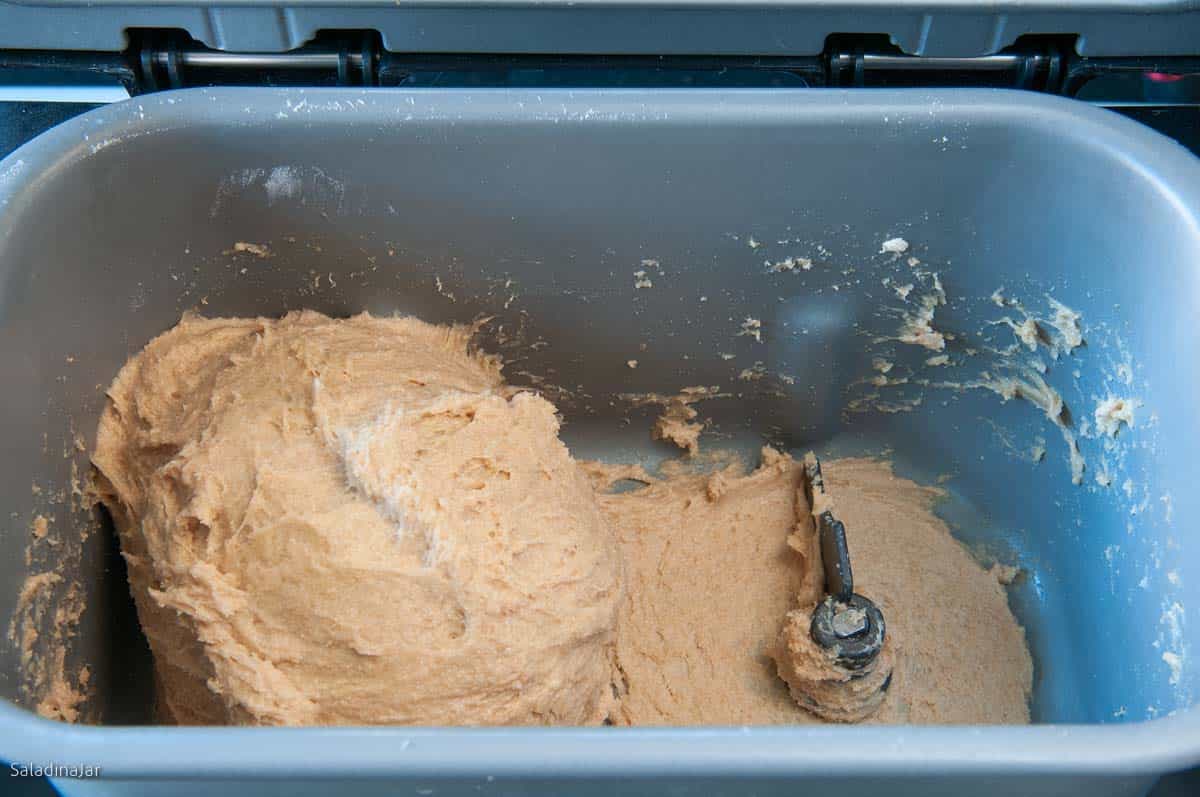
- After 15 minutes of kneading, raise the lid and make sure the dough is the correct consistency. This is best described as dough that sticks to the side of the pan, then pulls away. If the dough is too dry and bouncy, add milk or water a little bit at a time. If the dough is too wet, add flour. Go slowly when adding either one to allow the dough to absorb what you’ve added before adding more.
- When the dough has completed the DOUGH cycle and risen to double its original size, remove dough to a floured work surface.
- Divide the dough into 16 equal pieces. See video for instructions for rolling into balls. Arrange into two 8 or 9-inch pans. Cover loosely and set in a warm place until rolls almost double in size.
- Preheat oven to 350˚F (180˚C).
- Bake in a preheated oven for 10-12 minutes until golden brown. The internal temperature should reach 190˚F (88˚C).
- Loosen rolls from the pan and turn them out onto a cooling rack or towel. Leaving the rolls in the pan until cool will result in soggy bottoms.
Notes
- To make this recipe in a heavy-duty stand mixer: Add ingredients to the bowl in the same order. Turn on LOW to mix until all ingredients are moistened. Then, using a dough hook, turn the speed to 2 or 3. Continue beating/kneading until dough becomes smooth and elastic (about 5-10 minutes). Cover and allow to rise in a warm place. Deflate dough gently and shape as indicated in the recipe.
- If making by hand: Combine all ingredients into a shaggy ball in a large bowl. Turn dough out onto a floured surface. Knead with your hands until the dough becomes smooth and elastic. Kneading will likely take 10-20 minutes, depending on your experience. Place the dough ball into a greased bowl. Cover and allow to rise until double. Deflate the dough gently and shape as indicated in the recipe.
- Please note: If you only have active dry yeast, use 1/4 teaspoon more than called for in the recipe. It no longer needs to be dissolved first, but you can if you prefer.
Equipment
Nutrition
All images and text ©️ Paula Rhodes for Salad in a Jar.com
If you want inspiration and exclusive tips, add your email and press the button. (Don't worry. I won't sell your email.)

Paula Rhodes, owner
As a retired home economist, I created Saladinajar.com to share my belief that you don’t have to be a chef to find joy in creating homemade food worth sharing. Bread machines (used in an unconventional way), homemade yogurt, and quick microwave recipes are my specialty.