12 Tips for Getting a Good Seal when Vacuum-Sealing Mason Jars
Sneak Preview: If you’ve been struggling with achieving a good seal when vacuum-sealing Mason jars, you’re in the right place. Dive into these 12 expert tips to troubleshoot and solve the issue. Discover the potential culprits and 12 solutions for your problem.
NOTE: The vacuum-sealing process is not a substitute for heat canning. Perishable foods must be kept in the refrigerator even when vacuum-packed.
As an Amazon Associate, I earn from qualifying purchases.
Have you ever experienced a classic case of seeing things differently after experiencing the problem yourself?
Throughout my years of running this website about my “salad in a jar” method (preserving chopped lettuce in vacuum-sealed glass jars), I occasionally receive questions from readers struggling to achieve a proper seal on their Mason jars.
My initial response was to gently repeat the original instructions. Many would later report back, sharing that something seemed amiss – things were either upside down, backward, inside-out, or topsy-turvy. Eventually, they managed to make it work.
However, I recently faced a sealing challenge myself that couldn’t be solved with lid gymnastics. There’s at least one Mason quart jar in my cabinet that simply refuses to seal, regardless of my efforts. (See clue #6 for more information.)
I apologize to all of you who have encountered similar difficulties. (See the rest of the story at the end of this post.)
Happy Cooks Speak Up
“Bought my Food Saver and jar sealers over 20 years ago (2012), and today was the first time I’ve ever had an issue with the lids not sealing. I would have never thought of the 2 Lid solution for the regular jars. I use regular jars for long term storage of dry goods like beans, lentils and quinoa. THANK YOU for this article!! “–LAURIE M.
Twelve Tips for Getting Lids To Seal on a Mason Jar When Vacuum-Sealing
1. Is the flat lid bent?
You can reuse the flat lids if you aren’t heat-sealing, so this will happen occasionally.
2. Does the rim of the jar have a crack or chip?
If you find one, that particular jar won’t work for vacuum sealing.
3. Is there a piece of food between the lid and the edge of the jar preventing a clean seal?
I hope this is the problem because it’s an easy fix.
4. Is the rubber gasket on the attachment dirty?
Wash in soapy water.
5. What brand of jars are you using?
Do they match up to the wide-mouth attachment? The FoodSaver website recommends Ball and Kerr brand jars. However, these are not the only ones that work. One researcher discovered that ten worked out of twelve brands she tried, and two did not. So, trial and error may be the order of the day on this one.
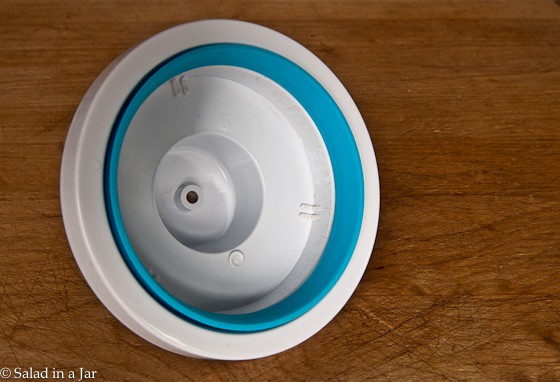
6. Is your jar a mutant?
Regarding the wide-mouth attachment seen above, the blue rubber must form a seal around the ridge at the bottom of the top of the jar (see picture below). If there are any bumps or other irregularities, it may not form that seal.
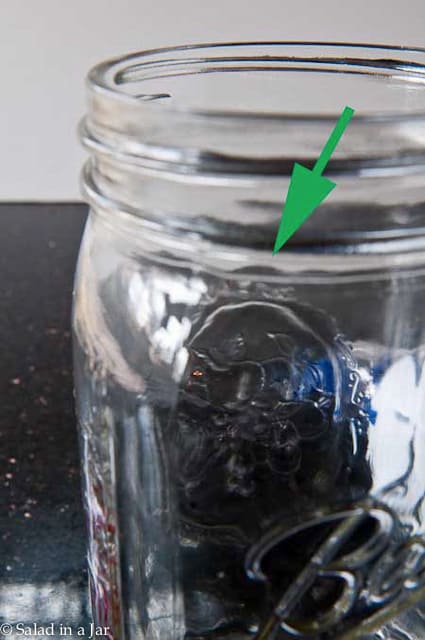
If you look carefully at the jar in the picture, you can see that the lowest ridge has some ripples. This is entirely unnoticeable to the casual observer, but I can feel it with my fingers. It looks like this jar will receive a new job description that doesn’t include storing anything that needs to be vacuum-packed.
7. Foreign particles may be blocking the hole in the attachment.
Check the top of the attachment where the air is sucked out of the jar. If you are packing something powdery (e.g., powdered sugar or flour), try cutting a piece of paper the diameter of the jar and laying it on top of the contents to prevent the small particles from entering the attachment.
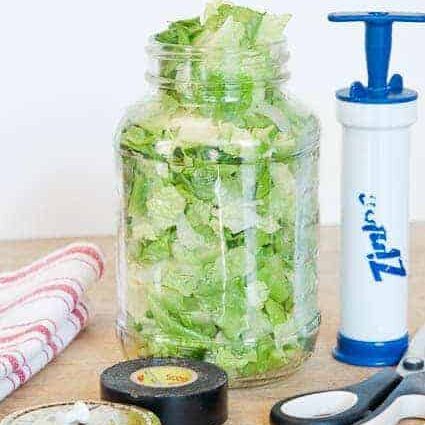
8. If you use a hand-held sealer, you may not be pressing firmly enough or at the right angle.
The goal is to create a seal between the sealer and the attachment. Try applying more pressure on top of the sealer.
Readjusting the angle of approach solves the problem for me 95% of the time.
If you want inspiration and exclusive tips, add your email and press the button. (Don't worry. I won't sell your email.)
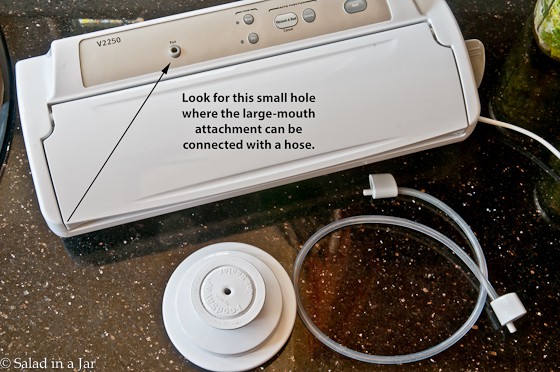
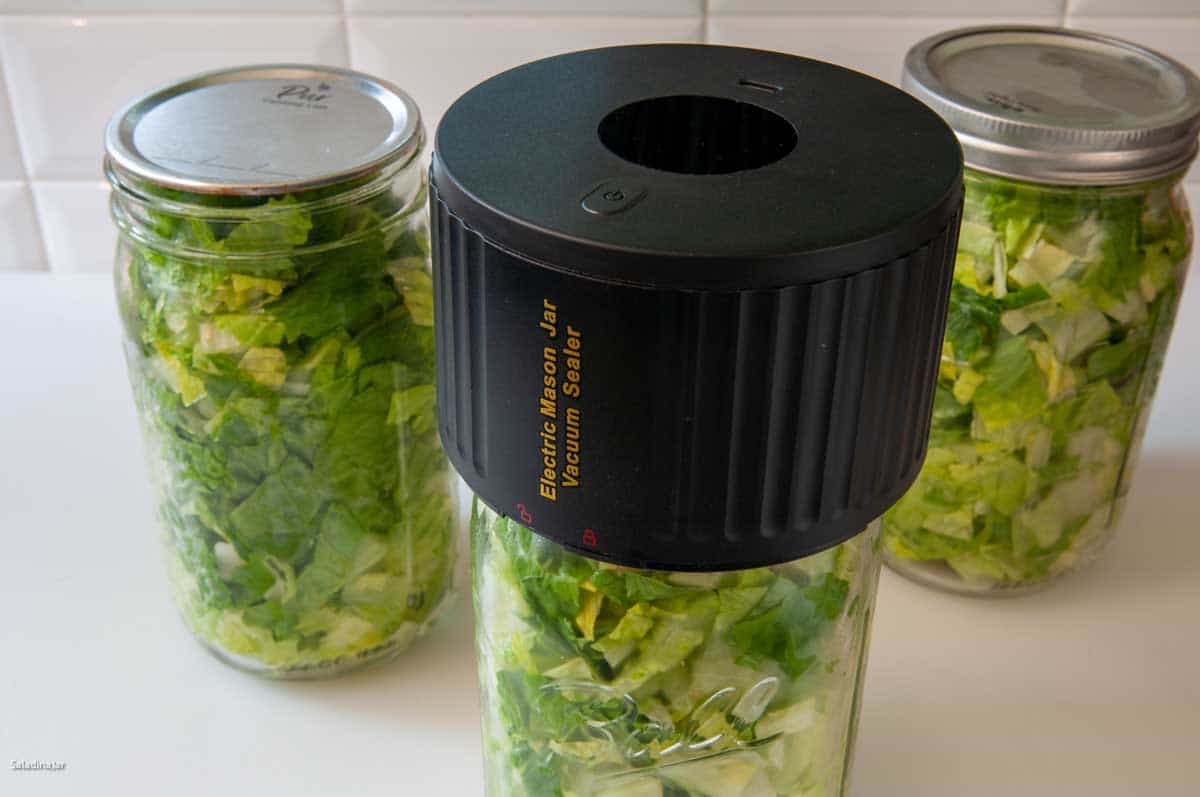
9. If you use a countertop vacuum machine with a port, your hose may not be attached securely and completely.
Make sure the hose inserts as far as possible into the machine port. Also, make sure the hose to the attachment is secure.
10. No matter your method, are you operating the machine long enough to pull out all of the air?
You should hear a difference in the sound of the motor as it slows slightly. If you are vacuum-packing with a hand pump, pump it several times and then pump one more time.
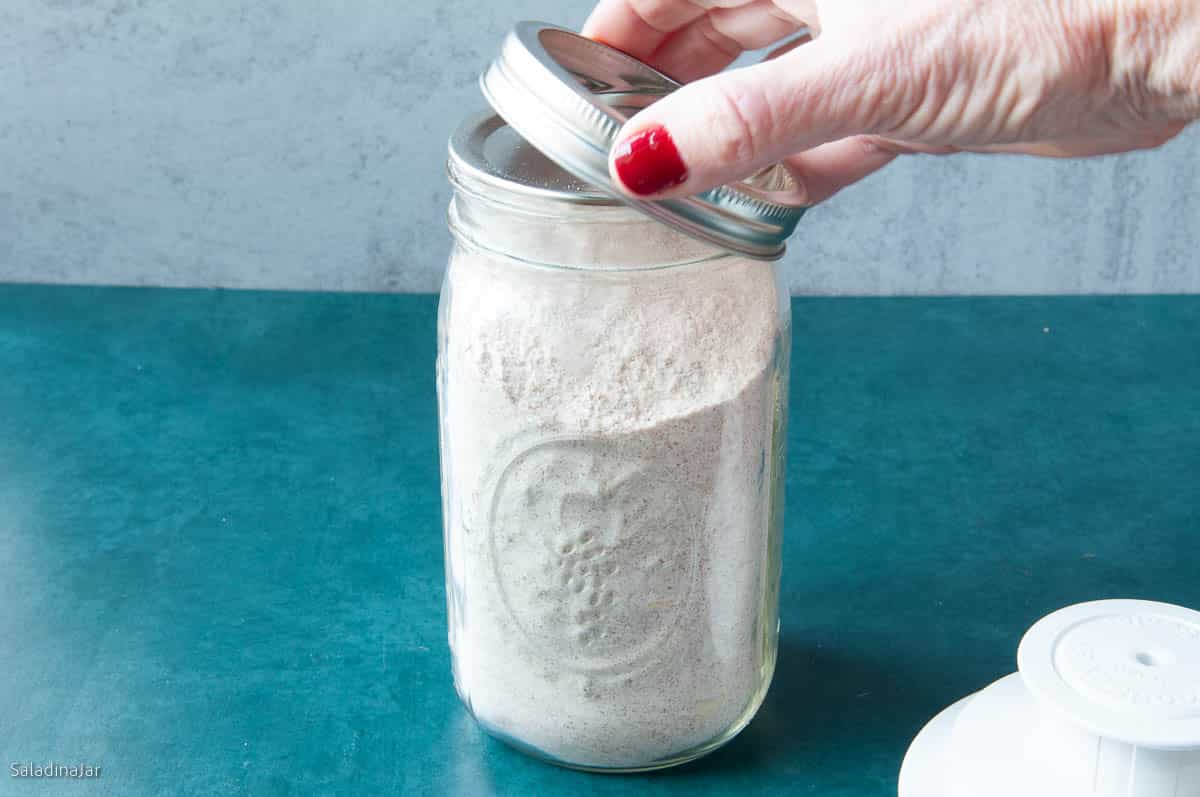
11. Try using two flat lids, one on top of the other.
I have found this tip most helpful when sealing regular-mouth jars (as opposed to wide-mouth jars).
Remove the second lid when you finish since it has served its purpose.
12. If you are having trouble sealing a regular-mouth Mason jar, try using a wide-mouth jar.
Regular-mouth Mason jars seem to be more challenging to seal. As a result, I exclusively opt for wide-mouth jars when acquiring new ones. Additionally, wide-mouth jars offer greater convenience when it comes to both filling and emptying them, as well as simplifying the cleaning process.
My New Favorite Way To Vacuum-Seal Mason Jars
Read more about my latest favorite portable vacuum sealer in this post about my favorite gadget for vacuum-sealing Mason jars. No large or small-mouth attachment is needed. This device is quieter than a countertop vacuum machine, rechargeable, and much easier to store. You can purchase one online (paid link). Don’t miss the coupon.
Parting thoughts: In case you missed it in the beginning, vacuum sealing is not a substitute for heat-sealed canning. Perishable foods like fresh fruits, vegetables, and milk MUST be kept in the refrigerator, even when vacuum-packed.
If you have questions or suggestions, email me privately for a quick answer: Paula at saladinajar.com. Hope to see you again soon!
Paula Rhodes, owner
As a retired home economist, I created Saladinajar.com to share my belief that you don’t have to be a chef to find joy in creating homemade food worth sharing. Bread machines (used in an unconventional way), homemade yogurt, and quick microwave recipes are my specialty.