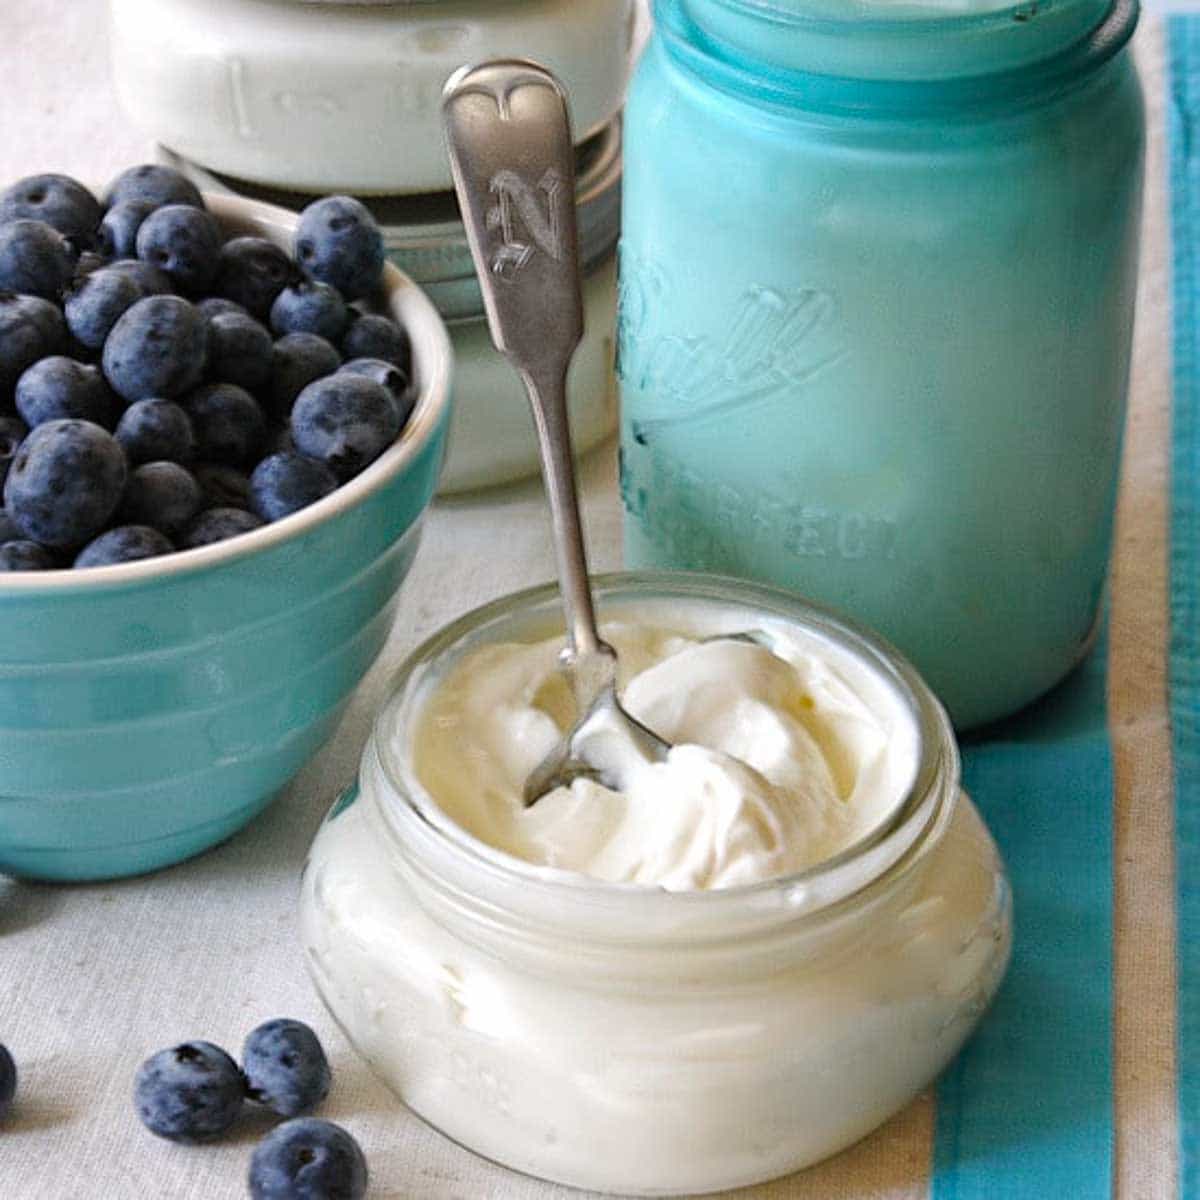
How To Make the Greek Yogurt of Your Dreams

Pinterest Hidden Image

Sneak Peek: Learn how to make Greek yogurt (aka Greek yoghurt) in the comfort of your own kitchen without any fancy gadgets. Dive into my easy-to-follow Greek yogurt recipe, complete with step-by-step instructions and visuals. Say goodbye to store-bought versions and hello to homemade yogurt made to your specifications!

Homemade Greek Yogurt in a serving jar with blueberries in the backgroundPin

As an Amazon Associate, I earn from qualifying purchases.

Making yogurt is easier than you think. Follow my instructions, and before you know it, you’ll be turning cartwheels over your first successful batch of Greek yogurt.

At first, I wasn’t turning cartwheels. You see, I approached making Greek yogurt the same as a high school term paper. I read many recipes and tried to boil down millions of ideas and traditions into the perfect “recipe.”

Before long, I was confused. So many people copy from a friend. When they make one good batch of yogurt, they publish the directions. Who should I listen to??? Aach!

Seven reasons why you will rejoice after making yogurt this way

  1. This recipe is for basic yogurt. I’ll show Greek Yogurt lovers how to complete the transformation by straining.
  2. You don’t need a yogurt maker. I’ve tried the yogurt maker already. It’s OK for beginners (like a flip phone for cellphone users), but when you become addicted to homemade yogurt, you’ll want more.
  3. You don’t need a fancy incubator–yet. I have ideas for using things you might already have.
  4. You don’t need cheesecloth. Have you ever used cheesecloth to strain anything? What a mess! There’s another way (paid link). Stick with me.
  5. If you are impatient like I am, you’ll appreciate learning how to heat milk in your microwave FAST. We’ll also talk about other options.
  6. The essential tools are persistence, patience, and an appreciation for live cultures. I’ll teach you all about it.
  7. Beginners will find a quick-read thermometer (paid link)indispensable—we’ll talk about that, too. (I still use a thermometer–every time.)

If you prefer to skip the details and answers to questions, click the button at the top to go straight to the recipe.

Happy Cooks Speak Up

“Paula, I have been using your original recipe for Greek yogurt, starting about 2009, and I am glad to see you have the website. Very recently, I discovered Icelandic skyr. Last night, I made my first batch of whole-milk skyr, using this same method. The texture is great and the taste is every bit as good as the starter culture I purchased. Well done!” –DAVE E.


If you’re unsure whether homemade yogurt is right for you, hop over to this post for an easy and humorous read about “Five Things You Should Not Do When Making Yogurt.”


What’s the Difference Between Greek Yogurt and Regular Yogurt?

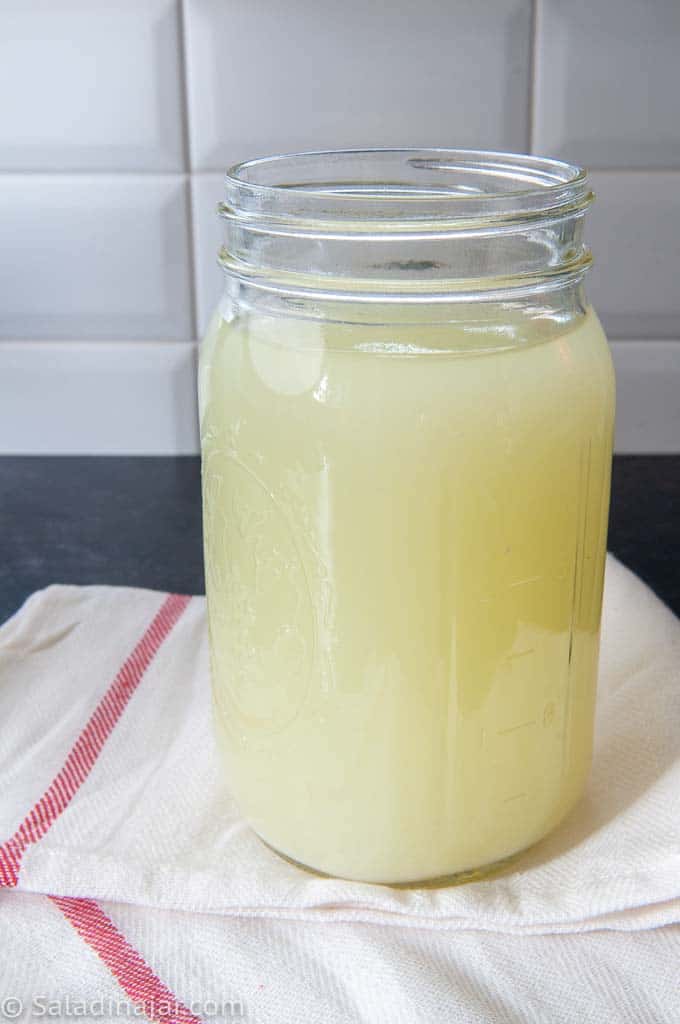
Greek yogurt is regular yogurt minus part of the whey. Whey is the yellowish liquid you see collecting on top of yogurt. Greek yogurt is often referred to as “strained yogurt.”

More Differences Between Regular Yogurt and Greek Yogurt

  • Thicker than regular yogurt
  • Higher in protein and lower in sugar than regular yogurt
  • It contains more fat (unless you make it with non-fat milk) than regular yogurt.

The simplest way to make Greek yogurt is by straining off the whey from regular yogurt. Some companies add gelatin, rennet, or other mystery ingredients to make it thick. The result is often an inferior (and cheaper) product.

Something else to note from Healthline: “Because the straining process reduces the total volume, Greek yogurt takes significantly more milk than regular yogurt to make a batch of the same size.”


How long does it take to make yogurt?

Now that my system is streamlined, the hands-on time is less than 15 minutes.

But there is hands-off time. With my method, you don’t have to watch the process; only move the milk or yogurt to the next stage.

  • Heating (I use a microwave oven) 15 minutes. Add another 15-30 minutes if you like to hold the temperature at 180˚F for extra time.
  • Cooling the milk back to 105˚F: ∓ 20 minutes
  • Incubation period: 3.5-10+ hours
  • Straining yogurt: 1-3 hours

Adding up those hours sounds like an all-day affair. But it’s like doing the laundry. You learn how to weave it into your schedule.

Do I Need a Yogurt Maker To Make Yogurt?

A yogurt maker is easy and foolproof. That’s not a bad thing, especially for beginners.

However, all yogurt makers are not alike.

Many yogurt makers only make individual servings. Therefore, they are impractical if you want to make Greek yogurt (straining required). Quart-size and bigger yogurt makers are better for Greek yogurt lovers.

How To Make Yogurt at Home

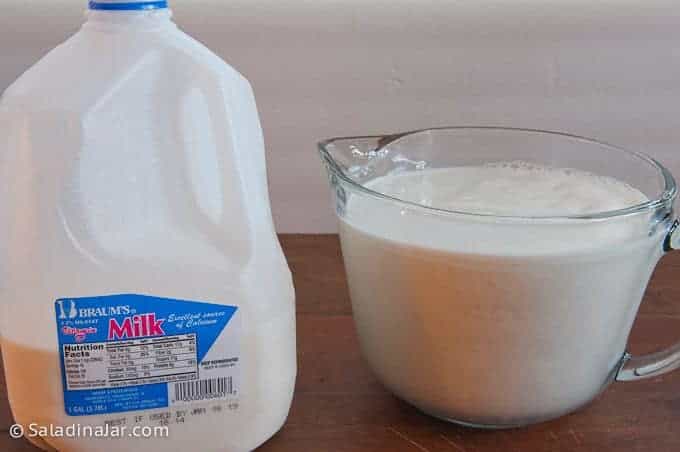
Step 1: Fill a heat-safe container with dairy milk (cow’s milk or goat milk).

choosing a microwave-safe pyrex pitcher to heat milkPin
Use a microwave-safe 2-quart glass batter bowl or a larger Pyrex dish to heat milk in the microwave. Or use a large saucepan to heat milk on top of the stove.

Happy Cooks Speak Up

Thank you for all the great information! I’ve made two batches of yogurt, both were a success but the second batch was much firmer than the first. I did the crock pot method first from start to finish. It took much longer to reach temp and cool down than the videos claimed. 


For my second batch I heated up my milk in the microwave as you do, brought it down to temp and then incubated it in a warmed crock pot. It turned out perfect!! 
–JAN O.


Step 2: Heat milk to 180˚F using a microwave, stove, or Instant Pot.

heating milk in a microwave ovenPin

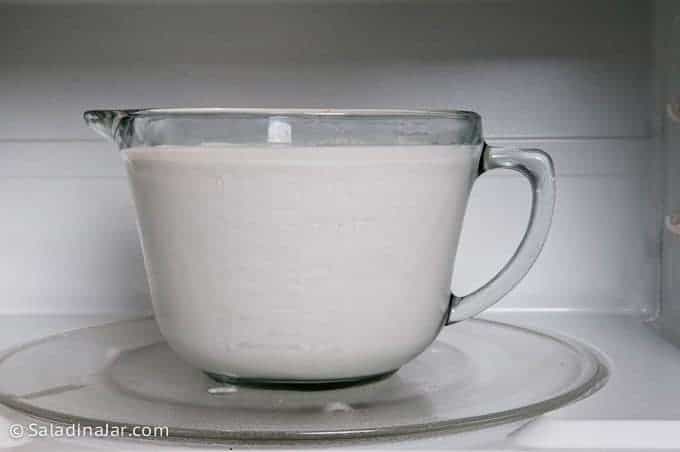
1. Using a microwave to heat the milk

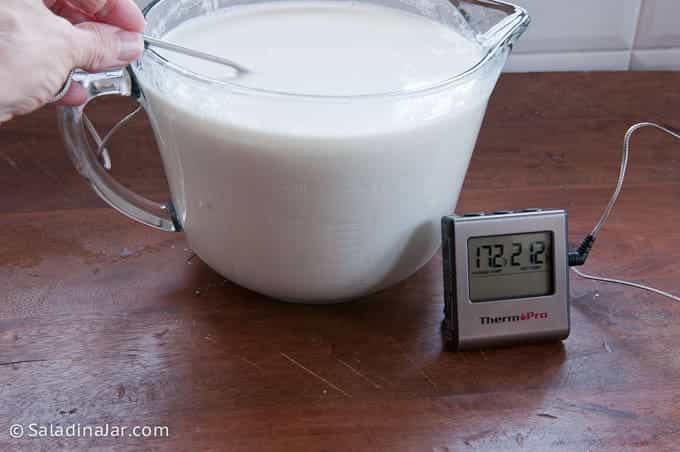
For 2 quarts of milk, heat on HIGH for 14-17 minutes until the milk reaches 180˚F.  Check the temperature of the milk with a quick-read thermometer (paid link) until you know how long it takes for the milk to reach the right temperature in your microwave. If you want to heat less milk, the time will change.

If you want to hold the heat at 180˚ for 15 minutes, as some recommend for thicker yogurt, set the cooking level to 20% power and the timer to 15 minutes. Again, check the temps with a quick-read thermometer and write them down for future use.

logo for saladinajar
Join our community of adventurous cooks, and start creating homemade food worth sharing.

If you want inspiration and exclusive tips, add your email and press the button. (Don't worry. I won't sell your email.)

Microwaves can vary wildly. Experiment with yours to see what works best. Once you figure out the perfect timing, make a note. You’ll never have to think about it again unless you get a different microwave or use a different amount of milk.

Why I Prefer Heating Milk with a Microwave

  1. No worries about the milk boiling over and making a mess
  2. No monitoring is needed once you figure out the perfect timing for your oven.
  3. No stirring is required.
  4. No scorching and the ensuing mess you have to clean up
  5. Easy to hold the high temperature for 15 minutes if you choose to do that
  6. Only one dirty dish to wash (plus a strainer if making Greek yogurt)–heat, cool, incubate, strain, and whisk yogurt in the same glass container

Happy Cooks Speak Up

“I did it! I made yogurt. The first time didn’t work. I used a crockpot and it took me four hours to heat the milk to 180 degrees on low (ughhh), and wrapping a towel around the crockpot wasn’t enough to maintain the temperature later on. I was much happier to use the microwave because it was so much faster (I did have to purchase a microwaveable dish of the right size, which is why I tried the crockpot method first), and then I put my dish with a lid on wrapped in a towel in the oven with the light turned on, after turning it to 350 degrees for 1 minute as you suggest. I love how effective that method is, and it takes up less space than a big crockpot wrapped in a towel sitting on my kitchen counter for hours! I was thrilled to see that my yogurt set after five hours.”SARAH S.

2. Using a stove to heat your milk

You can also heat the milk on the stove. Keep the heat turned down to avoid scorching. Stir frequently and check the temperature as you go.

No matter how you heat the milk, avoid boiling it. But if your milk does boil, carry on. The milk will still make yogurt but may not be as smooth.

3. What about using an Instant Pot?

Some people use their Instant Pot to heat and incubate the milk. That’s fine if you don’t mind babysitting the process.

The disadvantages of making yogurt with an Instant Pot:

  • The size of your pot will limit the amount of yogurt you can make.
  • Whenever I’ve tried this, inevitably, I need my Instant Pot to fix dinner. (This might be related to Murphy’s law.)

The advantages of making yogurt with an Instant Pot:

  • Incubation is easy if your model has a preset button.
  • It is convenient if you want small jars of yogurt

4. Can I skip the heating step since my milk is pasteurized?

Many people think the only purpose of heating milk is to sterilize it. But the milk has already been “sterilized” in the pasteurization process. The crucial reason for heating the milk is to unravel the proteins so that the incubation process will result in a thicker yogurt.

NOTE: If you use Ultra-filtered milk (such as Fairlife), you do not need to heat it. Some people call this the “cold start” method.

Don’t miss this post if you wonder whether the cold start or the traditional method is better for you.

checking temperature with a thermometerPin
A thermometer will ensure the temperatures are correct.

Step 3: Let the milk cool down.

The temperature of the milk needs to drop back to somewhere between 100-110˚F.

Milk that is too hot will kill the little yogurt bodies in the starter. Project over!

Cooling times will vary depending on the volume and type of container holding the heated milk.  Use a quick-read thermometer (paid link) to check the temperature.

Hot Tip: If you are in a hurry, fill your sink or a tub and set the milk container down into the water. Add some ice once the milk cools down a bit.

Don’t panic!

If you let the temperature slide down to 80 or 90˚F, don’t worry. Add your starter and proceed as usual.

Until the temperature returns to 100-110˚F, the yogurt-making party is delayed, not canceled.

If you don’t want to wait or your incubation system has no steady heat source, gently heat the milk back to 100˚F.


checking cool-down temperature with a thermometerPin
It looks like the temperature of this milk is back up to 105˚F. So, we are ready for the next step.

Step 4: Add a starter to the cooled milk.

a spoonful of thick starterPin
Place a spoonful of yogurt starter into a small bowl.
whisking milk into starterPin
Add cooled milk to the yogurt starter and whisk until smooth.
whisking starter into warm milkPin
Whisk the starter into the warm milk.

More answers to common questions about yogurt starters

1. What’s a yogurt starter?

A yogurt starter contains live yogurt microbes. No starter? No yogurt.

2. Can I use a jar of my favorite yogurt from the store?

  • Yes, if it’s unflavored, fresh, and contains live cultures (little yogurt bodies).
  • Avoid yogurt with additives such as gelatin or other thickeners. They can cause a grainy texture.
  • If you can’t find unflavored yogurt, vanilla-flavored will usually work. But it’s not my first choice.

3. What’s the difference between using yogurt from the store and freeze-dried starters?

  • Unflavored yogurt from the store:
    • Readily available in almost every grocery store
    • It’s relatively inexpensive.
    • Usually suitable for 3-4 generations, sometimes more. It can be unpredictable the farther away you get from the original store-bought yogurt.
  • Freeze-dried yogurt starter (aka “traditional starter”) comes in a foil packet and costs more. It’s available online, in health food stores, or in specialty supermarkets like Sprouts.
    • A traditional starter is hardier than highly engineered commercial yogurt. It’s easier to ward off “wild yeast” that can mess up your yogurt.
    • A traditional starter is more complicated to use for a beginner. Expect the first batch to be thin. (Follow the directions that come with the starter.)
    • Subsequent batches will be thicker as the yogurt bodies reach their full potential.

4. Can I use yogurt from a previous batch of homemade yogurt?

  • Yes, if it is no more than a week to 10 days old.
  • If you use commercial yogurt for a starter, buy a new “starter” yogurt from the store every 3-4 batches.
  • “Traditional yogurt starter” can be used over and over–years, if it has been cared for properly. Make a fresh batch every 7-10 days for the best results.

5. Do I have to warm the starter before adding it to my cooled-down milk?

Not really. Little yogurt bodies don’t mind jumping straight off the diving board into warm milk. So I’ve made hundreds of batches of yogurt using a refrigerator-cold starter.

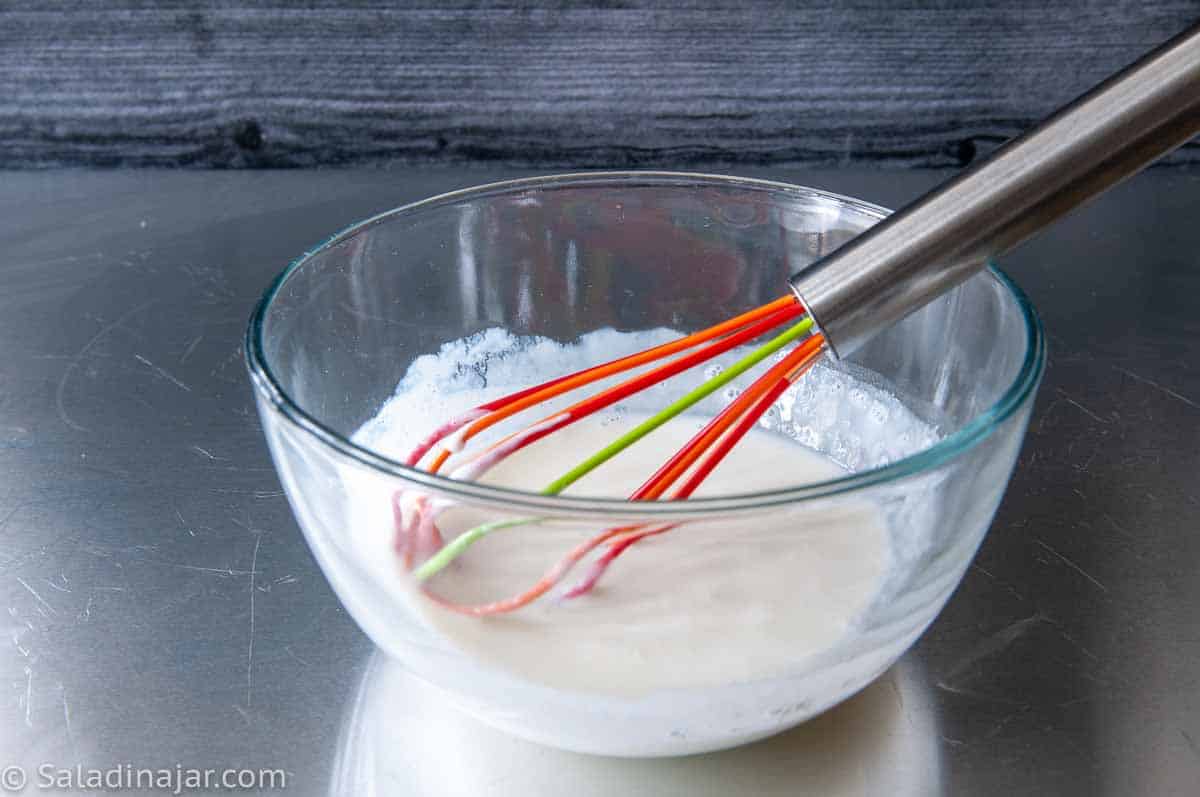
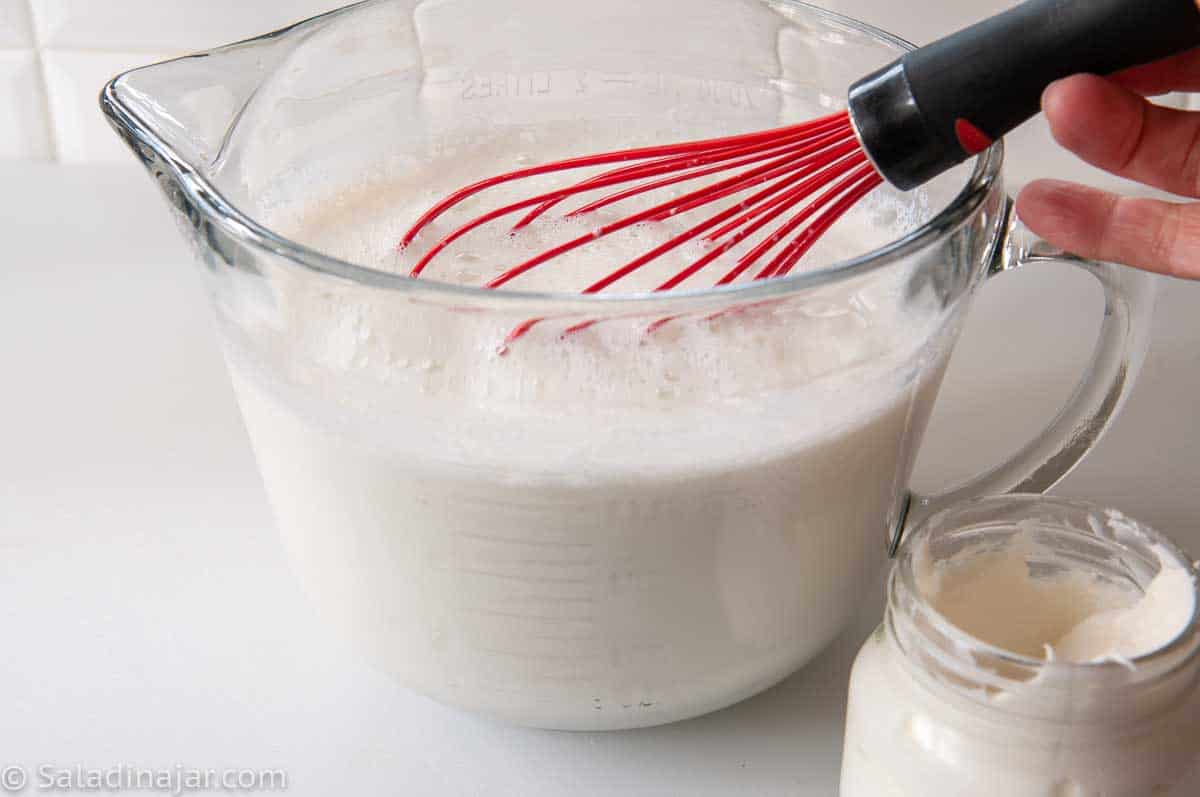
However, mixing the yogurt with cooled-down milk and whisking it until mixed is a good idea. Doing this helps to avoid “hot spots” and results in a smoother yogurt.

6. If I want to make Greek yogurt, do I have to use Greek yogurt as my starter, or will regular unflavored yogurt work?

It doesn’t matter. Greek yogurt starts life as regular yogurt. Use whichever you have. Freshness is more important.

7. How much yogurt starter should I use?

Use a generous tablespoon of yogurt starter per quart of milk. More is not necessarily better. Yogurt bodies are big eaters and don’t like to be crowded.


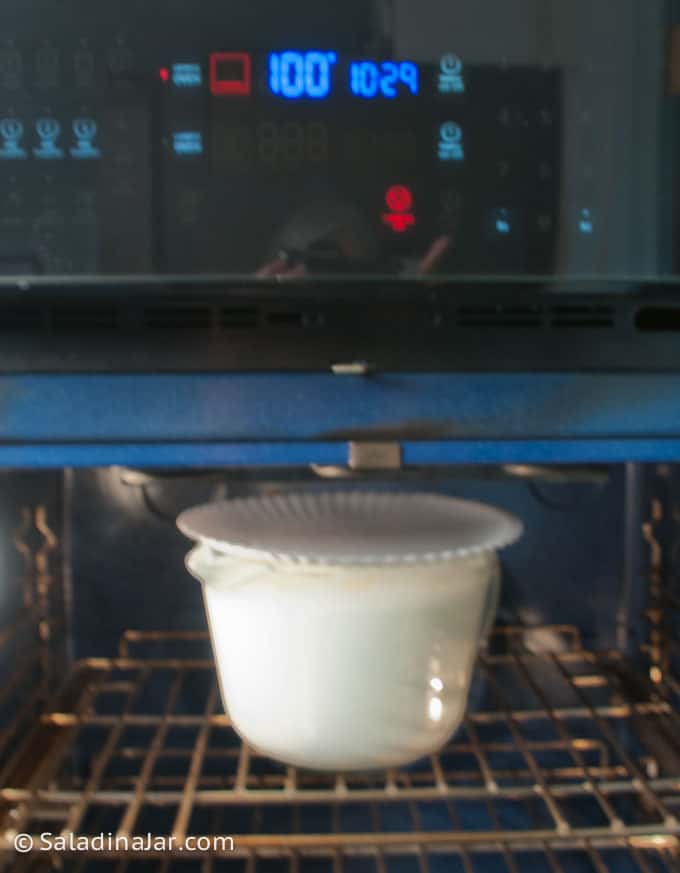
Step 5: Cover milk (loosely) and incubate.


Incubate inoculated milk for 5-10 hours. Whatever system you use must hold the temperature steady at 100-110˚F.

incubating yogurt in a conventional oven at 100 degrees FPin

CAUTION: This step is where many people go off the rails. The little yogurt bodies will die if your incubation system gets too hot. But, on the other hand, nothing will happen if the milk doesn’t stay warm enough.

Either way, the result will be milk, not yogurt. If that happens, find out what to do with failed yogurt here.

1. What is the best way to incubate yogurt?

Short answer: Whatever will hold your milk at a steady 100-110˚F.

Long answer: The possibilities depend on how your kitchen is set up, the equipment you already own, and how much milk you are trying to incubate at once.

See this post about the varied and creative ways my readers incubate their yogurt. Ideas include:

  • Set your oven on the “dehydrate” or “bread proof” setting
  • Wrap the warm milk in a blanket and put it inside an ice chest
  • Run your oven at 350˚F for 1 minute, then turn it off. Wrap warm milk in a towel and put it inside the oven.
  • For smaller amounts, some people use a thermos.
  • Use your instant pot on the yogurt setting (see the manual–instructions vary)
  • Wrap your milk in a towel and set it on a heating pad.
  • Buy an electric bread-proofing box (paid link).
  • Find a warm place in your house, such as the top of the water heater.

HOT TIP: When trying a new method, check the temperature periodically to ensure it is neither too cool nor too warm. Set a cup of water next to the milk and check the water, not the milk.

2. How long does yogurt need to incubate?

It depends…(Don’t you hate that answer?)

3. What is the best temperature for incubation?

  • 100-110˚F is optimal. A half-gallon of milk with a fresh and vigorous starter will be set within 4-1/2 to 6 hours. The yogurt will taste mild. Incubate longer for a tarter flavor.
  • The hotter the temp, the quicker your yogurt will set, and the tarter your yogurt will taste.
  • Note that temperatures closer to 115˚F have a downside:
    • The higher the incubation temperature, the more likely a “skin” will form across the top.
    • You may see excessive whey on top. Strain it off if you don’t want to stir it back in. (See directions below.)
    • Go much higher than 115˚F, and the little yogurt bodies will die.

Step 6: When the yogurt sets, remove it from incubation.

determining when yogurt is set with a spoonPin

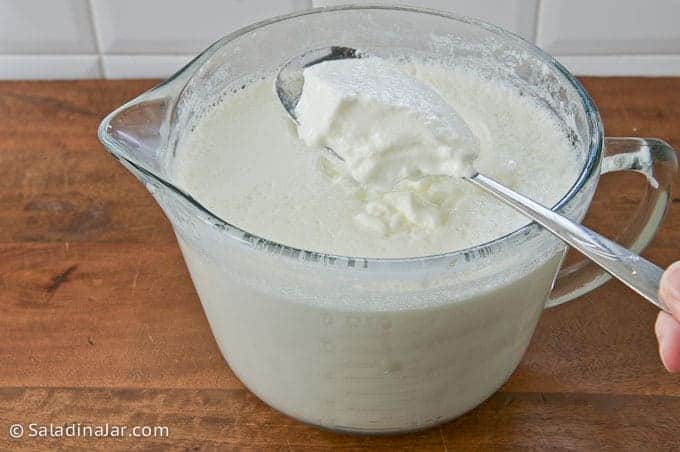
1. How can I tell if the yogurt is set?

Good question, and for some, the hardest part of the entire process.  You will learn from experience when it “looks right.”

Finished yogurt should look set — like jello. If you take a spoonful out of the middle, it should stand on its own.

2. What is the watery liquid I see on top?

There may be a watery and yellowish liquid on top called “whey.” That’s normal. Pour off the whey or stir it back in–your choice.

If you pour it off and want to save it, here are some ideas for what to do with fresh yogurt whey.


Step 7: Chill yogurt or strain it for thicker Greek yogurt.

At this point, you could chill the plain yogurt for 2-3 hours, then eat it. Or, you can make it thicker (Greek yogurt) by straining it.


How to make Greek-style yogurt from regular yogurt

Step 1: Transfer yogurt into a strainer.

Cheesecloth is the traditional way to strain yogurt. However, in my opinion, there are better options.

Check out these posts about alternate methods with coffee filters, a fine mesh sieve or colander, or a yogurt pouch.

straining yogurt with a nut pouch or yogurt bagPin
The yogurt on the right is ready to strain.

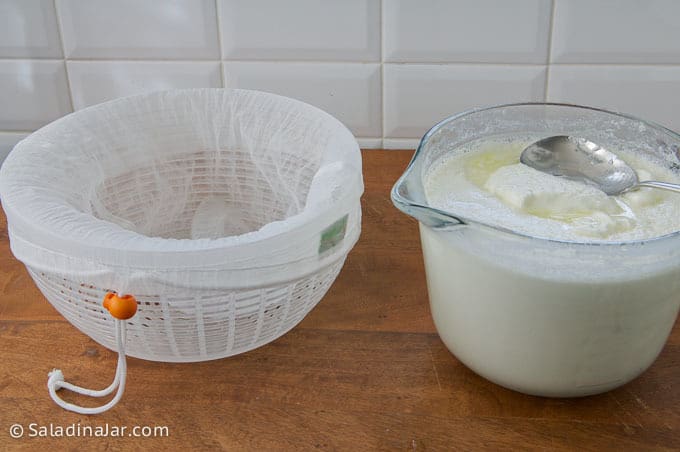
📌Kitchen Tip📌: The plastic bowl inside a salad spinner works great as a colander. It will hold up to a gallon of milk.

yogurt at the beginning of straining processPin
Yogurt will “break” when spooning it from the original bowl. So don’t worry if it looks more like cottage cheese.


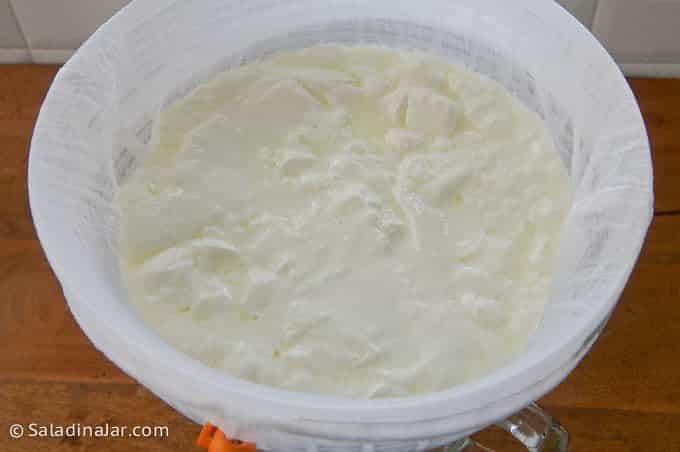
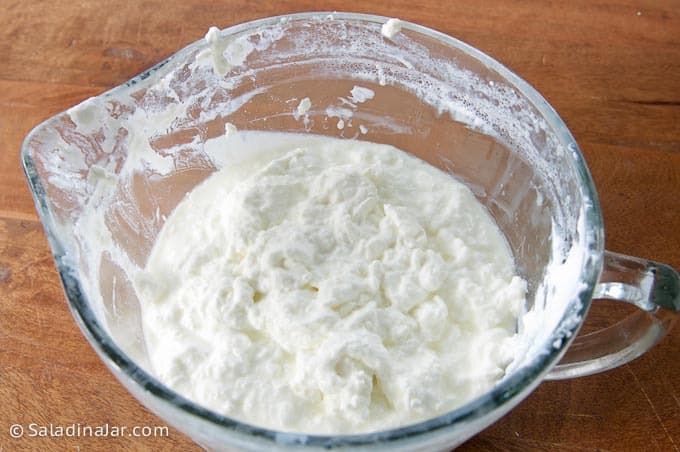
Step 2: Let the yogurt drain until it is as thick as you want.

straining yogurt with a yogurt pouchPin
If using a pouch, you can pull the bag tight and hang it. If using cheesecloth or a coffee filter, set the lined colander back over the original bowl to catch any whey that drains off.

The time required to make Greek yogurt will vary according to your straining method and how thick you prefer your yogurt. The longer you strain, the thicker the yogurt.

If the yogurt is not properly fermented, it will be difficult to strain. When too thin, yogurt immediately runs through the cheesecloth or a pouch. When using a coffee filter, it may just sit there. Read this post about when yogurt fails for what to do next.

Should I refrigerate Greek yogurt while I’m straining it?

Some say the yogurt should sit in a refrigerator while it is straining. But who has room in their refrigerator for that?

Another 2-3 hours sitting on the counter won’t hurt your yogurt (or you). The acidic nature of yogurt protects against spoilage.


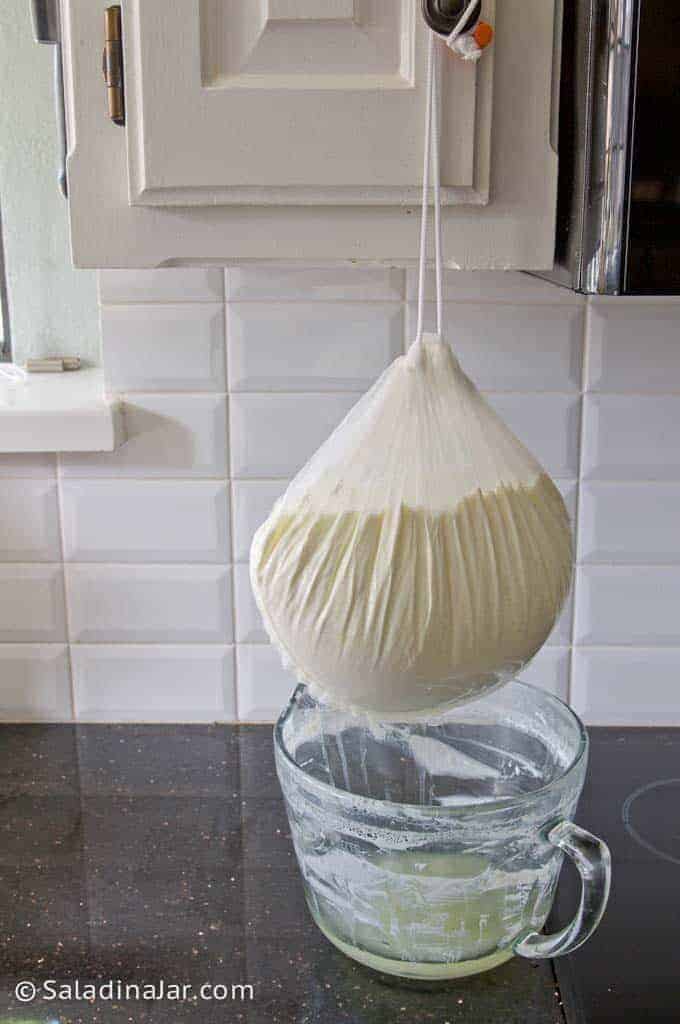
Step 3: What should I do with the whey?

whey drained from homemade yogurt to make the yogurt thickerPin
Empty the golden liquid you collected and dispose of it. Or store the whey in the fridge and make good use of it later.

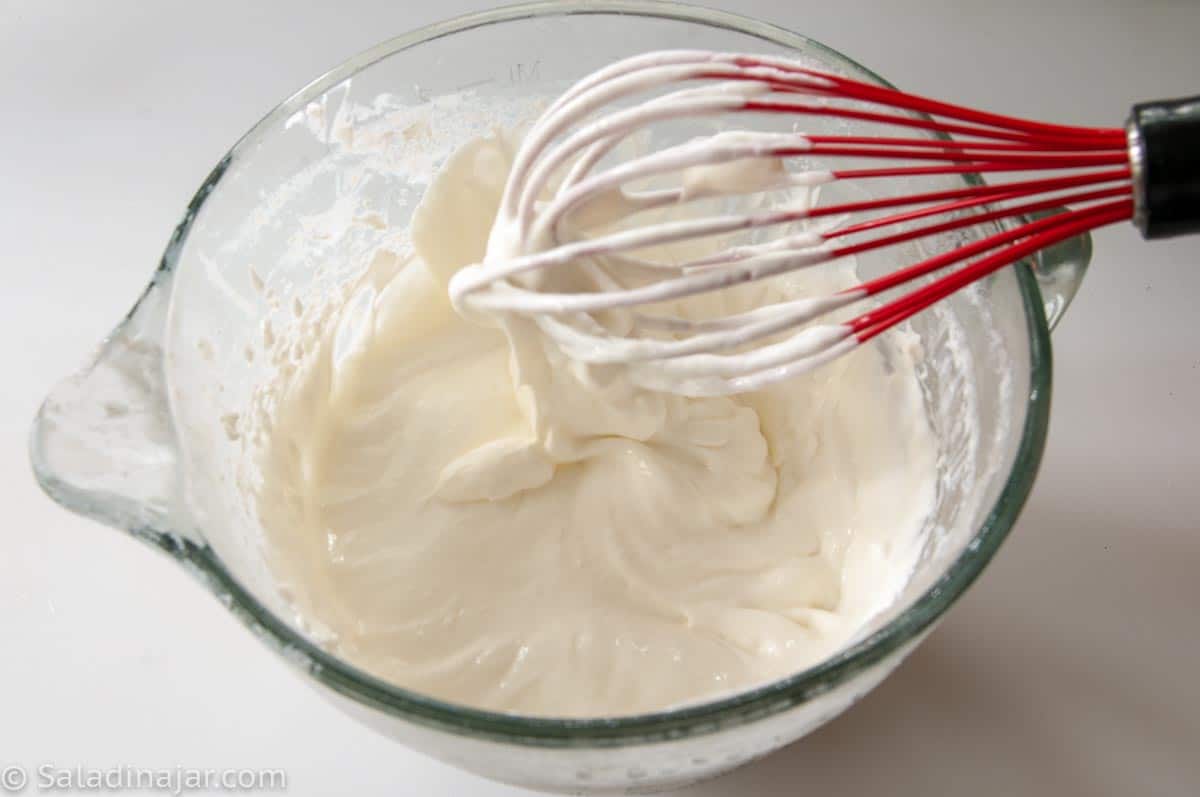
Step 4: If desired, whisk Greek yogurt until creamy and smooth.

strained yogurt before whippoingPin
Strained yogurt looks curdled like cottage cheese. That’s normal. You can chill and eat it as is or whisk it.

When chilled, the texture should feel smooth on your tongue. If it doesn’t, see the troubleshooting guide below.


whisking yogurt with a whiskPin
Beat strained yogurt with a giant whisk until the lumps disappear. If you do a large amount, try using a stand mixer with the whisk attachment. Immersion blenders are too harsh and may result in a runny texture.

Step 5: Add flavoring.

Note: Before adding flavoring, save a small portion of unflavored yogurt to use as a starter for your next batch.

Now is the time to add fresh berries, fruit, flavorings, or sweeteners such as sugar, maple syrup, honey, or Splenda. The yogurt may appear thinner than you hoped at this point. Forge on. It will thicken up when chilled.


FAQ about making yogurt

Why didn’t my yogurt set?

The most common cause relates to incubation. The yogurt will not be set correctly if the temperature is not constant at 100-110˚F for several hours.

Another cause is the starter. It should be fresh (made within the last 7-10 days), without additives or flavorings.

Why does my yogurt look lumpy?

It’s normal for yogurt to look like cottage cheese once you “break” the surface. However, if it is extreme, you may have used too much starter.

Only a generous tablespoon or two per 2 quarts of milk is necessary.  More is not better. Yogurt bacteria dislike being overcrowded. Read this post if you’re confused about how much starter you really need.

Another cause is letting the milk incubate too long. A fresh yogurt starter (in a perfect environment) can transform warm milk into yogurt within 4-6 hours.

How can I make my yogurt creamy?

Whisk it vigorously. When making Greek yogurt, whisk it after you have strained it.

Do this by hand or use a wire attachment with a stand mixer. Some immersion blenders and portable mixers come with wire whisks that work great. Don’t use a blender or food processor as they are too rough on the yogurt and will cause it to thin out, even after it’s chilled.

Why is my yogurt grainy?

Was the milk heated too quickly? Also, using a yogurt starter with additives can cause graininess. Read more about grainy yogurt here.

What are the little bits of “skin” I feel on my tongue when eating yogurt?

You may have missed some skin attached to the side of the bowl as the milk was cooling.

I’ve tried several methods to prevent skin from forming. None work without a lot of stirring.

If the possibility bothers you, check out the cold-start method for making yogurt.

How long does homemade yogurt stay fresh?

Unflavored yogurt without additives should last at least two weeks. The freshness window may be smaller if you add fruit or other flavorings.

How can I tell if my homemade yogurt is still good to eat?

1) Smell it. If it seems off, throw it out.
2) Examine the yogurt carefully for mold. Pink mold can be hard to see, so look carefully. Black, green, or gray mold is easy to spot. Throw it out.

Don’t throw it out if your milk doesn’t make yogurt. Instead, see this post for what to do with a failed batch of yogurt.


Parting thoughts: Does this whole process seem too complicated? Anytime you work with living organisms when making food like bread or yogurt, those yeasty bodies depend on you to throw the perfect party so they can have fun. If you still have questions, check this post for questions about making yogurt.

It takes a few tries to determine what yeasty bodies prefer, especially the ones who hang out in your kitchen. Keep trying. I guarantee that creamy and delicious yogurt is within your reach. I’ll help you.


If you have questions or suggestions, email me privately for a quick answer: Paula at saladinajar.com. Hope to see you again soon! 

How to Make Healthy Homemade Greek Yogurt--three servings of finished yogurtPin
Yield: 8 servings

How To Make Healthy Greek Yogurt

This is a comprehensive guide to making yogurt (strain for Greek yogurt) at home using fresh fat-free, 1%, 2%, or whole milk. Heat the milk with a microwave; no worries about scorching, boil-overs, or stirring.

Rate this recipe

(5 stars if you loved it)

5 from 36 votes
PRINT RECIPE PIN RECIPE SEND EMAIL

Video

Prep time: 1 hour 25 minutes
Cook time: 0 minutes
Incubation Time: 5 hours
Total time: 6 hours 25 minutes

Ingredients
 

  • 2 quarts (1893 g) milk fat-free, 2% or whole milk
  • 2 tablespoons yogurt commercial or your own homemade for starter

Instructions

  • Fill a Pyrex 2-qt microwave-safe bowl or pitcher with 2 quarts (1893 g) milk. Alternatively, pour milk into a heavy-duty pot to heat on the stove.
  • Heat milk in the microwave until bubbles begin to appear around the edge. The temperature should reach 170-180˚F after you stir it. (In my new microwave, it takes 15 and a half minutes on HIGH). Monitor the temperature closely until you figure out the best time and power for your microwave.
  • If you prefer thicker yogurt, an optional step is to hold the temperature at 180˚F for 15-20 minutes. (I do this in my microwave for 15 minutes on 20% power.)
  • Remove the milk from the heat source and stir it. If a skin has formed, remove it.
  • Allow your milk to cool until the temperature drops to between 100-110˚F. Use an ice water bath to hasten the process, if desired.
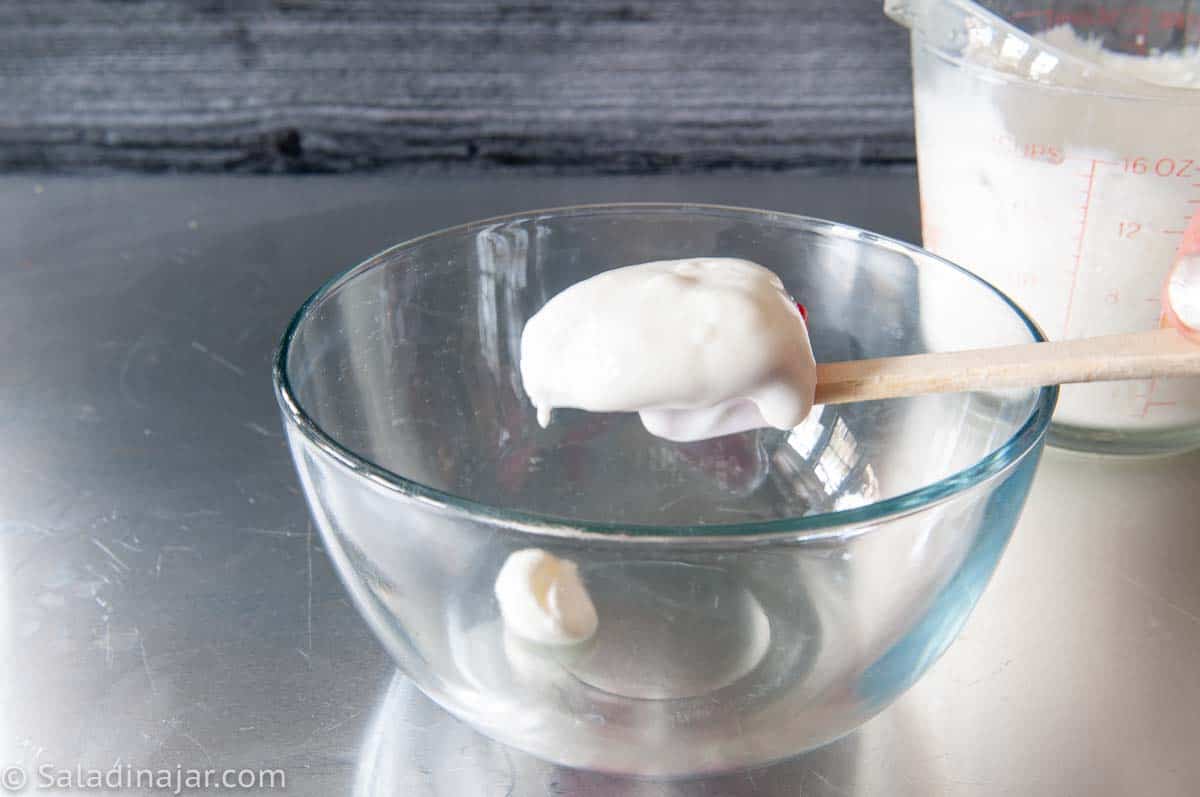
  • Add a small amount of cooled milk to 2 tablespoons yogurt as a starter. (You may use yogurt from a previous batch of your homemade yogurt.) Whisk until the starter is smooth.
  • Cover the milk and place it in a warm environment where the temperature stays around 100-105˚F.
  • Allow the inoculated milk to incubate for 4-8+ hours or until set like gelatin.
  • At this point, you could chill the yogurt and eat it as is. Or you can decide whether to pour off the whey or stir it back in. Straining yogurt to make it thicker will result in Greek yogurt.

Making Greek Yogurt from Regular Yogurt

  • Very carefully pour yogurt into a wet bouillon strainer or chinois. If the mesh is fine enough, you won’t need to use a cheesecloth or paper towel. Or use a double layer of commercial-size paper coffee filters inside a cheap colander. (This is my current favorite method of straining.)
  • Let yogurt sit in the strainer until the yogurt is reduced by approximately a third. Time will vary according to the thickness of the yogurt out of the oven and your preference regarding texture and sourness.
  • Empty whey from the batter bowl and pour yogurt from the strainer back into the original bowl. Use a good whisk to beat until smooth. Thin with milk or leftover whey if yogurt is too thick.
  • Now is the best time to add flavorings or sweeteners, if desired. Otherwise, add extras before you are ready to eat.
  • Chill. This will stay fresh in the refrigerator for at least two weeks.

Notes

Nutritionals are only an estimate. Numbers will vary according to how much you strain your yogurt and the type of milk you use.

Nutrition

Serving: 1 | Calories: 121kcal | Carbohydrates: 12g | Protein: 8g | Fat: 5g | Saturated Fat: 3g | Polyunsaturated Fat: 1g | Monounsaturated Fat: 1g | Trans Fat: 1g | Cholesterol: 20mg | Sodium: 113mg | Potassium: 339mg | Sugar: 12g | Vitamin A: 246IU | Vitamin C: 1mg | Calcium: 290mg | Iron: 1mg

All images and text ©️ Paula Rhodes for Salad in a Jar.com

5-Star Ratings Are My Favorite!Help others find this recipe in search results on the web.

My Amazon Store

Leave a Reply

Your email address will not be published. Required fields are marked *

Recipe Rating


686 Comments

  1. 5 stars
    I did it! I made yogurt. The first time didn’t work. I used a crockpot and it took me four hours to heat the milk to 180 degrees on low (ughhh), and wrapping a towel around the crockpot wasn’t enough to maintain the temperature later on. I was much happier to use the microwave because it was so much faster (I did have to purchase a microwaveable dish of the right size, which is why I tried the crockpot method first), and then I put my dish with a lid on wrapped in a towel in the oven with the light turned on, after turning it to 350 degrees for 1 minute as you suggest. I love how effective that method is, and it takes up less space than a big crockpot wrapped in a towel sitting on my kitchen counter for hours! I was thrilled to see that my yogurt set after five hours. My kids happily ate it with granola and berries the next day. Win! Thanks for providing such detailed information. I’ve also enjoyed your bread recipes. My kids love your oatmeal bread recipe.

    1. Hi Sarah,

      I’m so happy to hear that you were successful with your yogurt. Congratulations!! Once your family gets used to the fabulous fresh taste of homemade yogurt, they won’t want to go back. Hopefully, you will use your microwaveable dish a lot in the future. I have lots of microwave recipes on my website, so it will be useful for them, too.

      Write back anytime.

  2. Laura Johnson says:

    Wondering if there’s much difference in microwave heating the milk on high for less time (as in initial comments) versus at 70 percent as in your actual recipe? Thanks!

    1. Hi Laura,

      I’m so glad you took the time to write. I need to change the recipe. After using my new microwave for a while, I discovered that I could set it on HIGH without a problem. I just forgot to change the recipe. I’ll head over there and change it right now. Thank you for letting me know. Your attention to detail qualifies you to be in my “Best Friends Club.” 🤗

  3. 5 stars
    The instructions and helpful tips were perfect. I make my yogurt in the Instant Pot…it’s really not a lot of babysitting, lol. I start it in the evening and it incubates overnight and by the afternoon I’m straining for greek yogurt. So glad I stumbled across your website.

    1. Hi Monica,

      Sounds like you have figured out the right system for your schedule and your kitchen. Congratulations!!!

  4. 5 stars
    I just started making my own Greek yogurt, and this was by far the most helpful source of information. Thanks! But I wanted to share one technical tweak I made, which is to use a sous vide immersion circulator for the fermentation. Precise temperature control is what they do! And you can use a tank matched to the size of the batch you are making.

  5. Thank you, Paula, for your swift response! I will try it again with your method. The best thing about making my own yogurt is that I can cut down on polluting the environment with plastic because yogurt in the supermarkets here (Canada) come almost exclusively in plastic containers. We have a recycling service in my community, but there is still far too much plastic being used in the world. (Please forgive the typos in the original query.)

  6. Hi Paula,
    I’ve tried making Greek yogurt before, but the texture is not pleasant. Here is what I’d done: I strained the freshly made yogurt *after* it had chilled it in the fridge. But it looks as though you’re recommending straining freshly freshly yogurt immediately upon taking it after incubating it, and *then* chilling it. Am I understanding your method correctly?

    1. Hi Addey,
      Yes, you are understanding right. Yogurt will strain much faster at room temperature and is perfectly safe because set yogurt is quite acidic.

      Here are several things that can affect the texture: 1. Too much starter. 2. Incubating too long or at too high of a temperature. 3. Quality of the milk 4. Age of the milk

      After straining, if you whisk it well, it will ususally transform into a beautiful, creamy yogurt. Chilling will make it firm.

  7. Kathi Moss says:

    Paula Can you use frozen yogurt for a starter? I put two tablespoons of yogurt from the previous batch in my Foodsaver bags and freeze them so I can make a batch if I don’t have fresh batch and can’t for to the store. I use a fresh batch after four batches. i make yogurt twice a week. Thank you Kathi,

    1. Hi Kathi,
      Sounds like you have a system that works for you. Frozen yogurt makes a good starter as long as it’s not too old. I’m not sure what “too old” translates to in specific days or weeks because I haven’t done it that much. I don’t keep it longer than a couple of months.

    2. Kathi Moss says:

      I put the starter in a FoodSaver bag and remove all the air then out into the freezer. It’s been a month. Later this week I will be using one pack later this week. to see what it does. i’m hoping this works great.
      i will keep you posted.

      1. Hi Kathi,
        I look forward to hearing how it works for you.

  8. Mary Smith says:

    I like your recipe for yogurt. However, I make mine in a crockpot. It’s very easy. I also add a 1/2
    cup of powdered milk for every quart of milk I use when heating my milk to 180°. I cool my milk to 110° and then add my starter. I wrap my entire crockpot (base and crock) in a throw blanket and stick it in a preheated oven( 250° preheated while adding yogurt starter, then shut off oven). Then I take my wrapped crockpot and place it in the oven for 8 to 9 hours. My yogurt is rich and so creamy and thick. When I strain I have very little whey. I strain using a colander and coffee filters, and yes I strain my yogurt in the frig.

    Thank You
    Mary Smith.

    1. Hi Mary,
      Thanks for sharing your method. It sounds like you have figured out what works best in your kitchen with your equipment to produce the yogurt of your dreams. Yay!!!! That is my goal for all of my readers.

  9. Dave Emerson says:

    Paula, I have been using your original recipe for Greek yogurt, starting about 2009, and I am glad to see you have the website. Very recently, I discovered Icelandic skyr. Last night, I made my first batch of whole-milk skyr, using this same method. The texture is great and the taste is every bit as good as the starter culture I purchased.

    Well done!

    1. Thanks, Dave. Have you seen my post on Skyr?

  10. Made yesterday enjoyed today yummie no shop bought anymore for me thank you thank you

    1. Hi Mondy,
      Glad to hear it! Enjoy. Now you’re spoiled. 😜

  11. Kathi Moss, FL says:

    5 stars
    Just sharing. I just started using a induction cooktop plate for my yogurt. I was amazed that I can bring my milk up to 180 in just 10 minutes. It use to take 25 minutes to get it to the 180. I find it takes me longer to bring it back down to 110 sitting it on ice bath. Such a time saver. Does anyone use one for there yogurt making?

    1. Hi Kathi,
      I find your comment very interesting. I have a portable induction unit so I’ll give it a try. Some people claim that heating the milk too quickly makes your yogurt grainy. I’ve never experienced this in real life even though I use a microwave. My question for you is: How much milk are you heating at one time? That is an important piece of information when you’re talking about time. Thanks so much for starting this conversation.

      1. Kathi Moss says:

        Paula
        Thank you for the feed back. I heat up 2 quarts at a time.
        How do I calculate my yogurt for Keto purposes. I get 26oz of whey out of each batch. because I over strain, I like it nice and thick. I don’t add any flavorings.
        Thank you.
        Kathi

        1. Hi Kathi,

          One of the drawbacks of making your own yogurt is that it’s impossible to get accurate nutritionals. There are just too many variables. Check out this post that includes the calorie count and a few other things for whey. You might be able to estimate from that. I don’t follow Keto so I’m not into the fine points of that diet. My only other suggestion is to find some commercial yogurt that you think is close to how you make yours and use their nutritional information. I don’t know any other way unless you know a food chemist who can actually analyze your yogurt in a lab.

  12. I have a suggestion for a place to incubate your yogurt. When I make bread, I use my microwave as a bread proofing box.

    First I heat up a cup of water in the microwave for 2 min. When that’s finished, I leave the cup of water inside, add the covered bowl of bread dough and close the door. I’ve never checked what the temp in the microwave is, but the yeast seems a lot happier in there than on my countertop, especially in winter.

    I’ve never done this with yogurt, but it seems like it should work.

    1. Hi Kari,
      Thanks for writing. The best temperature for incubating yogurt is 100-110˚F. My microwave does not stay this warm for very long so I don’t think it would work. Bread dough should incubate at a much lower temperature–more like 80-85˚F. That means your microwave trick works great for bread.

      p.s. The longer it takes your bread to rise, the better the flavor. Of course, if your room is too cold (wintertime?) then nothing happens. The temperature should be at least 75˚F.

  13. I’m confused. I read your post about how much starter to use, yesterday, and I’m pretty sure you said to use less than a Tbsp. (Pretty sure you said 1 tsp per quart gave the best and creamiest results.) Which is it? 🤔

    1. Hi Menolly,
      Sorry for the confusion. You can make yogurt with 1 teaspoon per quart providing your starter is fresh and active. I usually use a liberal tablespoon for 2 quarts so that’s more like 1½ teaspoons. These measurements do not have to be exact. Just don’t go overboard like a half cup for one quart. It may still work, but I would rather eat that yogurt than use it unnecessarily as a starter. Hope this helps. If you still have questions, send me a personal email. p.s. Because all of us use different starters and some are fresher and/or more potent than others, I can’t be dogmatic about the amounts.

  14. My Armenian mother-in-law taught me years ago. Once you have made the yogurt, if you don’t want to save the whey, cover the yogurt with a couple of layers of paper towels and a clean dish towel. Leave in in fridge overnight (covered). Next day, wring out towel and toss paper towel. Stir yogurt and go. You can also keep a paper towel on your container as you use the yogurt to keep additional whey soaked up. In my experience fat free milk make more whey.

    1. Hi Jan,

      What a great idea! Thanks so much. I would agree with you about fat-free milk.

  15. I have a recipe that calls for adding 1 tbls of Inulin powder per quart/liter of milk to help maintain intestinal health and function. Your thoughts?

    1. Hi John,
      I do not add anything to my yogurt except for flavorings, fruit, or cream. Inulin is a form of fiber (which doesn’t agree with some people). I don’t want anything that messes with the texture of my beloved and pure yogurt. I feel the same way about powdered milk. I control the thickness and texture of my yogurt by choosing the right milk and straining it. That’s it for me. If you try the inulin, I would love to know what you think.

  16. What size Matfer strainer do you use?

    1. I have the 8-inch Matfer. It will easily hold a half-gallon of yogurt.

  17. Hi Paula. I was wondering how long is the yogurt good for? When you save out some of the yogurt for your next batch how long is that good for. I love all the information that you give. Thank you.

    Gaile

    1. Hi Gaile,

      Homemade yogurt is good to eat for two weeks. If you have added fruit, the time might be less. I would try to use the yogurt you save to make another batch in a week and definitely within 10 days. The little yogurt bodies get old and tired and don’t work so well after that although you could always try. Thanks for your kind words.

  18. Avee Tsofa- Holmes says:

    Hi there Paula, I’ve been making yoghurt for many years. At first when I lived in England i used to use shop bought milk, but for the last 13 years I’ve lived in Kenya. I use Raw fresh milk straight from the happy Cows. To make Greek yoghurt I add 2Tbspns. of full cream powdered milk. once I’ve prepared the yoghurt I leave it beside the fridge for between 6-8 hours and thenstrain it as you do for 1-3 hours.

    1. Hi Avee,

      This is a great idea to use full cream powdered milk. It’s not readily available where I live, but it sounds delicious.

  19. Hi Paula, Just came across your post and it is fantastic. I love your post, it really helpful as a begginner. I have few questions here:
    1. Is the powdered milk not suitable for yoghurt?
    2. How long can my yoghurt stay to remain fresh and healthy?
    3.If you don’t mind,can I share my recipe for making yoghurt?

    Ingredients:

    2 cup (500ml) powdered milk (whole milk)

    2 cup water

    2 cup boiling water

    2 Tbsp starter.

    Paula,is the above perfect measurements and if not old I need your quick response.

    Love to read more of your posts.

    Esther.

    1. Hi Esther,
      I have never tried making yogurt with powdered milk. If this works for you and you like the taste, then it’s perfect. There are seemingly a million and one ways to make yogurt so keep doing what works for you.

      Thank you for taking the time to share your recipe. I know that some people prefer or need to use powdered milk, so maybe they will see this recipe and try it out.

      In regard to your other questions, I can only answer from my own experience. Yogurt made with fresh milk will normally stay fresh enough to eat for 2 weeks. If you want to use it for starter, it’s best if you make another batch within a week to 10 days.

  20. Greet tips Paula, very educating. Time well spent reading your article.

    1. Thank you Nenye. Glad you found it helpful.

  21. ROBERT BUNTZEL JR says:

    I have been making yogurt for over a year and do enjoy reading other’s recipes and experiences. A very good read here and I did purchase the Kleynhuis Greek Yogurt Strainer Pouch at Amazon so it was time very well spent reading this article and the related topics. Great source of information on your site, thank you.

    1. Thanks, Robert. Glad you found the post useful. I don’t have to tell you that there must be a million and one ways to make yogurt. Everybody seems to put their own spin on the process. It’s fun.

  22. THANK YOU I WILL TRY TO USE YOUR METHOD I”M SURE I WILL SUCCED

  23. Hi Paula! How much in grams/ounces does your recipe yield for Greek yogurt, not regular yogurt? I’d like to know the total amount, not per serving. Thanks in advance! I think I’ve read all of your post about yogurt making. Thank you for your helpful tips and dedication!

    1. Hi Angelica,

      That is a tough question to answer. And it can only be a guess. I usually strain my regular yogurt down to 1/3 to 1/2 the original volume. Since I start out with 2 quarts of milk, that would be about 1 qt. total, if I strain to half. It all depends on how much whey you strain off, and it’s different every single time. “How much” depends on the quality of the milk, fat content, your straining system, how much time you let it strain, and last but not least, how long you incubated the original yogurt. Sometimes the yogurt seems reluctant to release the whey. Other times, the whey will pour out of the yogurt (often when it has incubated too long or at too warm of a temperature.) As you can see, few things are black and white when it comes to making yogurt. Thanks for writing.

  24. Hi Paula, thanks for this wonderful post. I discovered your blog today and very quickly it became my favourite source of information for all things yogurt 😉 Now, I’m new to this process and have a question: can I whisk the yogurt between steps #7 and #8? (i.e. right after incubation, before chilling?). Or should I chill it first and then whisk it? Thanks so much in advance!

    1. Hi Diana,

      Thank you for your kind words. You can whisk the yogurt after incubation or after chilling. In my opinion, whisking before chilling is easier. After chilling, you just have to work a little harder to get rid of the lumps. Whisking before chilling will seem to make your yogurt thinner. But it will firm up as it chills.

  25. It would be useful to have the downloaded directions with the same heats AND quantities mentioned here online – I dread to think what is going to happen or, rather, what could have happened had I not noticed. (2-3 tsp is rather different from 2-3 tbsp.)

    1. Caroline, Thanks so much for pointing that out. I made the correction. Nothing terrible would happen using 2-3 teaspoons or 1-2 tablespoons (for 2 quarts of milk). 3 teaspoons=1 tablespoon. You can make yogurt with either measurement as long as your starter is fresh. It might take a little longer with 2 teaspoons as opposed to 2 tablespoons. But the yogurt should be great as long as all other guidelines are followed and the little yogurt bodies are in a good mood. Happy yogurt-eating.

  26. Yes I did it yeah💃🏽💃🏽💃🏽💃🏽💃🏽💃🏽 my Greek yogurt done and dusted

    1. Congratulations!!!!!!!!!! Doesn’t it feel good?

  27. I’m new to yogurt-making and have a couple questions. I use an Instant Pot Duo. After boiling, I allow my milk to cool, so that it’s 105°-115°F. If I accidentally allowed the milk to cool to around 85°F and added my starter (plain yogurt), is that going to be a problem? The Instant Pot should go to and maintain an incubation temp of 110°F after I’m done culturing. Second, have you found any issues with lactose free milk? I use Organic Valley whole milk. Thanks.

    1. Hi Weg,

      No problem with the milk cooling too much. The milk will come back up to the right temperature when you set your Instant Pot on “Yogurt.” It will add a little bit of time to the incubation period but that should be no big deal. I’ve let me milk cool too much MANY, MANY times. No problem.

      I have had no issues with lactose-free milk when making yogurt. Thanks for writing.

  28. Thank you for adding that classic video link back to your wonderful site. That video taught us how to make perfect Greek yogurt years ago, and it’s great to watch it again. “Tarter” outtake at the end is hilarious! https://youtu.be/2CN7938yu1s

    1. You made me laugh. A lot of water under the bridge since that was made. Wow!

  29. Thank you for the recipe. This was the first time I made Greek yogurt and it turned out perfectly!

    1. So glad it worked for you Gary. It’s easy to get hooked!

  30. Thanks for so many detailed articles on making yogurt at home! I am really enjoying this new hobby and kitchen science. I have a question about whipping the yogurt at the end. I’ve heard that bacteria are very delicate, and just rubbing your hands together can actually kill bacteria. Do you think it’s still safe to whip the bacteria with a powerful blender? I wonder if this will damage the precious bacteria.

    1. Naomi,
      I whip my yogurt by hand with a whisk or with the whisk attachment on an immersion blender. Neither is powerful. I’m afraid to use a powerful blender as I think it might make it too thin. Of course, if you are using the yogurt in a smoothie, that’s ok. I have never heard of bacteria in yogurt being so delicate that rubbing your hands together would actually kill it. The most common way yogurt bacteria is killed is with heat (over 115-120 degrees F) or age.

  31. I looked thru the comments but didn’t see the answer and I understand everyone’s preference is different but what is a good starting amount of honey or other sweetener and flavoring to a gallon of milk made into yogurt?
    Thanks for all the work you do to help us…

    1. Deb,
      That is a difficult question as you have already stated. I have FINALLY learned to eat my yogurt without added sugar but it took me years so I’m a bit out of practice in that area. I would probably start with a couple of tablespoons and keep tasting. Good luck!

  32. Pingback: Homemade Greek Yogurt Recipe - Be Health And Fit
  33. Thanks for the info. I put my yogurt in tall, quilted 12-oz jelly jars (tightly sealed) and incubate in an inexpensive, insulated Rubbermaid “Victory Jug”. Add hot tap water to 115 degrees, add jars, let sit for 6+ hours. Perfect yogurt and insulation is so good the water is still over 100 degrees. Never fails. Better success than with oven, heating pad or yogurt maker. Plus, the cooler serves other uses.

    Recipe: 10 pints whole milk heated to 180 degrees then cooled to 115 degrees. Boil jars, lids and utensils, stir in 1 cup starter, fill jars, screw on lids tightly, add to Rubbermaid cooler, add water at 115 degrees, seal cooler, set aside for 6-8 hrs. I even forgot to take the jars out overnight and was still warm and successful at 24 hrs of incubation.

    Thanks for your post!

    1. Hi Karen,
      Thanks for taking the time to detail how you do it. Sounds like you have figured out the perfect method for your situation. Maybe it will give others an idea how to modify the whole process in their own kitchen. Using the jelly jars would not be efficient for somebody wanting to strain their yogurt such as I do, but would work great for those who are happy with unstrained yogurt. Happy yogurt-eating. paula

  34. Gwendoline says:

    Do we still have live probiotics when using pasteurized milk?

  35. I’ve only been making yogurt fora month but that’s 7 1 gal batches. Learned some great tips from your article.
    Here what we do with the nutritious whey:
    *freeze in ice cube trays. Seal in freezer baggies labelled with the date made. Keeps for 6 months per the article I read. ADD several to your blender for smoothies to replace the usual ice. Give one to your dog a cube or 2 after his hot summer walk. Add 1 or 2 to your kids’ too hot soup bowl to cool & boost protein level.
    *store some liquid whey from straining in a mason jar in fridge. Use it to make your morning oatmeal instead of water. The added protein keeps you fuller longer. Add to baking replacing all or part of the water amount recipe calls for. Add to smoothies.
    That’s just a few of the grea tways we use whey from our homemade Greek yogurt.
    I am loving all this fresh Greek yogurt. I replace the sour cream in most recipes with my yogurt. It makes an awesome blue cheese dressing instead of the sour cream.

  36. Hello again. I commented here before about using whey as a starter. It does work well. I have another experiment I would like to share. Unless youre getting milk directly from the farm, heat to just 120, add starter, wait as usual.
    If using grocery store milk, it has already been pasteurized, no need to to heat up to 190 f. Add room temperature yogurt whey to 120 f milk, you’ll get yogurt! Saves time in waiting to get to 190 F, saves time in waiting to cool to 120 F.

    1. Hi Mark,
      Nice to hear from you again. I have experimented with heating the milk just as you stated. My experience evidently differs from yours. While just adding starter to warm milk will indeed produce yogurt, I find it turns out much thicker if I have first heated the milk to 170-180 degrees F. Since I prefer “Icelandic yogurt” which is super thick, that is my preferred method. Sounds like your preferences differ so your method is certainly easier. Happy yogurt eating!

  37. Laura Larson says:

    Can you use 2 quarts reconstituted dry milk instead of 2 quarts skim milk, or would that alter the process too much?

    1. Laura,
      Yes, I think you can. Wouldn’t do it myself but perhaps you have a good reason. Good luck!

  38. The recipe sounds awesome and of course varies little from how most of us make our yogurt. I do have one comment however, I looked at the cost of boullion strainers on Amazon and HOLY COW!! I would rather buy an electric yogurt maker just for the strainer than pay 80.00$ dollars for one!! Everything else sounded wonderful! Thank you!

    1. Annie, Please, please check out this link. You don’t have to spend that much.

  39. It didn’ t work for me. 🙁
    i normally make my homemade yogurt with ecaporated filled milk, but tastes ick

  40. i thank you. I have been making yogurt for years now, from first reading your tutorial. Don’t know why it’s never occurred before, bu the microwave and a sink full of water are ideal;. Just tap water, no ice works fine to cool a pot of microwaved milk. The strained whey, stored in frig, makes excellent starter. It is also a good cocktail mixture. A shot of gin, a squeeze of lemon, and whey makes a nice creamy tasting drink.

  41. Careful about adding honey. I love it with yogurt but only add it to the serving and not the full batch. That’s because honey is antibiotic and will kill the live bacteria culture making it useless as a starter for your next batch. It probably also kills the active bacteria in the individual serving but almost none of the yogurt bacteria make it past the tummy anyway.

    1. Hi Verne,
      I did not know this and have not verified it either. To my readers who like to use honey, I would suggest you do your own research.

  42. hey! I don’t have an oven, only a microwave. Can i still make it?

    1. Sure. There are many ways to incubate yogurt without an oven. See this post.

  43. Just found your site last night. Made my first batch today following the temperatures exactly. Used UHT milk and an old Decore Yoghurt system to incubate it 12 hours. It is basically a glass bottle that fits snuggly in a insulated container. Voila it is the most perfect yogurt I have ever made. The homemade starter yoghurt was runny but this new batch it thick and wonderful. I have only heated the milk to 50 degrees C before with earlier attempts not 80 as you stated. Also i use to previously add the yoghurt at 50 degrees. I had never heard before about the bacteria needing room to grow. Thank you so much for sharing your yogurt knowledge. I am so excited that after two years to finally have made a lovely thick creamy yogurt. No more runny sticky yohurt here.

  44. Paula,
    I just made my VERY first batch of Greek Yogurt tonight within my Excalibur dehydrator. I found a large glass bowl and followed all of your directions except using my dehydrator instead since my oven does not seem to go low enough. I am currently waiting for it to strain out the Whey and I have to say it is so beautiful and exciting. I’ve talked about wanting to do my own yogurt for several years now for several reasons. First of all being the cost of yogurt at the grocery store! I also hate having to purchase commercial yogurt with flavors since many of the ingredients look scary.
    Thank you for all of the great tips you provided, especially considering the fact that yogurt does NOT get thicker after a certain period of time and only increases the tart yogurt flavor.

  45. Why are you preheating the milk?

    1. Paul,
      It rearranges the proteins so your yogurt will be thicker. You don’t HAVE to do it but I like it much better when it turns out thick as possible.

  46. I dont understand the reheating to 350 degrees part. Suppose i need to produce for retailers, how can i drain it?

    1. Joseph,
      I’m not sure I understand your comment. Never heat your yogurt or milk to 350 degrees. When I told about one way to incubate your yogurt, I mentioned you could preheat your oven set at 350 degrees but turn it off after only one minute. The oven temp should be around 100 degrees at that point.

      I do not deal in commercial production of yogurt so can’t help with that. If you just want to know how to drain yogurt see this post or this one.

  47. When travelling around Greece as a young man I fell in love with the local yogurt produced in (reusable) terracotta pots. One of the great things about that yogurt was that it had skinned over after straining, producing an airtight surface to protect the yogurt. The skin was one of the real treats when eating it too.
    How does one go about reproducing this skin?

  48. bakingtutsdotcom says:

    I’ve been reading about making greek yogurt because I’m becoming more health conscience for my family and I try to save money where ever I can. Some recipes call for dry milk while others don’t or list it as optional. What is the use of dry milk when making your own yogurt?

    1. Some people think dry milk makes their yogurt richer without adding calories. Some think it makes it thicker. I used to use it myself but decided I could taste it so I quit. Don’t need it for thickness or richness I have discovered. paula

  49. Scott Birnbaum says:

    No fat means no Calcium absorbed. If you want to obtain Calcium from your yogurt, you need to either use milk with fat or add some after the fact.

  50. Hi
    Thank you for this very nice blog .
    I give all whey to my animals i love so much: goats dogs cats and hens.

  51. Christine says:

    I used whey in my banana pancakes instead of milk. Extra protein and same great taste.

  52. Another note. I actually use a fine-mesh drum sieve rather than a bouillon sieve. (Baking fans may already have one, but they are also readily available online or in baking shops.) I prefer it because it has a large horizontal sieve screen that seems to drain the whey better than a conical bouillon sieve does.

  53. If you or someone you know keeps chickens, they love whey. The protein in it is healthy for them (and much of it ends up in their eggs). Cats also love whey if you have kitties. I’ve also heard that it’s good for roses, but at our ranch, the chickens and the meowers always got it.

  54. Thanks! finally, i made yogurt!! your recipe is perfect…now to get my hands on a bouillon sieve!

    1. Hi Danielle,
      Congratulations! Before you invest in a bouillon strainer, be sure to check out this post for a much cheaper method that works even better.

  55. So does the electronic thermometer you’re using here sound an alarm sound when temp *drops* to desired setting? Or only when temp *rises* to desired setting?

  56. Mary G Smith says:

    I used the whey to make my “no knead” bread from the New York Times article and it was beyond wonderful. I will have to make more yogurt to have whey available to make the bread. I am having such fun.

  57. Annabelle says:

    I add whey from making yogurt or cheese into soups as my sour ingredient, as an alternative to lemon or vinegar, plus, it adds dimension to the broth without being so thick and filling as cream. I think you can also use it to make soap, though I’ve never tried it.

    1. Thanks, Annabelle, for contributing to the list.

  58. I followed the directions exactly, and the yogurt turned out great. I strained it for 3 hrs, and removed all of the whey. My problem is after I strained it, I only got 3 six ounce containers of Greek yogurt from it. The cost to make it worked out to be about $3.50 ($2.99 for 1/2 gallon of Reiter 2% milk, with no hormones -the only milk that has ever worked for me, and about $1.00’s worth of yogurt). It doesn’t seem worthwhile for me to continue to make it, if that’s all I get out of it. Is there some way for me to get more 6 ounce servings out of the recipe? How many 6 ouce servings do yo get out of each batch? I would like to be able to save some $. I can buy individual containers of yogurt at the store for $1.00 each. Thanks for your help. I appreciate it.

    1. You can normally expect your yogurt to strain down to half the volume you start with. However, different varieties of milk can produce different results. How long you strain is another variable. Your method of incubation is another variable.

      About the dollar yogurt: is it Greek yogurt? Have they used additives like gelatin or cornstarch to make it thick? Is it organic? Do you love the taste?

      These are all questions only you can answer. Some people decide it’s not worth the trouble. I have done it for so many years, I can do it in my sleep. And I love the taste better than anything I can buy except maybe the $3+ dollar per 6 ounce stuff. Hope this helps.

  59. gale rosenman says:

    I have been following your blog for a little while. Your recipes, explanations, videos, and tips
    are really invaluable. Thank you for doing all of the work and sharing the information.
    I just wanted to give a big thanks for the yogurt making video and tips. I’ve been making my
    own greek yogurt for a few years, stovetop. The method is not difficult, so it never seemed
    an issue, that is until I overcooked the milk giving it a very bad taste thereby suspending my
    yogurt making for a few months. There is nothing more sacriligious to me than wasting food
    and money. Upon reading your blog one evening, I stumbled upon the microwave video and thought it
    time to finally try. Using the microwave was nothing short of genius! While it took me a bit
    of time to figure out my microwave’s power, it finally came together. As an added bonus,
    the results were better than any of my stovetop results!
    I am so grateful that you do what you do. Your instructions are concise and thorough. I hope
    you keep doing this because you are a gifted teacher.

  60. Guess I should have read that article before making yogurt. Figured I would only need to read it if something went horribly wrong 🙂

    I’m surprised that the the freezing process doesn’t kill the bacteria.

  61. If I vacuum seal the yogurt in a mason jar (to be used as starter for next batch) how much longer then a week will it last in the fridge ? Just starting out, so unlikely will be making a new batch once a week. Really don’t want to keep having to buy store bought yogurt over and over again if only end up making twice a month or something like that…

      1. I tried it for the first time two weeks ago. Left it in the dehydrator at 115 for 10 hours and came out just as thick as the commercial yogurt started with. It wasn’t almost a gel like with your powered milk but happy with the results. Used 1% milk and 0% plain greek yogurt. Although did put in about a cup of starter yogurt, so not sure if that had anything to do with it. The big tub was the only one on sale (so cheaper than the little 4 pack cups) so ended up purchasing that one instead…

        Might have left the original batch in the fridge a few days too long, found the taste was starting to change a bit. Still edible though. So had to buy more starter and will make sure to freeze some and vacuum seal some within a day two this time to make sure 🙂

        Do you have to let it unthaw the starter from frozen at all? Or the 110 temp is more than enough to compensate?

        1. No, I do not thaw the starter. They warm milk will do it quickly. If I thought about it, I would set it out on the counter when I heat the milk but rarely do I plan that far ahead.

  62. leonardo a says:

    Hi Paula, I’m from Brazil and I want to congratulate the site, I have a doubt if you can help me thank you! I wonder if when making homemade yogurt is regular milk curdle so added the yogurt brand, that bought in the market. Thank you!

  63. So I assume that if I use store bought greek yogurt as a starter, that won’t automatically add in extra protein to my homemake stuff?
    Speaking of which, I see there is a post of what to do with the left over whey. I was wondering how long it would last in the fridge. A few days, few weeks? Although I guess if it’s just 4 cups at a time, could use it up pretty quickly…

    Glad someone finally explained as to why this greek style yogurt is higher in protein. Or I guess it was just assumed. Have searched tons of other websites and no one else says anything. I think I was more confused because of the whey powder that body builders use. So was thinking that if strain out, then how is there more protein…

  64. I don’t know what’s going on. I boil the milk (I used 2%) in a sauce pan because the microwave shuts down after being in use for 17 minutes, then let it cool before adding the live culture yogurt (I used Oikos this time) and then let it incubate in the oven over night like it says here. This time though after I strained it there was a lot more whey than normal and after it was done it came out tasting and looking like cottage cheese. I’ve done this before and it’s come out fine, but I’m just not sure if I’m doing something wrong. Incubating it or draining it too long? Maybe the temp got too high for it? I don’t know, but if you could help me at all I’d sincerely appreciate it.

  65. Wanted to say thank you for your recipe and instructions for Greek yogurt. Your instructions were easy to follow. Every time I’ve made it, my yogurt comes out perfect (and I’ve messed up on times, temps, measurements plenty)! I’ve shared your site with many people curious about yogurt-making.
    I have a small old oven in the place we recently moved to. Really wanted to replace it with something bigger, more modern. However, when I noticed I spend more oven-time making yogurt than anything else, I realized I have no need for a newer “yogurt incubator.” 🙂 Who needs to cook a big ole’ dead bird for the holidays in an oven anyway?!?
    I’ve made yogurt ice cream, used the yogurt in place of mayo or sour cream in recipes, but have mostly just added a little sugar and fruit and devoured it.
    I place a piece of tape on my yogurt containers with the date I made it, so I don’t prematurely throw it out.
    Wonder… does the whey last the three weeks in the fridge also? So far, the only thing I’ve used the whey for is for bread-making (and it does something miraculous to my bread!!) Also, if watering plants outside, does the whey attract bugs?
    Was thrilled to see I could freeze the starter! For now, it’s just me eating this treat, so my yogurt-making goes in spurts. But it is great to know now I can freeze and use my own starter without a run to the store for manufactured stuff. Can I freeze the yogurt itself (to stock up for grandkids’ visits)?
    Thanks, again, for sharing your knowledge. I’m looking forward to checking out the rest of your website for more useful hints and recipes.
    (Oh, and I think you should get paid for every bowl, thermometer, strainer sold that you’ve recommended! LOL)

    1. Hi Susie,
      Yes, whey will last at least 3 weeks in the fridge. It’s highly acidic. Have no idea if it will attract bugs outside. Hmmm.

      If you freeze yogurt, it changes the texture. This doesn’t matter if you are only using it for starter but I would not serve it as plain yogurt to eat.

  66. Denise Brennan says:

    I’ve had success with every batch of yogurt, thanks to your wonderful directions! Now I’m making it with 1% milk for myself and a friend – so doing two gallons at a time was presenting a challenge. So – today I tried the double boiler method to heat the milk – and using my big water-bath canner. I put the water in, and an 8″ circular roasting rack inside to hold the 1-gallon capacity pot up off the bottom. It was so much quicker than waiting for my (older) microwave to heat up all the milk! I get lots of free cold-packs from a local beer brewer, as they keep his brewing yeast cool during shipping. Those go in the sink to cool the milk quickly. I add the culture-yogurt, add lids to both pots and wrap them in an electric blanket since my oven doesn’t go low enough to incubate. I have several layers of cheesecloth that strains perfectly for the greek-style of yogurt I like best. At first I felt guilty about “wasting” all the whey letting it go down the kitchen sink drain, but a friend who knows about such things says it’s the best thing I could give my septic system!

    When it’s done, I add 1/2 tsp of organic vanilla and whisk it smooth with my hand mixer. Perfect – thank you so much!

  67. Hello Paula,
    After salad in a jar, I have graduated to homemade yogurt. I wanted to try the microwave method but nobody mentioned the wattage of their microwave so, not wanting to clean the microwave because of the milk boiling over, I decided to use the double boiler method using a thermometer with an alarm set at 180 degrees F and the heat at Medium so I walked away until the alarm. This is the one I have and it worked great:
    http://goo.gl/4s6uZi
    I then waited for the temperature to drop to 110 (30 min or so) and added the freeze dried culture. Then I placed the pyrex container in my oven overnight( I forgot to cover it with a plate). My oven does not have one incandescent bulb, it has 2 halogen ones but with the temperature set at the minimum and even without a plate cover, when I got up, the oven was still at 94 degrees(I used the same thermometer to monitor it in the oven) and the yogurt was ready for the chinois and finally the fridge. It is perfect, thank you Paula.

    1. Hi JP,
      I love to hear yogurt success stories. Thanks for writing.

  68. Petra Holtze says:

    I freeze about 5 T of freshly made yoghurt until I need it again and it keeps wonderfully which allows me to make it when I need it. The whey can also be used when making bread.

  69. I like your recipe, but you forgot to mention how much yogurt you produce with your 2 quarts of milk and how much Greek yogurt is produced in the end. This would be convenient for trying to adjust batch size to needs.

  70. Your recipe is very great and easy to made, I tried it and come out very good.
    Thank you for shared your delicious yogurt.

  71. Thank you so much for sharing this recipe. After traveling around South America for the last 5 months and not being able to eat yogurt because of all of the extra sugar and other stuff they add to it I decided I would make my own when we got back home to the UK.

    I made my first batch yesterday and it came out perfectly! Instead of the microwave, I used a digital thermometer/spatula and stirred the milk constantly while heating up in a Le Creuset type casserole dish. I got no skin! I just put the lid on the dish and put it in the oven for about 7 hrs and it set perfectly. I used a jam strainer from Lakeland. After putting the yogurt in the strainer my husband and I went out to dinner and when we got back a few hours later we had perfect yogurt. It didn’t even stick to the mesh!

    I like my yogurt thick, so I didn’t add anything to it. I have really creamy and mild tasting yogurt! Thanks again for sharing this recipe!

    1. Glad to hear your success story, Arlene. Always interesting and informative to hear how each person adapts the process to their own situation and tastes.

  72. Hello, I love this recipe and have used it MANY(at least a hundred) times, but the last 3 times I have made it, it did not work for me. I am doing the exact same things I have always done but have no clue as to why it is not working. I LOVE this yogurt and make mine into Greek yogurt. I am going to try one more time. This is so frustrating for me. :-(( If it works out I will let you know.

    1. So sorry to hear this Helena. Have you tried a new, fresh starter? Checked your temperatures? There are so many variables, it’s hard for me to help without more details.

      1. Paula!! I did some trouble shooting and found the problem! THANK GOODNESS! Checked out my thermometer, it was good. Checked out my temps,,they were good. Always had good starter…sooo at my husband’s suggestion, he bought an oven thermometer and voila! That was it! the oven no longer was staying at the 100 degrees it needed to be to incubate! To aleiveate the problem, I purchased a heating pad, just a cheap one from the dollar store. I had read somewhere in my wanderings about a heating pad could do the job , so instead of putting in the oven to incubate, i turned on the heating pad, layed a kitchen towel over it, put the container on top of it and covered with a bath towel. Worked like a charm, I am now back to making this wonderful yogurt! Thank you so much for this recipe!

        1. Yeah! I’m so glad to hear you figured it out.

  73. can you make the batch with part skim milk instead of nonfat?

  74. would you please tell me the exact amount of milk which i should add with Gram or with standard measuring cups. I don’t know what you mean by 2 quarts. I don’t have them.
    with many thanks in advance.

  75. I have a friend who bakes a lot and she uses the way as a liquid in cakes. Her cakes are divine so it works.

    This may be somewhere in the posts but I’m not reading all 500+ to find it 🙂

    1. Haven’t tried that before Jill. Thanks for writing.

  76. Hi,
    I live in Brazil, on a farm. I make my own yogurt, but I use a yogurt starter (in powder). I’m not sure which is the right consistency: creamy or gelatinous. When it is gelatinous, it has a slightly green color and it is very acid. When it is liquid its taste reminds heavy milk.

  77. Jeanne Fischer McKee says:

    First batch was perfect, but the last two didn’t thicken very well while incubating. I double checked the temperature so that wasn’t the problem. The only thing I could think was the starter (nancy’s) wasn’t fresh enough. Leaving it in longer didn’t help either. If you have suggestions please email me at jeannefm@gmail.com. Thanks!

  78. You said that straining the yogurt and adding milk gives it a more mellow flavor, I was curious what you mean by that… I just made my first batch, left 2 pints for 8 hours and 2 for 10 because I had read the longer you leave it the thicker it gets. With these times the consistency wasn’t much different, on the thin side but the 10 hour quart was much more tangy/sour. I want to strain it for the thickness but will this take care of the sourness also?

    1. Hi Becky,
      Your comment about the longer you leave your yogurt to incubate, the thicker it gets is only true to a point. Thickness is influenced by several factors. The longer you leave it, the more sour it gets IS generally true in my experience. Straining it will get rid of some of the sourness. But sourness is also affected by the starter and the kind of milk you used. As far as adding milk back in, it also depends what kind of milk you add as to how it changes the taste. So many variables! Also, what is sour to one is mild to another. Keep experimenting and you will eventually find what is perfect for you. After 4 years, I’m still experimenting and changing my idea of what I like when it comes to yogurt. That’s part of the fun. 🙂 For example, I used to whip my strained yogurt but recently have stopped doing that and I think it is not quite as sour that way. Not as creamy either but I think I like it better. Good luck and happy yogurt making!

  79. Steve Ford says:

    Thanks – I followed this with GREAT success! Thanks!!!!!!

  80. Eileen Bailey says:

    I’ve been making homemade yogurt every week for 2-3 years. I agree that it is less expensive, and since I am a “selectarian” I am extremely careful concerning what I eat. When I make my yogurt, I know exactly what goes into it–1% milk and my starter and nothing else. Anyway…..Since I make Greek yogurt, I was left with the whey and what to do with it. I freeze the whey and then when I have time I make frozen popsicles by adding 2 cups of the whey, 1 cup yogurt, sweetener and fruit. Ginger popsicles are excellent. They are all fantastic, and again I know what’s in them. I definitely will try using the whey in other areas of cooking as well.

    1. Eileen,
      Your ginger popsicles sound very interesting. I couldn’t agree more about know what goes into your yogurt. It’s one of the best reasons to make your own–besides that fact that it just tastes better and fresher.

  81. Oops! Can’t type. Sure, not sugar….

  82. Thanks for such a great yogurt lesson. I found you by asking about skim milk yogurt and learned more than I even thought to ask. I will be subscribing for sugar. About the whey; you can make a spreadable sweet cheese from it. I think the name is gjetost. You just cook the whey down over a slow heat. It will thicken in the final stages and turn a golden to light brown color. You need to stir it constantly at this point, and just stop when you reach a texture you like. You can stop when it’s spreadable, or keep stirring until it’s a bit “stiff” and pour it into a small container or mold, and when it cools, you can slice it. It has a great sweet taste, I think from the lactose. The texture varies depending on the type of milk, but the taste is always good. I know it works with cow and goat milks, but I never tried it with almond, coconut or soy.

    1. Hi Judi,
      I’ve heard of ghetost but never tried it. Will have to give it a go. Thanks for writing.

  83. Paula-

    Thank you for the fantastic instructions. I have been making my own yogurt for a month now and it hasn’t failed yet. My yogurt habit was getting pretty pricey and all those plastic containers that can’t be recycled were such a waste.

    My (your) homemade yogurt is absolutely delicious, ridiculously cheap and easy – there’s no going back!

    Thanks again!
    Mary

  84. I purchased a digital thermometer with a sensor, but I was told by the company that it cannot be set to go off at a lower temperature. What type of thermometer do you use? Thanks for your help.

  85. Hi Paula, I have been making Greek yogurt for over a year thanks to your video and recipe with great success, and now have begun making ricotta too (it makes a wonderful white garlic pizza with fresh basil, oregano, tomatoes). I usually use organic fat-free or 1% milk, but lately have seen a lot of discussion online about how “ultra pasteurized” milk cannot be used to make yogurt at home. All the organic milk sold at all of the stores in my area is ultra pasteurized (this increases the shelf life of the milk). Have you any experience with organic milk compared to milk that undergoes the regular pasteurization process? Thanks for your input.
    (The poppy seed scones are delicious!)

    1. Hi Caroline,

      Hmmmmm ….not too sure about the whole “ultra-pasteurized” milk issue. I’ve made yogurt successfully with whatever milk is the cheapest at the store. I’ll have to pay attention. I do not buy organic milk because of the cost.

      Glad you liked the scones. Have a great week.

  86. Dominique says:

    If you do any other fermenting, you can use the whey as a starter, like if you ferment your own kimchi.
    You can never stir it back in, the yogurt won’t absorb it

  87. Hi Paula, I just want to thank you for this guide! I tried your method some time last year with success on my first try! You made it so much less intimidating than I thought it would be. I had gotten out of my routine with making it for awhile (resorted to buying it instead) and decided to start making it at home again today and came back to your website to refresh my memory. Thanks again!

    1. Welcome Nicole, Glad to hear you’re back at it.

  88. This is a great recipe. I just published a post ( http://wp.me/p2UxnZ-lm ) on making your own Yogurt Cheese on my Yonder Wild blog ( http://yonderwild.wordpress.com/ ). I give the option that you can make your own greek yogurt for the cheese and then I mention your blog and put a link to this post for my readers to see how. I hope that you don’t mind! Best – Rachel

    1. Hi Rachel,
      Thanks for the link. The cheese looks very interesting…and delicious!

  89. Lori Tummonds says:

    Just made my first batch after following your instructions exactly. Sadly, I discovered my oven does not have a 100 degree temp setting, but I heated up to 350 degrees for 1 minute then shut the oven off. I wrapped the “milk” container in a towel, left the oven light on, and went to bed. I checked it at 8am and could see it was working. I pulled it out at 11:00am. And proceeded with the instructions. I have great yogurt!!! I feel so accomplished. Now, I don’t have to buy a yogurt maker!! Thank you for the wonderful instructions! I love your blog.

    1. Always love to hear the success stories, Lori. Thanks for sharing.

  90. Stacey Williams says:

    Thanks for the nutritional data. I have been looking all over, but its very difficult to find. I’ve been making strained yogurt at home for 6 months, as I live in Thailand right now and it is very difficult to find plain yogurt, and when found it is very expensive. However, after I have added the starter, I put a lid on the container, wrap in a thick towel, and put in the microwave overnight. When I get up in the morning, it is ready to go! I also use a recipe that calls for 4 tablespoons of yogurt as starter for 2 quarts. Am excited to try a much smaller amount!

    Good to know about using new starter or “not old” starter, as sometimes it hasn’t tasted as well as other times – or seems to get a “bite” to it more quickly.

    Thank you!

  91. Rhonda Bartee says:

    Does making yogurt with whole milk make it more “Atkins” friendly?

  92. When I make 2 gallons of milk for yogart heat I. And cool I15 It always sets up well. But when I make it with 3 gallons it has not set up well. What is wrong

  93. Thank you for the article! I thought you might like to know that you can use the whey in bread making. It is delightful.

  94. Use whey to replace water when making bread. Boosts protein content and tenderizes.

    1. Jennie, This is probably my favorite use for whey. Thanks for writing.

  95. I tried a few different greek yogurt recipes before finding Paula’s. Some failed to set, others had a grainy texture. Paula’s method has worked perfectly each and every time and I’ve now followed this recipe a dozen times. I make yogurt about once a week.

    To those that have not had success: I have found that the freshness of the initial starter and milk is critical to success. Be sure to buy fresh yogurt (look at the expiration date).

    Thank you so very much Paula!

    1. Thanks for your testimonial Cindy. Love to hear the success stories!

  96. Ok tried this for the first time, used a metal pot and boiled the milk to under 200F though because I didn’t think the microwave we have could fit a 2 quart container. After that I let it cool awhile then added some of the yogurt I had and stuck it in the oven at 350 over night. Went to check on it this morning and it didn’t set up.
    So either I didn’t let it cool down enough (and it was pretty close to 100F) or the oven didn’t stay hot all night. Any suggestions on what to do and can this mess of milk still be used/fixed?

    1. Will,
      Did you leave the oven on 350 all night? If so, you definitely killed the yogurt bacteria. Yogurt incubates best at 100 -110 degrees. What did you use for starter? You can try using new starter in the old batch if if doesn’t smell but your chances for success are iffy. My best suggestion is to start over and make a smaller batch until you have a success so it’s not quite so painful if it doesn’t work.

      1. It worked, just had to keep turning the oven back on to get it back to 100-115 degrees, I used a store bought yogurt and it still came out really good and I got it nice and thick almost as thick as peanut butter and while a bit bitter I added some things and it tasted much better. Thanks for the advice.

  97. Paula thanks for this page. I’ve been eating a lot of greek yogurt for about a year, and was looking for a way to save some money. Using your site, I finally tried making my own this weekend and it worked great. I made several batches and they all turned out great. My oven stayed right at 100 degrees when I left the light on, which made the whole process very easy. Thanks again!

  98. I have made yogurt several times in my crock pot before and never had a problem. this time I began making it just as I always have and during the initial heating as always i whisk it up every so often to keep it from getting skin. But this time, as the heat reached it’s target It had i guess curdled. it looked like super tiny cottage cheese and whey. Do you have any idea how this might have happened? the milk was good. it didn’t boil or get too hot. I hadn’t put the starter in it yet as I am not sure it will work with the milk separated so much like this. Any idea how I might fix a problem like this or would you recommend a full start over?
    Thank you for you help! this is the first post I could find with trouble shooting helps.

  99. Will freezing yogurt kill the good bacteria cultures?

    1. Yvonne,
      Not normally. It will change the texture of the yogurt however. I always keep a small amount of yogurt in the freezer as an emergency starter. See this post.

  100. Hi Romaine,

    Thanks for the recipe. I made Greek yogurt successfully! I used a nut milk bag placed on top of a kitchen strainer but it was a difficult process. Are there any bouillon strainers in the market that is cheaper but works as well as the one you are using?

    Please let me know.

    Thanks!

    Matt

    1. Matt,
      Have you seen this post? Check out the links there for cheaper strainers. Some like the larger OXO strainer. However, for me, the expensive is totally worth it because I make a gallon of yogurt every week. It’s worth saving up to buy if you find yourself making yogurt very much. Good for other things too. I’m writing a post right now about other uses that help make the “investment” worth it. 🙂

      1. Hi Paula,

        Thanks for your reply! I might go ahead and purchase the bouillon strainer that you have. I think it’s worth the investment. I love your website! Lot’s of practical tips! By the way, I have an idea on another way how to make yogurt. I recently saw an induction cooker at Bed Bath and Beyond. It’s called Nuwave PIC2 and you can set the temperature to as low as 100F. This may be an alternative for those who don’t have an oven that can be set to 100F. If I happen to purchase one, I’ll let you know!

        Cheers!

        Matt

  101. Judy Readey says:

    I saw your video on how to make your Greek yogurt, in it you added vanilla to flavor it. Do you know of any way to make it taste like chocolate without altering the caloric content (not more than 5 calories for a 5-6 oz container? Blue Bunny used to sell one for 80 calories non fat (Black Forest Chocolate Cherry) but after Weight Watchers bought them out they discontinued it. I have tried alkali processed cocoa topping flavors all without success. Can you help?

  102. I wonder if you could make a video on making feta cheese. I’ve tried it twice without success, and don’t know what I’m doing wrong. I am making your recipe for Greek yogurt right now. Your instructions are simple, concise and very detailed. Great job! I do your salad in a jar all the time. What a great time-saver that is. 🙂

  103. Hi all,
    I’m an Expat living in the Philippines, and make yogurt a couple of times a week. I use powdered milk to do my Yogurt and just mix it up, add the starter, put in in my oven
    or Styrofoam cooler with a electric hot pad turned down to just above Minimum. Turn it on and walk away, always get perfect results.
    Yogurt is kind of pricy here as there is no dairy industry to speak of. A few are starting up, one using water buffaloes which produce milk with 12 % fat. Again it is pricy, $2.25 / Ltr/ Quart. Now You can probably see why I use DMS (dry milk solids)
    I ordered a n Ice Cream machine, unfortunately it takes about 8-10 weeks to get here, so in the mean time I just use frozen yogurt, sweetener, a couple ozs of 35% fat whipping cream and fruit of some kind, then use the food processor, back to freezer freezer, food processor again, and then freezer.
    What I get is frozen yogurt out of this world. Sometimes I do the draining part, sometimes I don’t…….just depends on my mood. But anyway, good luck to all in making yogurts.

    1. Hi Jerry,
      Thanks for sharing your perspective and techniques on making yogurt. You may very well help someone else who doesn’t have fresh milk available.

  104. Use the whey to make ricotta! 🙂

  105. So glad found this. 😀 I’m trying to make everything from scratch these days, and this just looks awesome!!

  106. Emma Grey says:

    Hi, I use the whey as a protein addition to soups. Makes them really filling and I can never taste. Xx

  107. Thank you for the great recipe!!! I cannot wait to try it, but have a few questions.
    1. My oven will only go as low as 170 degrees, so not an option. Currently, I use a thick wooden cutting board on my counter, place a heating pad on the cutting board (set on medium), use a cover on the pot and wrap two bath towels around the pot. It keeps that mixture between 100 – 110 degrees. Is this OK?
    2. How long does the milk need to stay at 175-185 degrees in the microwave? When I make it on the stove, I keep it at 175-185 for 30 minutes.
    Thanks so much for the great recipe!!!

    1. Andrea,

      100-105 degrees F is ideal.

      As soon as my milk hits 170-175 degrees, I stop heating and let the cooling process begin. Why do you keep it at 175 for 30 minutes? I haven’t heard of that before. paula

  108. Tere Fredericks says:

    I just found your site after a Yahoo! search. I will be making this tonight. My granddaughter has just moved closer to us, and we’ll be keeping her while her mother works on occasion (yipee!). She loves yogurt (at age 14 months!) and is getting hers through that nasty suck on it thingy. I refuse to put one in my fridge, let alone in her mouth. So, I’ll be making it, using your recipe. She loves fruit, so we’ll be adding that most of the time. I was just told my blood sugar is waaay too low as well, and this will help with the swings I’ve been suffering without knowing it.

    I wish I could pin your site, but apparently the pin-it button doesn’t work with FF 20.0, so I can’t right now. I do, however, have it bookmarked in List.It, so I can find it faster than going through all my other bookmarks.

    I’ll let you know how baby and I get along with your recipe. Using the microwave just sounds perfect!

    1. Hi Tere,

      Sounds like you have great times ahead with your granddaughter. Happy yogurt-eating!

  109. Paula. Thanks for posting this. I have made Greek Yogourt before. I have a Yogourmet yogourt maker. Love it. I believe you can buy it from Costco online, or you used to be able to.
    I do line my colander with a kitchen tea towel and it works well. It is messy.
    Thanks so much for saying that your yogourt keeps getting better and better. I have been discouraged when people say that you should use fresh starter (purchased) after a few times.
    I’m Canadian and am in love with Fage 0 %. I love Fage 2% even more and Total even more, but I am trying to lose weight.
    We were recently in the USA and I loaded up on Fage 0% at the local Costco. I am going to haul out my Yogourtmet and make some more while I still have starter.
    I’m told that Liberte makes a decent Greek yogourt and also there are Kirkland brand and Oikos. But I love the Fage.
    Thanks! Don’t know why I didn’t try it myself to see what happened. Didn’t want to cry over ‘spilled milk’ I guess.
    Helen

    1. Hi Helen,
      There are so many myths about making your own yogurt, probably borne from people who make it “like their mom did” but don’t really know why. Even my own sister told me I could not use my own yogurt as a starter more than 3-4 times before it would go bad. Not true. Another example is the amount of starter called for. You actually need very little but I’ve seen people call for 1/2 cup or more of starter to make only a quart. I think this has given me an idea for a blog post. Thanks very much. Good luck with your yogurt.

  110. Jane Ramirez says:

    I have been making Greek yogurt for a long time. It is so good!! And as for the whey, you can use it to make a batch of yogurt. Just add it to the milk when it is cool just as you would add yogurt. I bring my milk to a boil. It makes the yogurt thicker, like Greek yogurt….no straining needed. And, I add frozen fruit….my favorite is mangos for a great smoothie, and I also use Torani syrup, too. To make it sweet without sugar, I use Agave Nectar.

    1. Hi Jane,
      Your comment caught my eye. I have not tried making yogurt with the whey only. Will have to put that on my list of things I want to experiment with.

  111. If I only use 1qt. of milk then I just need add half of table spoon yogurt. Is it correct?

  112. Pat LaBorde says:

    I have been making my own regular yogurt for a couple of years. I’m interested in a recipe for Greek yogurt to make using my yogurt maker. I want to be able to create Greek yogurt that is low carb like the Kroger brand of Carb Master. How does one get the really low carb, low calorie with little or no sugars yogurt?

    1. Hi Pat,
      Greek yogurt, by definition, is regular yogurt that has been strained of much of its whey which makes it really thick. Of course, that means the volume will be greatly reduced. So if you have small 6-ounce serving jars from a yogurt maker, removing the yogurt to strain and them putting it back into the jars would be a huge pain since you might end up with only 3 ounces of Greek yogurt or even less, depending on the milk you use and how long you strain. That’s why I make it with 2-qt batter bowls. It’s even easier than a yogurt maker once you get the hang of it. Whether or not you add sugar is your choice. Calories will depend on the milk you use.

      I don’t know anything about Carb Master so can’t speak to that subject. You might compare the stats listed on this post at the bottom to those of the Carb Master container.

  113. Hi Paula, Wow! I so appreciate reading your very informative blog. Not quite sure myself how to obtain whey or exactly what it was, I am happy to have stumbled upon your website. For your readers that are seeking ways to more fully utilize the whey obtained from yogurt, I would recommend the cookbook “Nourishing Traditions”, the recent purchase for which prompted my search for whey and its uses. Many of the recipes call for whey – from baked goods to fermented vegetables. Thank you,

  114. rachel moore says:

    if i was going to make half of this would I just cut everything in half

  115. chocolatier52 says:

    When I wrote my message to you, it was 3 am and I was TIRED! This morning I was showing my daughter your video and then we looked over the written instructions and lo and behold, there was an editor note that explained why you don’t use powdered milk anymore.

    Thanks for posting this recipe. My first try came out great and we’ve eaten it all already!

  116. chocolatier52 says:

    Your recipe and instructions mentions NO addition of powdered milk. Only while waiting during the straining process, did I read comments from others and found out that you DO add powdered milk. How much, and at what point?

    1. Hi Chocolatier,
      I did add powdered milk in the very beginning of my yogurt-making career but quickly found it was not needed so I deleted it from the post but not all the comments, of course. And just now, I realized that I still have a picture on the post with powdered milk in the background. I need to redo that. Thank-you so much for writing me today so I would realize that. What would I do without my readers?

      The reason I no longer do it is because I thought it gave a subtle “chalkiness” to the texture. Powdered milk is one more expense, one more step, and unneeded since my yogurt turns out thick and creamy without it.

  117. I just made this yesterday, and was SO pleased with the results! I’ve been making yogurt in the crockpot for a few years, but lately half my batches weren’t thickening at all, and I frustrated enough to find a new method that was more consistent.
    I have the same pyrex bowl as you, and I used a meat thermometer to check the temperature. I was a bit nervous about only putting in 2-3tsp of starter, as my previous recipe used 1/2 cup for the same amount of milk – but it worked great! My oven cannot set to a low enough temperature. I have two lightbulbs in my electric oven, and when I tested the temperature in there with an oven thermometer, it was 115 with just the lights on… perfect! I used my colander with some paper towels lining it to strain, which worked well… no solids came through. It was just a bit messier trying to get the yogurt off the soggy paper towels.
    I love the mild taste of the greek yogurt!
    Thank you so much for sharing this easy-to-follow recipe with all the tips – they were very helpful.

    1. Hi Jannyne,
      So glad to hear your yogurt is a success. Many people don’t believe me regarding the small amount of starter but it really works. Thanks for the affirmation.

  118. Another way to give the plain yogurt a vanilla flavor is to put 1 split/sliced vanilla bean into the milk when you initially heat it. Allow the vanilla bean to continue to soak in the milk until the milk is cool. Remove the vanilla bean at this time and continue with your process. It leaves some small brown flecks of vanilla in the yogurt, but we don’t find those bothersome. I guess you could strain them out if you like.
    We think the flavor is excellent and so smooth.

  119. I have used whey in everything baked that requires a liquid but cookies, my biscuits are so fluffy and moist and I have used it in homemade macaroni and cheese, it was so creamy and smooth.

  120. USES FOR WHEY: you can use it in baking when the recipe calls for buttermilk or sour milk. Also, my chickens LOVE it. It’s good for dogs or cats, too.
    I chill my yogurt before straining. I strain through a clean dish towel or cloth of similar fiber (non-terry). It is kind of a pain to clean the cloth, so I might try to find your strainer thingie. Thanks for the tip!

    1. Hi Carol,
      Thanks for your suggestions about the whey. Some time ago, I put everybody’s suggestions in a post you can read here.

  121. What would be the nutrition/calorie content in this?

  122. Rosemarie says:

    I use the whey in cooking or I just give it to my dog he loves it and it has lots of good nutrients and helps with yeast which he get a lot.
    I found a great way to incubate yogurt since my oven does not go
    below 170.
    I got my hands on a large Styrofoam cooler. Any cooler will do but styrofoam holds the heat best. IMO.
    I place my heating pad on the bottom, even thought it is water proof I place a tray on too of that, it helps keep the jars level.
    I make my yogurt while the heating pad is heating up, on medium is the best setting for me. I keep the cover on to keep the heat in.
    I prefer jars so I can have handy servings and the whey never has a chance to accumulate I eat it all. I place the jars (or bowl if you prefer) and I place in on the tray. (making sure the het in the cooler is over 100, I put the thermometer probe in the largest container and close the lid. I set the probe to warn me if the yogurt gets to hot but that never happened. I check the temp a few times during the (cooking) process and it usually stays at an even 103 or so.
    I am able to make a full gallon at a time between my dog and me we have just enough for us before I make a new batch.

    thanks for you hints, I also have another hint I just read, put yogurt in ice cube trays and use about 1 for each quart of liquid, this person (possibly you?) says she has been doing this for sometime and it works. Well.

    1. Thanks for your hints Rosemarie. These could be a great help to someone else with a similar situation.

  123. Could you please tell me what thermometer you are using? The one I bought only sets off the alarm when the temperature RISES to the right temperature, not when it LOWERS to the right temperature.

    1. Hi Patty,
      The thermometer is a TruTemp 3528-21. Honestly, I gave it away because I figured out pretty fast how long it takes for my milk to cool down in my kitchen so I just pay attention to the clock and test it on my hand. Think I got it at Target some years ago.

  124. Super! Thank for all the details and step by step directions! The video was helpful also. PS Great kitchen. : )
    Thanks so much!!

  125. I previously worked at a restaurant who used the whey to cook grits. It makes them creamy in a way nothing else can. If you eat grits, cook them in whey. The result is absolutely delicious.

    1. Brie,
      What a great secret you have shared! I’m not a grits expert but I always have whey in the house so I will try it. Thanks for writing.

  126. Paula,
    I have the Taylor thermometer you mentioned from Target. It’s great if the preset temp you desire is “going up” (like baking bread). I was hoping to find a thermometer that would sound an alarm when preset temp was reached “coming down” as in cooling heated milk to 110 degrees. Mine rings the alarm if temp is ABOVE the preset temp. It has been helpful when testing my oven temp with the light on. Maybe with more experience I will get a “feel” for how much time it takes for milk to cool down. Thanks for your great website. My family has loved everything that I have tried!

    1. BJ,
      My thermometer did buzz when the temperature cooled down but as you mentioned, you won’t need it with just a little bit of experience. If I’m not sure, I use my quick-read thermometer.

      And thanks for your kind words.

  127. Could you please share info about your thermometer with alarm? Thank you for your website. I have made 3 batches of Greek yogurt with your instructions. I also love your bread making instructions. I made spinach dip with homemade yogurt in a New York deli-style rye bread bowl that I made in the bread machine on dough setting for a new year’s eve party. It was a big hit! Thanks for your encouragement.God bless.

    1. BJ,
      I gave away the thermometer with an alarm but it was very similar to this one, available at Target. http://www.target.com/p/taylor-digital-timer-thermometer-with-probe/-/A-533891 The alarm is nice for beginners who are figuring out their “system”.
      My favorite thermometer now is this Redi-Check digital thermometer. http://www.amazon.com/Maverick-Redi-Check-Food-Probe-Thermometer/dp/B00005AM8F I love it because it’s cheap, reads the temperature fast, and is digital. I use it all the time for my yogurt but also when making bread–so I never under-bake a loaf and end up with doughy bread.

  128. Hi Paula,
    I just came across your video. It seems quite easy the way you have shown it. I just recently got a yolife yogurt maker for Christmas. I made my first batch yesterday and was very disappointed. It did not thicken up hardly at all. I used a 6oz cup of Greek yogurt from the store. I’m wondering if the yogurt didn’t have enough active cultures or if I added too much? The recipe that came with the yolife called for 6oz of starter. Do you have any suggestions?
    Confused but anxious to succeed,
    Kelly

  129. could you use almond-coconut milk to make the yogurt?

    1. Judy,
      I tried it a couple times. Complete fail. Not sure why. Perhaps a different brand would have worked, I’m not sure. I have been successful with soy milk….but sadly, I did not care for the taste.

  130. Hi Paula,

    I recently started making greek yogurt following your directions and it has turned out quite well. I have a couple of questions that I was hoping you could help me with – I am using 2 quarts of non-fat milk to start out with. Once i’ve strained the resulting yogurt, i am getting less than a quart of greek yogurt. Is this right, should I be getting more greek yogurt out of the 2 quarts of milk? One issue I think might be that the yogurt doesn’t set as thick as it could, is there a way to increase the thickness. I was reading that mixing in non-fat milk powder during heating of the milk helps to thicken the yogurt once set. Have you tried or would you recommend this as an option? Thanks!

    1. Akhil,
      I am not surprised you are getting less than a quart. That is normal. Yes, I have tried the non-fat milk powder and did not care for it. It gives the yogurt a slightly different texture I didn’t care for- you might say a bit chalky. Are you using your own yogurt as a starter? Mine just gets better and better because my yogurt is very fresh.

      You might try a different brand of milk. Certain brands seem to set up thicker. If you live in an area with Braum’s stores, try their non-fat milk. It is specially formulated to be more concentrated and it comes out unbelievably thick and creamy, even before straining.

  131. Great use for the whey filterd out in making greek yogurt – I use it instead of milk in my bread machine. Works like a charm!

    1. Thanks John, I have tried that and I love it. Have you seen this post?

  132. Christy Chekwa says:

    Hi Paula,

    Your recipe and it’s reviews have definitely inspired me to step out of my grocery store comfort zone. Just a quick clarification should help. In the video, I didn’t see you place a towel over the milk in the oven, yet it is listed in your recipe post, is the plate sufficient or is the towel necessary as well?

    P.S. The Broccoli Cheese Casserole was a Thanksgiving hit! Thanks.

  133. hi paula,i just made my very first batch greek yogurt following your recipe.it turn out wonderful.i was a little worried cause my oven doesnt go down to 100 degree.(i wrap mine in plastic wrap and covered with towel in a preheated oven with light on )but when i wake up in the morning i was thrilled to found out that i have yogurt!!! it was thick just like the one in your video,but i still stain it with my cheese cloth which worked just fine for me.i couldnt wait for it to be chilled had a bowl of it with some honey when its still warm ..lol silly me but it taste so good !!thanks so much for sharing !!

  134. I haven’t been able to read through all the replies but you can make fantastically good for you fermented veggies with the whey. Super easy, on the counter, no boiling, etc to can them. There are lots of recipes out there but basically put your veg into a quart jar; mix 4 or 5 tablespoons of whey with spices – dill, mustard seed, garlic and sea salt for traditional – add enough filtered water to fill the jar and leave on your counter for 3 days then move to the fridge and eat. All that wonderful goodness from the whey and so easy they won’t last in your fridge! It works with cucumbers for pickles, cabbage for sauerkraut, radishes, mushrooms, okra, asparagus or whatever you like on your salad that is in season. Great tang on those daily salads and especially good with a sweet pear or poppy seed dressing! Yum! I am hungry, going to make a salad : )

    1. Hi Lindsay
      Thanks so much for writing. I included the fermented veggies with whey in my post of things to do withe whey seen here. Although I have never tried it myself, you make it sound pretty easy. I would love to try it with mushrooms.

  135. I was just wondering about the size of the mesh of your chinois. I finally broke down and bought one off of amazon. Fox Run 3-Piece Stainless-Steel Chinois Set. It says its 18/8 stainless-steel fine mesh. . .
    I thought a chinois was a chinois. . .not that there were different size mesh. . .that they were “fine meshed” and would work well for the greek yogurt. I have been making your yogurt for many months and have been using a pretty small mesh metal normal strainer. . .but always had to line it with paper towel and scrape and scrape so the liquid would go through. It would take me almost two hours. This is why I finally gave in a bought one.
    I would like to know the size of mesh in your chinois. I just opened mine, and am wondering if I should return it. (a piece fell off right away opening, but is easily remedied so I can return it with no questions) The holes seem bigger than my normal mesh strainer. I don’t want to try it if I end up wanting to return it. I could send you a picture of the holes. I was quite surprised at how big they are. . .they are holes. . .not what I would consider “mesh”.

    1. Jamie,
      I am not familiar with that brand. But from your description, it doesn’t sound like it would be good to strain yogurt. You are correct in thinking you need a VERY fine mesh and not holes. (One moment) I just looked this up on line. If it were me, I would return it.

  136. Why do you microwave the milk rather than heating it gently on the stove? Microwaving milk may not be the best way to maximize the nutrient and digestive organisms in the product you are trying to make.

  137. I just wanted to say thank you for sharing your know how! I just tried my first batch of homemade greek yogurt last night and tasted it this morning. It all went very smoothly and wow did it ever taste great! I stirred in maybe a 1/3 c. of cocont milk and vanilla and had some on a slice of my whole wheat sugar free pumpkin pie this morning! Whoop! Really, thank you!!

  138. As a cost-saving tip, I use my honey strainer to strain the yogurt. I have my own honey bees (whose honey is top notch in the yogurt). Honey strainers in stainless steel can be bought online at half the price of the other strainers noted. I believe the mesh is about the same. If I incubate long enough I get nothing but whey strained out.

    1. Barry,
      Well, I’ve learned something new from you. Until now, I had never heard of a honey strainer. In googling it, they seem to be perfect for straining yogurt too. I’m going to look into it some more. Thanks for writing.

  139. I haven’t tried Greek yoghurt but seems an interesting evening exercise.Other yoghurts I have and the more you make the more you become an expert.Good day

  140. Will this work with almond milk?

    1. Lori, I tried it at least twice without great success. It didn’t get nearly thick enough for me and I honestly didn’t care for the flavor. Soy milk does work. I’ve read about people who claim it’s possible but not sure if it requires some kind of special starter or perhaps a different brand of almond milk would make a difference.
      P.S. For the record, coconut milk also did not work for me.

  141. i love your video . I been looking for yogurt in stores like plain yogurt and i meant to tell you that um……i want cream yogurt. I want strawberry flavor so if you can make a video you tube or on salad in a jar website.i’ll will be watching so i’m begging please make a video that your are making a video that have berrys flavor. 😉 see yah !!! your video was on fire love it.

  142. yogurtlover says:

    Thank you paula for the explanation, you are the best!! No one can explain better than you!! By the way, I would appreciate it if the latest comment is put in front first and the later ones behind, it is hard to find the latest comment and people would be needing to go through the pages to find their last comment, I just clicked next and once the website has a page number, I put the number of the page to reach it quicker. Anyway, thank you for your lengthy explanation.

    https://saladinajar.com/skinny-secrets/healthy-homemade-greek-yogurt/comment-page-6#comments

  143. yogurtlover says:

    Is it true that they say that yogurt that has preservatives, even the live active cultures will not work? I make yogurt three times already, second time it failed as it has preservatives in it, it named the bacteria in it, didn’t say about live active cultures.

    1. Yogurtlover,
      I don’t think the preservatives will keep it from working. But if it is not fresh, the bacteria may not be numerous enough. Once you make a good batch, you might want to just use a tiny bit of your own yogurt as a starter because then it will be super fresh.

  144. Katie Lynn says:

    I seem to be having a slight difficulty keeping the oven close to 100F. What are the limit temps? Too hot and too cool? And what are the results of having the yogurt incubate at too warm a temp, can it be “re-tried”?

    1. Katie,
      You might take a look at this post and try a different way. In my research and experience, you definitely should not go above 120 (better to be lower than 110) and not lower than 95. If temp goes over 120, the starter will be killed.

      Regarding “retrying”, this is my philosophy. If the milk still smells good, add more starter and try again. Results not guaranteed. If it smells the least bit off, toss it and start over. 🙁

  145. Yogurtlover says:

    Hi there, can you make greek yogurt at room temperature without bringing the milk to a boil? Thanks 🙂

    1. Yogurtlover,
      The reason you bring the milk to a boil is to change the structure of the protein so that it will make better and much thicker yogurt. If you leave out that step, you will get something that is pretty much only good for drinking. If it’s Greek yogurt you want, then you first want your yogurt to be as thick as possible and then you strain out the whey to make it even thicker, like sour cream. So, practically speaking, my answer is “no.”

  146. Cricketswool says:

    I use the whey as the liquid for baking in place of milk, water, or buttermilk. It changes the flavor slightly at most, and I’ve never found the new taste to be unappealing – just different. I’ve used it for whole wheat yeast bread, English muffins, pancakes, biscuits, and even Indian chapati.

    1. Thanks Cricketswool. Sometime ago, I put together a list of everybody’s suggestions which includes a lot of the ones you suggested. You can see it here.

  147. If you use full fat milk to start…does that change anything? I can’t find Full Fat organic greek yogurt anywhere! Trying to be as Paleo as possible but I need so calcium! 🙂

  148. As a young bride (46 years ago), my grandmother taught me how to make yogurt. She had me use the same recipe as yours. I put the milk into a saucepan and heated it until the milk began to rise, which is like microwaving, but there were not microwaves then. When the milk rises you remove it from the heat. Let it cool until ‘your little pinkie finger’ can stay in the milk comfortably for ten seconds.
    Next, put the milk into a glass bowl and put another glass bowl over it to make a dome. Put 1/2 cup of regular plain yogurt into the bowl, put the dome on top and wrap up tightly in a large beach towel. Let set out on the counter overnight and it will be ready by morning. Spoon off the whey into morning oatmeal or some other food. Put in an airtight container and refrigerate. To serve add a sweetener and fruit or use to cook with. It has worked for Grandma our family for 2 generations.

    1. Hi Deanna,
      So glad you wrote. It really is a simple process, isn’t it? Fun to read about your process.

  149. Thanks for this video! I made my first batch (a little differently, but basically the same process) and it came out FANTASTIC. No more than 15 minutes to prep; I’ll probably get that down to even less the next time.

    I used:
    about 32 oz. whole milk
    1 1/2 Tbsp. Fago plain yogurt at room temp. mixed with 2 Tbsp. whole milk

    I plugged the sink and filled it with 3″ of cold water. Stirring constantly, I carefully heated the milk in a heavy pot on the stove using a digital thermometer to 180º (Alton has a neat trick using a binder clip to keep the probe from reading the pot instead of the milk). At 180º, remove pot and place into sink bath keeping thermometer on. When it cools at 120º, place back on the warm (but off) stove burner and stir in the starter mixture.

    My apartment has an efficiency stove with a gas pilot light that keeps the inside of the oven a constant 105º. Free energy! I simply poured the milk into a bowl, covered with a plate, and stuck it in the oven overnight.

    Great advice on the bullion strainer! I picked a great one up (2 qt. 18/8 stainless) at a restaurant supply store for $25. After straining, this yielded 16oz. of awesome yogurt and close to 16oz. of whey.

    Thanks, Paula!

    1. You’re welcome Oscar. Glad it worked for you. Don’t you love the strainer?

  150. I know this post is old, but I wanted to say thanks for the great tutorial. Also, about using whey, you can boil pasta in it, use it to soak beans or add it to recipes that call for water. 🙂

    1. Thanks Brooke, The post may be old but the subject is not so I get comments on it almost every day. I wrote a post about using whey here but don’t think I’ve ever thought about soaking beans in whey. That’s a good one.

  151. Thank you for such a fantastic recipe! I made my first batch just today, and it looks good, but I have a couple of questions…on average, how much whey do you strain out of it? I got about 5 cups worth…does that sound right? Have you ever had to repurchase store bought yogurt as starter, or have you always used from a previous batch? Thank you for such a money saver!!

    1. Hi Bill,
      Your question about the whey is a very good one. I would say 5 cups is about average although it’s really hard to say. It depends on the type and brand of milk you use (how many solids and fat the milk contains) and how long you drain the yogurt.

      Yes, I have repurchased store-bought yogurt to use as starter but it has been so long ago, I don’t remember. Since I keep some in the freezer, I don’t have to worry about accidentally eating it all.

  152. HI,

    Try freezing the whey, and when you want to make a cake or bread use the thawed whey for part or all of the liquid. You can also add it to cream soups. It increases the protein.

    Beth

  153. Tried the yogurt recipe–perfect! Please, no giggles from the peanut gallery regarding this quetion: If I freeze the yogurt, will the active cultures live through it? I put the yogurt into paper cups, added strawberries and blueberries and froze it for my daughter. She loves it, so I am hoping it still has the probiotics I wanted to get into her in the first place! Thanks

    1. Hi Diana,
      I’m no food scientist but my experience with making yogurt proves that freezing it does not kill the bacteria. It does change the texture when it thaws but I don’t get the idea you are concerned about that.

  154. May I make several suggestions? From what I have learned, microwaving food is not good. For the trouble it takes to heat the milk in a pot, you’ll have a much healthier yogurt. If you allow your yogurt to ferment for 24 hours in the oven, almost all of the lactose will be gone, and there will be more good bacteria. Finally, Tim Ferriss (4 Hour Body) wore a blood glucose meter to determine which foods caused spikes in his blood sugar. He found that the higher the fat in milk, the less of a blood sugar spike. Therefore he recommends using cream, not lower fat milk. Cream makes awesome yogurt, and you won’t have to add milk powder to thicken it.

  155. Just want to say thank you for this fantastic recipe. I got is right first time with no effort at all. Oh! i incubate my yogurt in the storage cupboard ( airing cupboard) with the hot water boiler is installed ;-). Those UK home have one.

    1. Maybe we all need a “storage cupboard”. Thanks for writing.

  156. I am getting very gelatinous whey and not solid enough yougurt… Any ideas?

    1. Lilian,
      Gelatinous whey? Having trouble imagining that. Is this after you have strained it? Can you send me a picture? My email is pzrhodesatgmail.com

  157. A suggestion for using your whey… We use it to ferment. (lactofermentation, I think that is what it’s called). Another way to get those good bacteria into your diet and it is super yummy. We make a fermented salsa that my husband loves. A resource for this: Nourishing Traditions (cookbook) I had a workshop using this technique and it really was cool and worth checking out if you produce so much whey.

    1. Great information! Have you seen my post about whey?

  158. I saw several comments in prior posts from folks who preferred to heat their milk on the stove rather than via microwave, but who’d had problems with milk scorching in their pans. I’m one of those who prefer not to use my microwave; my Jersey cows told me never to put their lovely milk into that machine, and I promised them I wouldn’t :).

    Here’s excellent advice from Ricki Carroll, cheese queen extraordinaire: To keep your milk from sticking to the bottom, ice the pan first. I put about 1/2 inch of water into a heavy-bottomed stainless pot, cover and bring to a rolling boil for several minutes, then pour off that water (to ensure the pot is clean). Then I put a couple of ice cubes into the pot, roll them around until they melt and coat the bottom, then add my milk and heat it on medium-high setting. No sticking or scorching, and it works great for yogurt and cheese.

    1. This sounds like a great hint for people who heat their milk on top of the stove.

      1. I forgot to mention that icing the pot works fine but be careful not to touch the bottom of the pot with a metal spoon when you’re stirring. I always use a wooden spoon with this method.

  159. I make yogurt several times a week, we use it for everything, dips, in place of sour cream, I’ve even used it between cake layers with lemon zest and sugar. Strained for a full 24 hours and salted & herbed it makes a great cheese spread, much like goat cheese…but always the whey! One day I happened to be making bread decided to try using the whey in place of water in a classic French bread recipe. OH MY! It’s a must try! Used in a regular bread recipe it gives a sourdough like taste!

    1. Hi Samala,
      Love your ideas. The cheese spread sounds especially good. Have you seen this post?

  160. i was wondering if you have ever tried using soy milk or almond milk for yogurt. i tried (and failed) once with almond milk and got nothing but a big curd of almond “cheese” and a ton of whey. it all together looked quite nasty. i do make yogurt with 1% milk quite often but had heard you couldn’t with skim. glad to see someone says differently! thanks 🙂

    1. Hi Andrea, Yes, I’ve tried both soy milk and almond milk. The almond milk was a fail but the soy milk worked. Unfortunately, I didn’t care for the taste of it. Whoever said you can’t make yogurt with skim milk must be smoking something. I do it ALL the time and I don’t add anything to it like dry milk. If you watch my video, you can see how I do it. Easy, easy. Probably the same way you make it with 1%. Have a great weekend. pr

  161. Hi Paula, I just ordered a yogurt maker and it doesn’t come with instructions on how to make greek yogurt. Would I be able to do it the way you did it? using a dollop of greek yogurt, letting it incubate, and eventually straining it? It sounds kind of complicated….
    Thanks in advance!

    1. Hi Susie,
      The only difference between regular yogurt and Greek yogurt is the straining process. Your yogurt maker should make perfect yogurt. BUT…if it uses little individual jars, emptying each of those jars and straining the yogurt would be a major pain. The straining process will reduce the volume by at least half, maybe more. If you want regular yogurt, use your yogurt maker. If what you really want is Greek yogurt, I recommend you use my method with one big bowl. Oh how I wish you lived next door to me and I would teach you how to do it. Meanwhile you can watch my video. It really is very easy after you do it a few times. I recommend you start with your yogurt maker until you build up some confidence and then try my way. Write back if you run into trouble.

  162. mum always put the glass bowl on top of the refrigerator. the temp there is perfect. you dont need to wrap in cloth. just put a towel on top to cover and leave overnight

    1. Good idea. Wouldn’t work with my fridge maybe somebody else’s. One girl told me she used the top of their computer. Whatever works!

  163. Here’s an update since my process has been improved. I said in an earlier post that I couldn’t use the microwave to heat the milk since it overheated. Well the light bulb went off and I realized that if I used the microwave to get the milk started it wouldn’t take as long on the stove. What a revolution! The rest of the process is still the same and works great. So on that note I need to get in and start another batch. I’m up to two gallon a week. We put it in everything! Thanks again Paula.

  164. Ryan Goodwin says:

    Cool post, very in-depth. I’m giving it a shot.

  165. Regarding the gallon Pyrex measuring cup, I dug it out of my cupboard only
    To find out its a3qt plastic cup, hadn’t seen it in a while,I’m gone to try it next batch.sorry for the misinformation

  166. We’ve used the whey in breadmaking. It helps feed the yeast and gives it a strong bread smell. Sour dough bread is the only tricky kind of bread I know of to do this with. It’s already pretty strong smelling and tasting.

    1. Thanks Jen. I included that in my list seen here. Good to hear from you.

  167. Thank you df or allowing me to learn by your trials, errors and mostly success with this yogurt recipe. I have been contemplating buying goats milk from a farmer neighbor. wWould it work in this recipe? Please email and let me know and after I make the recipe with goats milk will share the result with you. Thanks for such a thorough lesson! God bless you.

    1. Hi Andrea,
      I have never tried making yogurt with goat’s milk. The closest thing would be raw cow’s milk as seen here. I don’t have a good source here in the middle of the metroplex where I live. Can’t wait to hear how it goes.

    2. Andrea,

      My guess is that goats milk will work great. I haven’t tried it. Anxious to hear the result of your experiment.

  168. The whey works good for part of the liquid in bread.

  169. How much yogurt does this recipe make? How many 6 oz servings?

    1. It makes approximately 6 6-ounce servings but this can vary widely depending on how much you drain your yogurt and how much milk you add back in.

  170. I too must thank you for showing us all how to make Greek yogurt. I’ll be making my sixth batch before bed tonight because my buillon strainer arrived today! I’ve been learning along the way and think I finally have it. The microwave doesn’t work for me because it overheats. Guess I have a cheapy… So I heat a gallon of skim milk on the stove and then transfer it to two Pyrex mixing bowls. While it’s cooling down I get my ice chest and layer the heating pad between towels and put both bowls in. Cover each with foil (my Pyrex are really old and don’t have lids), put the thermometer in one, and close the lid, and turn it on low. The next morning it’s ready to strain. I added the flavoring to the first five batches but have decided to leave it all plain and my husband or I can add whatever we want when we’re ready to eat. That way I will always have plain yogurt ready to use and won’t have to worry if I forgot to keep out starter from my last batch. I love it! As a side note I have lost a lot of weight with yogurt as my major food for breakfast and lunch. Don’t know what I’d do without it! Even got my husband into eating it. And now I can save money too!

    Paula, I’m interested in how you froze your starter. Did you just put your 2 teaspoons in each ice cube tray and freeze? I would assume they can then just be popped out and put in a zip freezer bag?

    Thanks again for all your hard work. I just spent the afternoon reading all the comments. Love it!

  171. I have been making yogurt the low tec way for some time, I don’t have a thermometer so I bring the milk to just below the boil and then cool it down to just warmer than luke warm (finger test), I add the starter yogurt from my last batch and then wrap the pot with a couple of big blankets over night. I found in the summer that was all I needed but now in the winter when it is cooler I put a hot water bottle on top of the pot lid before I cover it. I get great yogurt!!

    1. Hi Hilary,
      It’s easy, isn’t it?–Once you get the hang of it and figure out what works in your house. Thanks for sharing your low-tech method.

  172. Mary Mary says:

    Thank you! I found your website yesterday morning, and realized I had the things necessary: milk, a fresh container of store-bought plain Fage, a microwave, and an oven with a bread-proofing setting. Your video and directions are excellent. By the time I went to bed (ok, really late), I had six little tups of homemade greek yogurt in the fridge, in addition to what I ate right away. I am so happy.

    I didn’t have a chinois or bouillon strainer, but I did have a jelly strainer (for canning). It’s a thin-mesh bag that fits over a stand on a tripod, and it worked fine. Not too messy to clean up either.

    I sweetened mine with honey and added pomegranate “molasses” (from the Middle East foods store).

    Someone asked why not add sugar-free Torani to the hot milk. I wouldn’t add sugar-free syrups to anything that will remain hot (unless you’re going to drink it right away), because most artificial sweeteners break down with heat and either lose their sweet altogether or change flavor to something bad. I would add it after the straining, as you show in your video.

    Overall, everything worked great, and it wasn’t difficult at all! Thank you, thank you, thank you for your gift of easy homemade Greek yogurt. I’ma go have a cup right now.

  173. Michael Baily says:

    Thank you so much for all the info you have posted on your site. I don’t know if this is new or helpful information for you, but here goes.
    I use UHT milk, non fat. That way, I completely skip the first step, all I have to do is mix in my starter and heat the milk to 110. I’ve used the boxed UHT milk(works the best) and “organic” milk which is also UHT. It works, but takes longer to gel.
    Step by step, here we go:
    Pour four cups hot tap water into slow cooker, turn on high. Pour starter in 1 quart Pyrex measuring cup, slowly whisk in milk until the cup is almost full. Put it in the
    slow cooker and cover. After about 15 minutes, check the temp of the milk. When it gets to 110, turn the slow cooker down to warm, and leave the cover off. Takes about eight hours, depending on the brand of milk you use. Refrigerate until it cools. Put a mans handkerchief in a large strainer, place it over a bowl and pour the yogurt into the strainer. I let it sit overnight in the fridge to drain. I then pick up the handkerchief and squeeze it like hail to get all the whey out. This makes a very thick yogurt cheese. If you want it thinner, just mix in some whey or milk. This is great for lactose intolerant persons, as the whey has most of the lactose in it.
    Because the yogurt cheese is so thick, it does not stick to the handkerchief, so that goes under the kitchen faucet, gets rinsed, then folded over the edge of the laundry basket until dried, then washed with the next load of clothes.
    Thanks for listening. If you are curious, go to Amazon.com, click on books, then type in my name, Michael Baily. You will see something you might be interested in!

    1. Hi Michael,
      Sounds like you have your method worked out perfectly. Thanks for sharing. You never know when you might give somebody else an idea that helps them make it too. paula

  174. I LOVE YOUR WEBSITE! Thanks for all the great recipes!

    1. Thanks Diana. welcome!

  175. david the grecophile + gardener says:

    Hello Romaine,
    What a sweetheart you are!!!
    This website seems as smooth as the yogurt you create. It also seems like it might be a shared endeavor, so congratulations to your hubby for all his support and contributions as well. The video is just great!
    I recently watched the movie Julie and Julia (about french cooking for Americans) where a time constraint drove the blogging and the cooking schedule. Glad to see this is really a project of simple “foodie love” and sharing, with no hard deadlines or something to prove.
    I would appreciate it if you would share what you have learned about chilling and freezing these yogurt cultures. I think my yogurt making cycle would be about every two to three weeks so the culture wouldn’t be as fresh unless its growth could be slowed down by freezing or chilling to temperatures cooler than refrigerator (58 deg F), but above ice making level
    ( say 38 – 40 deg F).
    I like the idea of using the whey in cookies or bread. I’ll have to explore that further and see
    where it might be combined with buttermilk for a potential taste boost and possibly better
    “crumb.”
    I am planning to experiment with stevia by growing it, drying it, then making a syrup of the dried leaves which could then be frozen and used for sweetening a variety of things….maybe even the bread and the cookies.
    I also like East Indian cooking. Yogurt is used in the chutneys which help the diner to mellow out the spicier dishes. I can try this approach with greek yogurt and Indian yogurt to see which one I prefer.
    In my imagination I’m already conjuring a yogurt chutney mixed with chopped olives and roasted peppers to compliment a well made dish of lamb Rogan Josh, which also uses yogurt to bled its ingredients. A plain version would be great with any of the Vindaloo variations.
    Yogurt is often used as a meat marinade though a less thick version would probably be preferable.
    Have you given any thought to doing a “thick and chunky” (low cal) sour cream? Just
    shopping for the right culture for your home made version would prove to be an adventure
    all by itself.
    F – Harry – Stow (epheristo)! Y’all

    1. Hi David,
      Thanks for writing. You have some interesting ideas. Homemade sour cream? Don’t use it much so probably won’t pursue that one. I use unflavored, unsweetened Greek yogurt instead. However, I have frozen yogurt starter and it works great, even months later. Plan to do a post about it soon. paula

  176. Fran Noerr says:

    Thanks for the great info! I’m a mother of 5 on a tight budget! Everyone of my kids loves yogurt! You just made my night! I know what I’m doing this weekend…Greek yogurt and jar salads!!!
    Ps I love mason jars now i can fill all of them up!

    1. Hi Fran,
      Thanks for writing. Happy Mother’s Day! pr

  177. You say you use this method because is healthy. Well, if you warm your milk (or anything for that matter) in the microwave, much of the “healthy” part will be lost due to the creation of free radicals (those nasty little buggers you try to combat with anti-oxidants.Knowing this, I do use my microwave, but in a very restricted way, when I absolutely cannot employ any other heating method. If you do use the microwave as you say so frequently, and are concerned about health issues, I personally switch to heat in a double boiler, or some other method that does not involve microwaving

  178. Hi Paula. I am a misplaced Texan that has been living abroad for many years mostly in the Middle East but now in Korea. My Iranian wife has been complaining that she can’t find low fat plan yogurt here that is not sweetened so I did a YouTube search and found you. Great video! I made a batch and it turned out very good. Your video mentions tossing the whey down the drain or watering plants, or making bread with it. I tasted the whey and was struck with its flavor being close to a common drink in the Middle East called laban. I added back some yogurt to the whey and a dash of salt and BINGO! It is exactly laban which I grew to love over a decade in the Arab world. I did a quick search to give you an example of laban: http://www.karoun.com/drinkinglaban.html

    Laban is addictive as a drink. Also, if you make cornbread with buttermilk, make this laban and use it instead of buttermilk. In my opinion it makes cornbread taste even better than when buttermilk is used.

    So use the whey! In a glass of whey stir in enough plain yogurt to give a consistency about that of buttermilk and add a bit of salt. Another popular way the Arabs make it is by adding mint instead of salt. Either way, chill it and drink it cold.

    By the way, watching your video I told my wife, I bet this lady is a Christian. Know that you shine the light of Christ Paula. God bless you.

    1. Hi Bobby,
      I will look into this idea of laban. I have used whey instead of buttermilk in many recipes but I’m thinking it’s not much different than whey and yogurt together. Must try adding salt.

      Your last sentence–well, what an encourager you are. Thanks and God bless you too. Have a good week. pr

  179. Hi!

    Great recipe! Whenever I make chhese, I take the whey and use it in my favorite bread recipe instead of water. It makes the bread higher in protein.

    1. Carm, Thanks for writing. I like the way you recycle whey and use it in bread. I especially like it in French bread. pr

  180. So glad to hear from you, Ted. I have also had good luck with freezing yogurt to use as starter later. If fact, I have a post in the works about that. I’ve been curious about the yogourmet. Nice that you got it cheap.

    Congrats on all the weight you’ve lost. pr

  181. Frances Marshall says:

    Hi, I’ve been making yogurt at home for years but only recently discovered Greek-style. Thanks for going to the effort of putting this on the web. I would love to use a thermometer that has an alarm set to go off when the temperature goes down in the milk I’m waiting to cool. It sounds like yours does. All the ones I can find only go off when the temp gets up to the desired temp. So if I put the probe in at 175 degrees with the alarm set at 110, the alarm goes off immediately because I’m over the desired temp. If yours works the other way, what brand is it? Thanks

  182. Carolinne says:

    I found this website with some uses for the whey:

    http://www.livestrong.com/article/445877-uses-for-whey-from-strained-yogurt/

    I’m intrigued by making ricotta cheese with it.

    I used a slightly different heating method – while heating and cooling the yogurt, I had my crockpot (empty) and turn on to low. Once the warm milk was ready to set, I poured it into the crockpot, turned it off and wrapped in a blanket. It did come out thinner than I prefer my yogurt, so its straining now using a coffee filter as I don’t have a very fine mesh strainer.

    1. Caroline,
      If you find a good way to make ricotta cheese from whey, let me know. I have tried a few but none worked.

      If you love Greek yogurt, it is totally worth it to invest in a good, fine mesh strainer.

  183. BERNARD KERBEL says:

    I HAVE BEEN USING YOGURMET STARTER FOR REGULAR YOGURT,
    IT HAS BEEN WORKING ALLRIGHT,BUT I WOULD LIKE TO MAKE GREEK
    YOGURT WITH THE SAME STARTER,CAN I DO THAT?
    I USE A YOGURT MAKER WITH 7 GLASS CONTAINERS.
    COULD YOU LET ME KNOW HOW TO MAKE THE GREEK YOGURT.

    THANK YOU

    BERNARD
    PD: I LIVE IN MEXICO CITY.

    1. Bernard,
      Yes, you can use the yogurmet starter for Greek yogurt. The only difference between regular and Greek yogurt is the straining process–which frankly, is a bit of a pain if you are using a yogurt maker with small glass containers. That means you would have to strain each jar. Much easier to make it in a big glass bowl, strain, and then pour into small jars. You might find it helpful to read through my post about making yogurt again.

  184. 2 quarts is alot of yogurt to make and too much for me to handle. Is there any way i can reduce the amount milk i start with? Lets say I use 1 quart instead of 2… How will this change the amount of yogurt made and the temperature/times do you know?

    1. Annabel,
      Yes, you can easily make 1 quart but then you will only get about 1-2 cups of Greek yogurt. It keeps for a couple weeks so I like to start with 2 quarts. Just cut everything in half. Temperatures will all be the same but if you microwave the milk to heat it, the time will be a little longer than half, depending on your microwave. Incubation time will remain the same. 4-8 hours.

  185. Mary ellen says:

    You can use they whey to substitute buttermilk in some recipes like buttermilk pancakes or muffins.

  186. Paula,
    Thanks for answering my ?’s. Believe it or not I actually lost weight eating that high-fat yogurt 🙂 but now I’m looking for a healthier way to keep it off. After reading your site more, I tried making the yogurt again today. The troubleshooting I tried didn’t change the outcome for me. But that’s ok, I’ll keep making it and see what happens. The taste is great, so much better than store bought! Thanks

  187. Hi Paula,
    I have a question, I’ve been making my own yogurt for almost a year with whole fat milk. Wanting to find a non-fat alternative, I came across your site. Using skim milk made my yogurt much thinner than I am used to and it looked thinner than your video (I didn’t add powdered milk). Straining it made it the thickness I am used to but the end product only left me with 3 cups of yogurt compared to the 8 I would normally get. Did I do something wrong that it wasn’t very thick before straining it? I let my yogurt sit over night, do I need to let it incubate longer?

    1. Hi Kris,
      I haven’t made very much yogurt with whole milk–can’t afford the calories. (One of my readers once told me she fed whole-milk yogurt to her cats daily and they fattened up quite nicely. YIKES!) But when I did, it did not set up as thick as the yogurt I always make from skim milk. Go figure.

      In my years of making yogurt I have noticed some differences in brands of milk so that is something you might experiment with. I rather doubt that you need to incubate longer. I only incubate about 5, sometimes 6 hours and it is as thick as after 10-12 hours. Longer incubation times just make your yogurt tangier, not thicker. How much starter do you use? I only use 1 teaspoon per quart of milk. Many people use much more than necessary.

      I also do not use powdered milk any more so don’t think that is an issue.

      If I let my yogurt strain for quite awhile, say more than 90 minutes (I do not use cheesecloth which slows down the process), I sometimes end up with only 3 cups or a little less than 1 quart of yogurt when I started with 2 quarts of milk. This is usually too thick for my tastes so I add vanilla soy milk back into it as I whisk which makes it super creamy and less cheese-like.

      I would encourage you to keep experimenting. Write back and let me know how it goes. pr

  188. MareeAlison says:

    Hi Paula – I can’t find my original comment which you responded to. You asked about the yoghurt maker – it holds 1.5 litres (which my online converter indicates is just over 1.5 quarts US). It doesn’t have small jars – just one big container. It’s similar to ones I’ve seen on Amazon which cost a lot of money – mine was fairly inexpensive and I bought it from the people who run the cheese making course I did. Re UHT milk – it’s long life milk and not used a lot in the USA – here’s a link about it: http://en.wikipedia.org/wiki/Ultra-high-temperature_processing. It’s used in some European countries a lot and is useful if you don’t have easy access to refrigeration though it does need refrigerating once it’s opened. Since it’s already been heated the protein issue you mentioned is addressed. It just is simple as you can use the milk right out of the container and not have to worry about heating it. Thanks again for your site and videos. They are fantastic. Cheers MareeAlison

  189. Hello – Thanks for the great advice! I have been trouble shooting my yogurt making process and thanks to you I think I have solved my problem – the last batch turned out terrific! I needed to strain it better and not add frozen fruit. Thank you!

    1. Kate,
      Congratulations! So glad to hear it. pr

  190. A good use for the whey is to substitute it for the water in a bread recipe. Equal amounts. So if the bread recipe calls for 3 1/2 cups of room temperature water, use 3 1/2 cups of yogurt whey, instead.

  191. MareeAlison says:

    Thank you so much for your video – it’s helped a lot. I recently did a cheese-making course here in Sydney, Australia and I also learned to make greek yoghurt, using a probiotic starter in granule form which I keep fresh in the freezer. One thing they recommended (probably for us lazy yoghurt makers) was to use long life milk (UHT it’s sold as here which stands for Ultra Heat Treated, I think). The reason being that it doesn’t needed to be heated again to remove any bad bacteria. I also bought a yoghurt maker which keeps it at a constant warm temperature while it’s setting as I can’t use my oven. It’s all pretty simple but no-one mentioned STRAINING AWAY THE WHEY (try saying that quickly, phew!!). I could only get a really good set with whole fat milk which I don’t want to use. Now I can use your method and I can see from your video that my Point One fat version looks just like yours so I’m not going wrong. I’m off to strain off my first batch of yoghurt which has just finished it’s 10hr shift in the yoghurt maker. You’ve made my day. Hugs from Australia.

    1. Maree,
      Congratulations on making successful yogurt. I have a couple observations on what you wrote. I am not familiar with UHT milk. What you say may be true. However, another reason to heat milk is to weaken the protein links so your yogurt will be thicker. I don’t really understand the process but experience tells me it helps.
      Re: the yogurt maker. Is it large or does it have several small containers? If it is the latter, it’s not so convenient to strain each little jar and then put it back. I usually recommend people skip the yogurt maker. The only advantage is that it incubates yogurt at the perfect temperature but that is pretty easy to do on your own without a yogurt maker.
      At any rate, the more experience you get making this delicious stuff, the better it will be. Promise. paula

  192. I am trying this recipe this weekend. We have an electric yogurt maker, and we make regular yogurt often, but I just can’t seem to quit the Greek yogurt, and would much rather make it than keep buying the little containers.

    I do wonder, has anyone found a (healthy-ish) way to make the fruity goodness in the bottom of the storebought kinds?

    1. Sarah,
      You might try my strawberry sauce in the bottom. I usually just mix it in when I get ready to eat but because it is cooked, it would survive nicely at the bottom of your yogurt.

  193. Hi, I just tried it for first time. I turned out pretty good in texture but it has a little bit of an acid flavour. I had it 12 hours i the oven (I have a non-electric oven so i didnt turn it on, instead i put my mixture inside a box which was inside other box, in the middle i put cartoon and newspapers and stuff, i covered everything with a big blanket and put everything inside the oven) What could have happened?waht can i do?Thanks

  194. I am afraid that’s to late! Making my second batch right now! Next I am going to try your sweet potato chips!

    Just one question, when you mean per 2 servings for your sweet potato chips = 70 calories. Do you mean with 2 medium sized sweet potatoes? Or two slices of chips? Because I think calories in just one sweet potato is more than 70 calories!
    Thanks!

    1. Hi Adrianna,
      You made me laugh about the yogurt.

      Re: the sweet potato chips
      The recipe calls for one sweet potato. But you get two servings from one sweet potato. So theoretically, one sweet potato would be close to 140 calories. Of course, every sweet potato will be a little different size, so the calorie count is only an estimate.

  195. This is awesome! I just tried it out last night, didn’t have an oven with a lighter so I popped it in my mini oven toaster (also wrapped it with tin foil + a warmed towel) left it for 12 hours and it came out DELICIOUS!
    thank you so much for this recipe!

    1. Hi Adrianna,

      Congratulations on your successful yogurt! Beware of the possibility of addiction. 🙂

  196. I made my first batch of yogurt yesterday (well overnight). It is now draining. It seems to me that the amount of whey is considerable and the actual yogurt is quite small. Possibly something went wrong? Is this normal?

    1. Trisa, exactly what proportion is the whey to yogurt? I drain mine until it is at least half and half. 50% whey and 50% yogurt. Sometimes I have even more whey. I don’t like my yogurt to be very tart so I drain as much as I can and then add milk back in to consistency I like–something like sour cream. Sounds to me like your yogurt has turned out perfectly. Some people don’t drain at all and stir the whey back in. It’s an option. pr

  197. I have a use for some the whey, use it in your recipes that call for buttermilk. I just started making yogurt for our family we are on batch 3 in 6 days. It would is totally worth the effort, and the whey is fabulous in my carrot muffin recipe. I just store it in a mason jar in the fridge, I’m out of eggs or I would be baking right now:)

    1. Thanks Amie,

      Great idea about the buttermilk substitute. Some time ago, I wrote more about it here. pr

  198. btw I tried it twice, with the same results. could using low fat milk be the problem?

    thanks!! 🙂

  199. Hi I tried the recipe out, but when i was done with the incubation period, it was just milk that tasted like yogurt, help?

    1. Parvs, I’m so sorry it didn’t work for you. I know you must be frustrated. Check my troubleshooting post I don’t think using low-fat milk is the problem unless it was not fresh. I have used it many times myself. Make sure you are not taking any shortcuts and use a thermometer. Wish I lived next door to you so I could help. 🙁 Regards, paula

  200. Just finished my 6th or 7th batch of your yummy yogurt in the last two weeks. Thank you so much. I wasn’t sure about buying a stainer so I bought a mesh bag you strain your paint thru at the hardware store, washed it really well and put it in my colander. It works perfectly. Clean up is easy, turn inside out and rinse then wash with soap.

    1. Hi Granny,
      It’s addicting, isn’t it? Sounds like you found a way to strain the yogurt that suits you. If you continue to make lots of yogurt, I highly recommend investing in the good strainer though. It is well worth it. Glad you took the time to write. pr

  201. I just made this yogurt for the first time the other day and my results were amazing! It’s delicious, and making my own is going to save me a fortune. Thanks for posting such detailed instructions and advice!

  202. Great recipe indeed! A friend of mine sent me the link and I tried it. I had made yogurt before but never thought to strain it, which is a great idea. The taste is much sweeter.
    On the other hand I use full fat milk – sold at the market by the peasants – which is just pure raw milk! No pasteurisation, no UHT! 🙂
    I make it on the stove as I do not like to use microwaves and it works without problems.
    I did not understand the point of adding nonfat dried milk…
    Another big cultural difference is that you (USA and big part of the Europe) are used to the sweet yougurt, since almost everybody buys it from the store.
    I suggest that you eat it just like that. I find that any sweetener is altering its special taste.
    Many thanks and all the best!

  203. Christina says:

    I made my yogurt last night, and when I woke up it still was liquid! what happened? and can I do it again using this same milk so I dont waste it or is it now garbage?

    1. Christina,
      Yes, you can try again. Bring your milk back up to 100 degrees and try with new and maybe different starter. Check my troubleshooting post to be sure you are doing everything right.

      Good luck. Let me know how it turns out. Paula

  204. Carla Berkley says:

    wERE DO YOU HAVE TO PUT THE yogurt THAT IS in the strainer till the yogurt is reduced by approximately half.
    DO YOU HAVE TO PUT IT IN THE REFRIGIRATOR OR LET IT IN A WARM PLACE?

    1. Hi Carla,
      That’s a good question. I leave my out on the counter because it only takes about 45 min to 1 hour to strain when yogurt is at room temperature. I always do mine right after I make it, before chilling. What’s another hour or two of warmness when it has already been sitting out warm for hours. But if you prefer, go ahead and put it in the fridge to drain. It might take longer. Since I make huge batches at a time, the biggest challenge for me would be clearing out a place big enough in my fridge to set the bowl with the strainer inside. If you are straining AFTER the yogurt has been completely chilled, it will take MUCH longer to strain, so I recommend you put it back in the fridge. Hope this helps. pr

  205. Just wondering if you could use your counter top roaster? Do you think it would hold the 100 degree temp? So excite to try this. Thank you.

    1. Sounds like it would be worth a try. You might try it with water first and test the temperature as you go. pr

  206. Hello, Nice technique. Since I (and all people from India) make yoghurt at home on a daily basis, i thought I should share some tips. We do not strain our yoghurt but we either buy slightly whole milk, boil it on stove until the fat starts to come up to the brim, Cool it until its lukewarm and then spoon in some culture OR we buy skim milk and boil it for a long time in medium flame (about 20 min) and then do the rest. This will help make very thick yoghurt and give a 1.2:1 milk to yoghurt ratio. This also cuts down hands-on time. Another trick to setting an excellent yoghurt is to place the container in a thermo lunch box. I have a stainless steel lunch box that sits within a thermo casing. This helps maintain the lukewarm temp for a long time helping the yoghurt set consistently thick. Hope this helps.

    1. Hi Jane,
      Thanks for taking the trouble to share how you make yogurt. Always nice to hear from a pro. pr

  207. Sorry for not proof reading above post; temperatures should have been Deg F. I’m part of the lost generation schooled in Fahrenheit retired in Celsius. With 2 of our boys temporarily back home, yogurt among other things has been has been hard to keep in stock. Your site was the first one I hit when I searched homemade Greek yogurt. I would like to thank you and the many others that take time to make information available for the rest of us, with out it I would never have got started. I’m amazed at how easy it is to make; and my wife and boys rave about how good it is.

    1. Hi Glenn, You have echoed many of the things I stated in the various posts I have written about my own yogurt-making experience. Sounds like you may prefer regular yogurt as opposed to strained or Greek yogurt. Nice that you can decide when you make it yourself. Happy yogurt-making! pr

  208. I set out to find a good method to make greek yogurt; after some trial and error and lots of researching here is where I ended up.
    My first batch although it tasted good had a curdled texture and a lot of whey liquid.
    If you are looking for a creamy smooth texture and mild taste here are a few things I learned along the way:
    1) Incubating longer is not better; once the yogurt sets leaving it longer only increases the amount of whey liquid and sour taste
    2) Temperature is imoprtant higher temperatures (105+ deg C)will produce yogurt quicker but it will be grainer and have more whey liquid. 100 deg C produces the best (creamy) texture
    3) Incubate yogurt in the container you intend to store it in: disturbing the yogurt before it is chllled separates the whey.
    The meathod I have acheived best results with are as follows:
    1) In stainless steel pot on stove top(@ med) heat 2 quarts milk (I used 3.25%) slowly, stirring constantly to 195 deg C. Turn off heat and continue stiring as cooling until temperature gets down to 170, then stir occasionally until 110 is reached.
    Note: to kill any unwanted bacteria the temperature needs to be over 185 deg C for 10 minuets
    2) Blend 2 Tbls plain yogurt with a small amount of the heated milk first; then add it to the rest of the milk and mix well.
    3) Fill containers with mixture (I used 2-1 qt. mason jars) and cover with saran wrap.
    4) Place in oven pre-heated to 100 deg C. (our 20year old oven’s digital thermostat starts @ 100 deg C)
    5) in approx 4 hrs the yogurt should be set up with no liquids on top; don’t stir or shake; put jars in fridge and chill before use

    This produced a mild creamy yogurt with no whey separation, so I haven’t bothered to go to the extra step to strain the yogurt. Also 2qts milk made 2qts yogurt (no dry milk added)

  209. I made it! I had to trouble shoot the first batch and figured out that if I put my electric oven on warm for 15 minutes or so and got the pyrex container and placed it in there (I put the ceramic plate on the top in the oven) and closed the oven door and turned the oven off………in the morning it was ready to drain the whey.
    I use the whey to make my white bread in my bread machine and it gives it good texture.
    LOVE the greek yogurt!

  210. sorry, it being the whey.

  211. i have used it in making my wheat bread. the sourness adds a nice flavor to the bread.

  212. I have had trouble keeping the temperature right, now sorted. Once the milk falls to 100 degrees I mix the yogurt in and put the lot in a food thermos (vacuum flask), leave for 8 hours and the tempeature seems to fall by about 2 or 3 degrees over the whole time. Perfect.
    I drain it through a fine plastic flour sieve which works for me.

  213. Leonor Yarhi says:

    Can I use the drawer warmer?

  214. I have made yogurt cheese for years using a #6 Melita coffee funnel and an unbleached #6 Melita coffee filter. It handles @ a quart of yogurt at a time. I have a carafe that my cone fits well on, but have also put it on a smallish bowl with no problems. Anyway, I pop a filter into the cone, add the yogurt and put the whole thing into the fridge over night. I think that chilled whey is tart, refreshing and delicious, so I drink it. The cheese is spreadable (and now, thanks to you, I know that if I use Greek yogurt as a culture, and strain it for only a couple of hours instead of over night, it is the same as Greek yogurt – yippee!)- great on toast, plain or with jam, great with herbs, in chili – whatever. For firmer cheese, just leave everything in the fridge longer. I’ve never done this for 48 hrs, as was mentioned in one post. I would probably put a damp cloth over the cone if I was going to process the cheese that long ( over night I don’t even bother to cover it.)

    1. Hi Jim Ann, Interesting to hear how you do it. Good idea for smaller amounts. Yogurt cheese has got to be a great calorie-saver! pr

  215. I just love this video of Paula teaching me how to make homemade Greek yogurt. I watched it 4 times, then tried it and it worked PERFECTLY! I LOVE that I don’t need a yogurt machine. Instead I went out and bought a fine, cone-shaped bouillon strainer and an electronic thermometer. I have been wanting to make homemade yogurt for awhile now, because my husband and I eat a lot of it and it is so expensive. I was so excited when I took my large Pyrex measuring cup out of the oven and the yogurt was so thick! The final steps of whisking it until smooth and shiny, adding sweeteners and / or flavours and a splash of coconut milk just make it amazing!!

    1. Glad to hear the success stories, Linda. pr

  216. Jeanne wilson says:

    Have you tried using a Crockpot for the incubation period?

  217. I looked up the strainer, but it looks very similar to what I already use for yogurt cheese. I can’t see a real difference. So, in my opinion, the best, most economical strainer for yogurt is this one: http://www.amazon.com/Cuisipro-Donvier-Yogurt-Cheese-Maker/dp/B000064841/ref=sr_1_1?ie=UTF8&qid=1326730726&sr=8-1. It is great for yogurt cheese, but with a shortened strain time, it would work great for this. Also, the container has a lid, so it is all contained nicely while it is straining for no mess. Thanks for the post, I will definitely be trying it!

    1. Hi Dawn, yes, that is a nice strainer that should work just fine. However, it is not nearly big enough for my needs. I strain 2 quarts at a time twice a week. So you can see how size is a major issue with me. I have purchased other very fine strainers that also work without cheesecloth or coffee filters for less. They work but the expensive one is still my favorite.

      Have you read my post about strainers?

  218. Mary Wilson says:

    I made two batches of yogurt this weekend. I eat it every morning. Anyway, I haven’t been making it very long and had not bought a new strainer. I had notice on previous batches I might have been loosing more yogurt than I thought down the drain. I just really didn’t want to buy more stuff. I had read about using cheescloth and a hankerchief which I had neither but what I did have were coffee filters. I had to use several to get a good fit but they worked beautifully. No mess left in the strainer. I am going to see about getting some commercial ones that would fit the colander I use. I may ask a business if I can buy a few and see how it works or find someone to share with.

    1. Hi Mary, Some people use paper towels the same way. It’s not for me but if it works for you, I say “Fantastic!”

  219. Hi Paula, awesome recipe, thank you for sharing. I’ve made several batches of yogurt now and it’s great! Have you ever tried making ricotta cheese from your leftover whey? If so, I’d love to hear about your experience with it.

    Thank you!

    1. Staci, I tried making ricotta cheese from whey once. It was a total fail. Tried making it from regular milk and it worked great! pr

  220. Oops, sorry I missed that! I usually use whey for broth-making soups. It almost seems to extend the meaty flavor a little and adds some richness. I’ve never used it to replace anything besides water though. The idea to imagine it as clear buttermilk is very intriguing.

    The biscuit idea is a neat one! I already use regular yogurt to make biscuits and they’re pretty awesome every time now (a big change from before, hehe). I think of yogurt as a potential replacement for milk, buttermilk, or even sour cream in recipes these days since I’ve started making it and keeping it on hand all the time.

    I can’t wait to try using the microwave for heating my next batch (I can’t believe it didn’t occur to me before reading your directions). I’ve had the best luck from partially submerging my jars in a stockpot of water and heating everything together, but it is slow. And REALLY slow waiting for it to cool back down. (But it works really well and all I have to do is add the lid and cover with a towel all night). Now I will just need to bring the pot of water up to 115. 🙂

  221. Awesome recipe, and my dog loved the whey on her breakfast kibble. I’ve had yogurt every morning this week and its delicious!

    1. Did I warn you that it is addictive?

  222. I know this is rather late, but whey is fantastic when used as a substitute for water in rice or soups. I find that it helps to enhance the rich/meaty flavor in soup.

    1. Thanks Lystessa, I wrote a whole post about uses for whey that included this one. I’ve observed that it isn’t good in all soups though. Had to throw out the last soup I made with it. What kind of soup do you like to use it in? Paula

  223. Hi. I want to try your recipe soon. I think the outcome is really appetizing. But I was wondering if I could use a dry skim powder instead, diluted in water? And also, I don’t have any kitchen thermometer, what hints can I have to know if I can already stop the boiling process, add the starter and right incubation temp. Thank you so much! 🙂

    1. Gale,
      I know people who make their yogurt with dried milk. I do not care for it myself. Didn’t like the texture or taste–but you might.

      Re: thermometer. Wow! I really think every beginner needs a thermometer. You can get them cheap at the grocery store. After you make it for awhile, you will have a better idea but I’ve been making this stuff twice a week for over 3 years and I still use one. It takes the guesswork out of it. There are enough variables out of your control whenever you’re working with live cultures; might as well help yourself as much as possible with a thermometer. People will probably write and tell me their mother never used a thermometer and makes wonderful yogurt. But I’ll bet they learned at the elbow of their mom and have made it since they had to stand on a stool to stir it. 🙂

  224. Joni Bergeron says:

    Just put my first batch of greek yogurt in the fridge! May have strained it a bit too long because it is super thick, but that is fine with me! Thank you for sharing all of you useful knowledge with us! I can’t wait to taste it!

    1. I sometimes strained mine too long but I kinda like it that way myself. Adding milk back in makes it so creamy and mild.

  225. I love your site. I wanted to share an observation I’ve made in my own yogurt making. I’ve found that letting the milk cool to about 90 degrees improves the consistency. I used to cool to between 100-110, but on accident let it cool to 90 and I was amazed by the improvement. I imagine the resultant greek yogurt would be improved as well. I’ve not tried that yet.

    Sincerely,
    Dawn

    1. Dawn, so glad you wrote. Interesting observation on your part. This has not been my experience as I have accidently let it cool too much several times. Didn’t get “jello” thick like I wanted. But if it works for you, great! I learned early on that making yogurt is not a precise science. Always lots of variables.

  226. Isn’t the “fat” in greek yogurt or regular yogurt for that matter, the “good fat” that raises the HGL fat levels? Thanks so much for sharing.

    1. KC, it might be. I can’t speak to that with authority. For me personally, full-fat yogurt means full-fat hips. No thanks. But thanks for writing. Always fun to hear what others are thinking.

  227. I had a quirky thought tonight. I drizzled some maraschino cherry juice and agave nectar over my yogurt. I liked it. I guess we can call it Shirley Temple Yogurt. 🙂

  228. welp, i made the ingredients for greek yogurt. heated the milk and cream, once i figured out it was for Half a gallon instead of a whole one (made from powdered milk). i’d started with just heating the milk, so it was fairly hot when i realized the cream needed to be added, but it was only half as much as needed for all that milk cooking, so half was ouchily taken out and heavy cream added. Didn’t realize the 180 degrees was Fahrenheit. (just bought a thermometer, it shows both). ALMOST overcooked it. when it was cooled to 110, 2Tb yogurt added. tried to keep it warm but it looked soupy after twelve hours; still sort of warm,cranked up the heat & added 2 more Tbs yogurt. It sat all day trying to stay warm. Having read your advice a thousand times, i never really ‘got’ the turn-your-oven-light-on thing. Do now, of course… it looked sorta gelled, sorta soupy so i tried straining it annnd… well i decided after looking at it to dump the whole thing in a pan & reheat. End result being, i think i have made cheese. don’t know whether i should dump it all & start over, using butter as an enrichment… (being beat up cream) should i still add yogurt & see if it works or makes yogurt cheese? (this one doesn’t follow directions well) thanks for your advice!!! 🙂

    1. Yogurt cheese? That’s not so bad. There are lots of ways to use it. But personally, I would start over again. Can you just use regular milk? Or nonfat milk? I know people who use powdered milk successfully but the taste is not the best. I certainly would not add butter. If you do add cream, it should done before heating. I guess you’ve already figured out how important it is to keep the yogurt incubating at 100 to 110 F. You’ve got to get that right for consistent results. Good luck next time. Until you get it figured out, I would make small batches–just one quart or less.

  229. after discovering greek yogurt and of course being cheap looking up how to make it, i am in the process of trying your and a guy on Youtube’s recipe. Hopefully it will go well, having rehearsed it in my head dozens of times. Of course things never run smooth! i’d bought a gallon of regular milk but it went sour before i could make it into yogurt, and then i ate the yogurt and had to buy more! so instead i’m trying it with powdered milk and fingers crossed a half pint of heavy cream. read the instructions over and over and still did it wrong, heating up a gallon of milk before realizing it needed to be half that, so after icing the burns, i’ve gone so far as to heat a half gallon of milk with heavy cream stirred in. It’s cooling down now. so now i’m nervous that the correct amount of yogurt will be mixed in. you said 2 teaspoons for half the amount i’m making, hopefully 4 tsp is the right measure? oh this is so exciting you have no idea! (Yes, it’s that boring here) thank you for your friendly recipe! i’ll let you know what happens…

  230. I just made yogurt! I can’t believe it worked the first time, as I didn’t know what to expect when I got up and looked in the bowl this morning! The temp stayed perfect in my oven with just the oven lights on all night. Thanks for the step by step instructions!

  231. Making my second batch of this stuff in two days! Bought a gallon of 1% on clearance for $1.25 from walmart (due to expire on Nov.19). This stuff is SOOO GOOD!!! The only ingredient I skipped was the milk solids, simply because I didn’t have it on hand. Ended up straining it in batches through coffee filters but will try a larger batch strained over paper towels today. thank you so much for the recipe. I have saved a ton of $$!!
    Not too tangy and perfect with a squeeze of agave nectar and some mexican vanilla extract. YUMM

    1. Hi Beth,
      Love your additions. Want to try the agave nectar.
      I never use the milk solids any more. Like the texture better without it.
      I would encourage you to buy a bouillon strainer (very fine) so you don’t have to use coffee filters or paper towels. So much easier and faster. Be sure to get one big enough to hold your entire batch of yogurt. Well worth the money. Check online, places like Tuesday Morning or restaurant supply houses. Paula

  232. Great article!
    Most concise and easy-to-do yogurt recipe I’ve come upon’

  233. Hi, I make yoghurt and cottage cheese often and usually have a lot of whey left over. Considering all the whey proteins from the milk remain in the whey I really don’t like throwing it away. I live in Asia so we eat a lot of rice and I usually add the whey into the water in which I boil the rice. It gives the rice a really nice flavour if there is a enough of whey. I hope that helps (:

  234. Hi, I’m from India :-). We people set yogurt almost daily during night and have it with our food the next day. I’m setting it for last more than 15 years ie since I was a kid. Never realised its that complicated as it sounds here. We heat the milk till it is just about to boil, let it cool approx 20 -30 min. which depends on the outside climate/temperature. Use our finger to feel its just the right warmth ie neither too hot nor too cool or in simple words little hot/warm enough that you can drink it. Add the yogurt from the last night (approx 2 tsp in half litre of milk), mix it well cover and leave overnight . In peak summers there we normally do the process in the morning and its ready by the lunch time that is in 4-5 hours. In peak winters we prefer covering it with a blanket or put in a hot case overnight (10-12 hours)or sometimes longer. We as well don’t drain the whey as its very rich in protein. Whisk it add a little sugar or salt ,enjot it. We also make “raita” something like a dip by adding grated or finely chopped veggies like cucumbers, carrots, onions,raddish,cilantro (any one or in combinations) etc with little salt as per your taste and pinch sugar, roasted cumin seeds, if you like it hot can add finely chopped green peppers as well. Yogurt plays a very important role in our diet. we do add it in lot different veggies while cooking as well.

  235. Donna Freedman says:

    Like CeeBism, I have added whey to soup. I also add it when making oatmeal (a little less than half of the total liquid) because it adds a nice tang and extra protein as well.
    I strain mine through a colander lined with a piece cut off a flour-sack towel that I bought at the dollar store. These are easy to wash and reuse vs. cheesecloth which, to me, never really gets clean.

  236. Your gonna think I am crazy responding YEARS after this post but I have JUST gotten into this “yogurt making frenzy” and ran across this video where a man uses his thermal cooler and a heating blanket. I tried it and it works perfectly every time. I leave it overnight before I go to bed then, in the morning straing it through a cloth. PERFECT and it doesn’t block alot of time in my day. I have some straining now.I do notice you use powdered milk but I use Heavy cream for my greek yogurt. Hmmmmmmmm I will have to try your way.Thanks for the info I really enjoyed it.

    1. Hi Trice, glad it works for you. I listed a thermal cooler as one of the ways to incubate yogurt on a previous post. Thanks for the testimonial.

      Regarding dried milk, I no longer add it to my yogurt. Like the texture better without it. I have never made yogurt with heavy cream. I assume it is most delicious but goodness! I couldn’t eat more than one tablespoon before my jeans would start to complain. 🙁

      Enjoy the yogurt making and eating.

  237. Now that you leave the dry non fat milk out, do you still only use 1-2 tsp of starter yogurt or have you changed that amount as well?

  238. Make your own jogurt machine.
    I have one of this wonderful automatic electric jogurt machines with portion jars.
    To be able to make the next batch before the last jogurt is eaten, I tried successful following: Take a plastic pot with lid and put it in a plastic bucket double the size in width. Spray some isolation foam (normally used to fill gaps in the walls) on the bottom of the plastic bucket, then “grease” the plastic pot outside with a bit of Vaseline, that you get it later out again. Fill the space between plastic pot and plastic bucket careful with isolation foam, which will expand. Let the foam harden and voila you have a excellent jogurt fermenter , which will serve you for years to come.. The warm milk, mixed with the culture and the lid closed, will ferment over night to a perfect product without using electricity.
    If you use a standard sized plastic pot (i.e. ice-cream pail) then you can replace it if needed.

    1. Barbara,
      Your idea is absolute genius. Can’t wait to try it for myself.

  239. Hi! I use the whey in place of plain water when making bread. It gives the bread a slight sourdough taste. Delish! Thanks for this recipe. 🙂

  240. I am so thrilled that your excellent directions on how to make Greek yogurt is working for me. It is so good and saves a lot of money. I like to cook a simple blueberry sauce from frozen blueberries to serve over it, and my children eat my yogurt faster than I can make it!

    On a different note — I recently heard an interview with heart surgeon, Dr. Oz, on the subject of whole milk vs. skim. Oz maintains that whole milk is a better choice because the fat helps deliver more of the nutrients. Skim milk, he says, goes into the blood stream as a sugar(?) I find this interesting and am now making my yogurt with whole milk. I would love to hear your thoughts on this. Here is a clip of the interview that was on Morning Joe:
    http://www.bing.com/videos/watch/video/why-whole-milk-may-be-healthier-than-skim/6wm4n5i

  241. I have made lots of homemade yoghurt and have tried many different methods. I don’t use the microwave just because my microwave is above my stove and it is too difficult to a big bowl of hot scalding milk out of and not spilling it. I find the oven method the easiest and I get the most consistent results. I tried keeping my oven at 100 degrees, but what I do now may sound crazy. I set my oven to 200 and let it heat the whole time I am prepping. When I am ready, I wrap it in dish towels and set my pot inside a large stainless bowl (facilitates getting it in and out easy and keeps towels from touching walls), place it in the 200 degree oven, keep the oven on for 1 or 2 minutes and then turn it off. Usually wait about 8 to 10 hours and I have yoghurt.

    1. Cyndy, I don’t blame you for not wanting to lift a hot bowl of milk. Mine is also over the stove but it’s not too, too high. Afraid I would scorch milk on the stove.

      Your incubation method doesn’t sound crazy at all. Most older ovens can’t be set to 100 degrees so your idea may be useful to others. Thanks for taking the time to share.

  242. You can make some cheese from the whey. Also you can add the whey as the fluid to things like breads, soups, etc. If you are concerned about the flavor perhaps only replace a portion of the fluid. Also whey is a great protine for many animals too. My dogs, chickens and hogs all go crazy for it!

  243. Love this recipe and have had a wonderful time with new flavors. I think my favorite is Almond lightly sweetened with honey or splenda.I use 1% or sometimes 2% and I leave out the dry milk, for I also prefer the texture better without it.

  244. stephanie says:

    Hi Paula, I have actually written to you before with the same problem and you asked for me to let you know how it went. Well, I have to say that my results are less than I expected. This may get long and I’m sorry but I really want this to work. We live in South Korea and the milk is $4.50 for 2.3 liters, just over 1/2 gallon and so it is relatively expensive to make but it is also expensive to buy yogurt. Anyway, here goes.
    I use 2.3L of 2% milk. Heat it to 175-180F, stirring occasionally, let it cool to 110-115F, add 4 oz. plain, live yogurt, pour into 3 quart canning jars (no lids), put into my yogurt maker, wait 8 hours. After 8 hours, I end up with 3 quart jars more than half full of whey, and bubbly, curdled-like yogurt. This last batch I made today, I only drained it for about 10 minutes and I ended up with 1 quart of yogurt and a boatload of whey. I took pictures and would love to send them to you to see.
    The bubbly yogurt looks more like a yeast sponge I use for bread.
    The yogurt has a good smell to it, not tart at all but the taste is not bad, it’s just ok. It’s thin also. I have drained it for 45 minutes before but end up with only 2 cups of yogurt. The whey is overwhelming and the yogurt floats to the top.
    Please, if you have any suggestions, I would certainly appreciate them.
    Thanks so much for your help.
    Have a blessed day.

    1. Stephanie, I wrote a long answer yesterday and then reread your post and realized you are using a yogurt maker. Hm-m-m. That means your incubation environment should be perfect. The description of your yogurt sounds like it is being incubated at a slightly high temperature causing it to curdle but that should not be the case with a yogurt maker so I’m baffled. Have you tried different brands of milk? (About the curdling, I assume you mean it has a curdled appearance but is not really curdled. Mine looks like it sometimes but a quick whisk miraculously turns into to smoothness.)

      I noticed the amount of live yogurt you use as a starter is WAY more than I do. I only use 1-2 teaspoons in a 1/2 gallon. You might try cutting back from the 4 ounces you mentioned. Are you using store-bought yogurt or your own homemade yogurt for starter? It’s always hard to know how fresh the yogurt from the store is so using your own that is less than 7-10 days old is much more predictable.

      Regarding the draining, I think you may have unrealistic expectations about how much yogurt you will get when you drain. Mine always drains down to half the original and sometimes even more. That’s why Greek yogurt is more expensive. But it’s worth it in my book. The thick, creamy and mild yogurt you get after draining is the best, in my opinion. I don’t like the tartness of all that whey (some do) and I don’t like a thin or watery texture you get when you stir the whey back into the yogurt. If you chill the yogurt before you drain, it takes a lot longer but you will not usually extract as much whey so that is an option.

      Hope this helps Stephanie. If you really like yogurt, keep trying.

  245. Hello Romaine

    Thank you for this great recipe. The iogurt turned out perfect!
    I am just concerned about the incubation costs – isn’t having an oven turned on for 12 hours too expensive? At what temperature should I preheat it, in order to have it turned off during the process?

    Thank you

    1. I keep the oven on 100 degrees. Otherwise, I would just keep the oven light on. Just preheating the oven one minute and then turning off is not going hold the temp at 100 degrees for 12 hours unless your oven is much better insulated than mine. Consider other possibilities. See my post about incubation–the link is in my sidebar.

  246. Hello Paula! Love this tutorial. Cannot wait to make it. My mom makes it with milk from their cows, but uses sweetened condensed milk which isn’t quite what I was wanting for me and my one-year old son. She also wasn’t sure if it was possible with pasteurized milk, but obviously it is! Just wondering if I need to change anything if I use organic milk/starter yogurt? You might’ve answered this already, but I didn’t read all 200+ comments:) PS I also have a degree in FACS Ed. – So fun!

    1. Kari, I have not made yogurt with organic milk but don’t see any reason it wouldn’t work. Let me know how it goes.

  247. I adore the rich thickness of Greek Yoghurt, and usually have it with bananas +/or honey. The combination is just wonderful.

    I make my own when I can (strained). What I found is that I have to use starter from Greek Yoghurt. If I use plain yoghurt, I don’t get the same taste/texture of Greek Yoghurt. It seems to me that the microbes community may be different? Anyone with similar experience?

  248. I use an insulated picnic cooler with a heating pad resting lightly on tip of the covered quart container which holds the milk mix, let it sit over night (ideally 12 or more hrs cuz I like it tart!) Great results every time.
    BTW, whey is a wonderful high protein liquid. Don’t waste it, use it when baking to add a bit of sour to yeast breads!

  249. Rainbowcreek says:

    I have to try this. My daughter’s trainer insists on Greek yogurt for snacks every day and is always harping on her about her protein. We are constantly on the hunt for the best price, and our WalMart seems always to be sold out of all the vanilla Greek yogurt, although they won’t cut back on the space for all the sugary Yoplait and kid yogurts to make room for more Greek yogurt. Now we are recently unemployed and our food budget is undergoing a drastic makeover.

    My only worry is how to get a consistent 100 degree temp in our old drafty house with a 30 year old oven with no light control. I have read about a crock pot version then wrapping in blankets, any idea how that would work? Also I happen to have a commercial chinois but never use it because I dont’ have a container deep enough to hook it onto to drain. What kind of container are you using? Hope you might still have time to answer my questions, I know your post is a couple years ago. Thanks!

  250. thanks for replying to my comment earlier this week. I am trying it again today with fresh homogenized milk rather than my usual Raw milk. I am also NOT a food scientist, but I am a very curious person and I like to learn new things, so here are some things that I learned after attempt “1” that you might be interested in: My mother-in-law, a true pioneer type, told me that the whey that you pour off is fabulous to use for making ricotta cheese or you can pour it into your compost and it adds wonderful nutrients back in. i would have never thought to do that, as in my head it is diary, but she said that the whey CAN be added to the compost, but obviously not the yogurt. She also told me that heating the milk in homogenized milk is not a big deal because it has already been heated resulting in good bacteria being killed off when it was originally processed. These good bacteria are still present in Raw milk so she uses a different process to make yogurt with her Raw milk that does not destroy them. I will probably try that next time I pick up milk at my CSA. She also told me that raw milk does not putrefy like regular store milk. It just sours and can be turned into a number of things from buttermilk to sour cream to yogurt. She thinks that based on the description I gave her, i must have scorched the milk during the microwave portion.
    So, i am now in the process of “attempt 2”, better go, the timer just went off. Fingers crossed.

    1. Hi Karen, I can’t speak to the whole raw milk deal. The only experience I have with the stuff is drinking it at some friend’s house growing up. I was unimpressed but looking back, they didn’t serve it cold enough. Sometimes they served it rather quickly after milking the cow.

      Anyway, I will address something you said about heating homogenized milk. Although it does kill off bacteria, it is not the main purpose. Heating rearranges the proteins in the milk so it will set up better. I have tried side by side experiments. Both heated and unheated made yogurt but the heated set up much thicker. I have heated it ever since.

      I have my fingers crossed too that your next batch of yogurt turns out great.

      p.s. I have heard mixed stories about making ricotta cheese from whey. How does your mother-in-law do it?

  251. Never thought of making my own yogurt. I use it often in my smoothies. Wonder if it works with goat milk as well? thanks for the recipe gonna bookmark and share.

    1. I’ve heard it works great with goat milk although I’ve never tried it myself.

  252. diana rahbine says:

    Got a yogurt maker. Boiled milk, added powered milk torani syrup, poured in jars, but forgot the starter. Added teaspoon to each jar without stirring. Will it turn out? Incubating anyways guess we will see tomorrow at 9Am

  253. I just started making yogurt again after not making it for about 25 years. I still have the original yogurt makers that I was using. They did not have Greek yogurt in grocery stores in those days. I found your blog and it is great – many helpful suggestions. I have not tried your recipe yet – but I plan to. I do not like it tart. I am not sure how long to keep it in the yogurt maker – I guess that I will have to do trial and error. I have a yogurt cheese strainer, since I only need to make a quart at a time, do you think that the yogurt cheese strainer holes are too big?

  254. Edie Mullen says:

    This recipe and the entire site has been so inspiring…
    Greek yogurt for pennies! Love it!
    It seems I was one of the lucky ones whose first try out of the gate for making Greek yogurt was successful. Exactly like the Greek yogurt we pay over $5 a container for here in Canada. One slight differance though, the homemade did not have that slight tang store bought does. I used 2% milk, will using another milk get me that tang?
    P.S. I also love the salad in a jar …you are a genius.

    Thanks Again,
    Edie

    1. As you know, making yogurt is not an exact science. The tanginess factor can be affected by several things. 1. How much whey you drain out–the more, the milder. 2. What kind of bacteria was in your starter? (Who knows for most of us) 3. How long did your yogurt incubate? The longer you let your yogurt incubate, the tangier it is. At least that’s what I’m told. I have forgotten about my yogurt and let it incubate as long as 24 hours with no harm done that I know of–just turned out a little tangier.

  255. Dimitra Catsaros says:

    My family have been making yogurt generation after generation. I have a relative in a village near Sparta in Peloponisos who made yogurt every day and also grew olives and made her own olive oil. I can remember from my earliest memories of my grandmother and my mother making yogurt in the kitchen and I have never seen yogurt made this way.
    My mother (and grandmother) strained her yogurt in a big pillow case. It was never an if you want to it was an we always do it this way. The same with my relatives in the old country. You are right when you talk about Fage, that is the yogurt that I would buy in Athens when I was not buying in bulk which is the most popular way to buy yogurt. As a rule it is rare when Greeks will add fruit or honey in their yogurt. It is mostly thought as something Americans do.

    Dimitra

    1. A pillow case? They were obviously making large amounts. If they did not add honey or fruit, I’m assuming they ate it plain?? I wonder if they just kept using their own yogurt as starter year after year. Thanks for writing Dimitra.

  256. Oh I am very excited to try this! My mom makes ricotta cheese every week and I love all the flavor combinations you can make. I especially like honey & mint together in ricotta. I cannot wait to start making Greek yogurt too!

    1. Honey and mint? Wonder how that would taste in Greek yogurt. Sounds good.

  257. Hi Paula! My Greek Yogurt was a success! I have just posted on my blog and linked back to this wonderful tutorial. Thank you so much for sharing!

  258. Hi,

    I followed your instructions and lo and behold, i made a creamy, delicious non-fat yogurt! It was delicious even on its own. No sugar added whatsoever. I add in a couple more starters, thinking I need more of the bacteria to get down there if in case the milk would kill some, I made sure they had back up! =) i didn’t have a yogurt thermometer so I used an oven thermometer and placed it on the sides of the pan. (Which i think is not really accurate) I allowed it to sit about 30 minutes, milk was warm but I was able to transfer pan from the stove to the dinner table without using any pot holder. Added the starter about half the content of a solo size plain yogurt, put it in the oven, mine had no lights so just surrounded and covered it with my apron and two pot holders =P. (Talk about keeping it warm) I was really anxious the next day.. But to my surprise it turned out more than I expected! I’m now straining it (waiting for another day, yes) and can’t wait to make my next batch! Thanks a lot! I’ve bookmarked your site and pretty sure to visit this again!

  259. I have been doing this for the last month or so and I love making it! I do have a question though – how did you come up with your nutritional information? I guess I just find it hard to determine them, especially when some of the mixture is strained out. Really just curious. Thanks!

    1. Good question Amanda. I originally used the nutritionals from Fage fat-free yogurt. There’s no way to say exactly because of the variations in the milk used, the amount of whey drained out and the variations in type and amount of milk added back, if any. Does that help? You might find my post about protein in Greek yogurt (link in the sidebar) interesting. Thanks for writing. Paula

  260. I have made yogurt for years but recently tried Greek yogurt and wanted to explore the differences in its preparation. I found your site–a great reference; I can’t wait to try making it.

    I just wanted to share that I have had great success using a stainless steel thermos for the incubation process. I just boil a pot of water and add to the thermos then dump it just before adding my yogurt mixture. Regular yogurt is usually ready in about 6 hours this way. I think I’m going to let the incubation period go longer when I attempt Greek in an effort to thicken it more than the American style I typically make. I’ve found this method a lot safer than using the heating pad method. I also wouldn’t be comfortable leaving on my oven while out or through the night. If this is a concern to you or your readers I’d definitely encourage you to try the thermos method.

    Thanks again for your wonderful site.
    Jen

    1. Thanks for giving your real-life experience using a thermos. I’ve never tried it personally. Not nearly big enough but if you are only making a small amount, it sounds great.

      Might also mention that letting your incubation period go longer won’t necessarily make the yogurt thicker–just more tart. Straining out the whey is what makes regular yogurt thicker and turns it into Greek yogurt. The culture you use will also affect thickness and tartness.

      Keep me posted on how it goes for you.

  261. You can use some of the whey to make lacto-fermented pickles. The cookbook Nourishing Traditions explains how to use whey along with a brine. They are yummy and healthy for you!

    1. Very interesting Aadel. I’ll have to give it a try. Thanks for writing.

  262. barb kelly says:

    I wanted to let you know that I use your recipe every week and it’s fabulous. I have tried 2% and 1% but not fat free yet. I started out using Fage as my starter and when I ran out of that I began using my own yogurt. The only difference I found is that the yogurt with my yogurt came out much more tart than the batches made with Fage. Any thoughts on why this might have happened?

    1. Hi Barb, I slept on your question but didn’t really come up with a great answer. In general, yogurt will become more tart the longer it incubates. And, it becomes milder the more whey you drain out of it. All this varies with the type of bacteria in the starter you use which we can only guess about. I’m not a food scientist so that’s about as technical as I get. I, personally, have not had that experience but as one of my readers says, “the yogurt gods can be fickle.” If I were you, I guess I would keep experimenting. If you prefer the milder yogurt, drain out as much whey as possible and add back milk to get the consistency you like best. I would love to know if you make any great discoveries about the whole process along the way. Thanks for writing.

  263. Hi, thanks for the instructions. I’m experimenting, and being a nerd, trying to make careful measurements. I’m shocked at how much difference the dry milk makes in the quantity of yogurt produced. I assumed that after draining it wouldn’t matter but it sure does. I’m only on my second batch but adding 4.8 oz. (all by weight) of dry milk doubled the amount of Greek yogurt produced over 1% milk alone. For 1/2 gallon of 1% milk I got 41 oz. of yogurt with 4.8 oz. of dry milk versus 20 oz. of yogurt without.

    Have you noticed you get much less yogurt without the dry milk?

  264. HELLO,
    My Lebanese grandma taught me a BASIC method to make yogurt, first, heat milk until below boiling temp, then let it cool until you are able to put a clean finger into the milk (comfortably), add your 1/2 cup of yogurt from a previous batch, rap it in a big towel, keep it inside an oven over night, and VOILA…It works every time.
    Do not waist any whey….it is so healthy.
    Thank you…..

  265. I did it! I did it! And it turned out so yummy. I followed your instructions to the T (except I used cheese cloth). I sweetened it with a little honey and agave nectar and then added two TBSP of Vanilla Coconut milk. I can’t wait til it chills and I can dig in. Thanks for believing in me and pushing me to do it.

  266. Hi. I know your post was from years ago, but am hoping you can help. I have attempted to make yogurt, but can now admit that I have not been very successful. My soy yogurt turns out great (but I do not like the taste). My cow’s milk yogurt looks great in the jars, but soon after I dump it into a bowl, it separates quickly and looks chunky like really water cottage cheese. It kind of tastes like baby spit-up smells. Rather unpleasant. What am I doing wrong? Please help if you can.

  267. So, the final verdict is in. He said it was delicious, so much better than store bought! Thank you so very much for sharing your process. I am already making a second batch tonight!

  268. I did it! Thank you for your instructions and tips. I started off with a half gallon of milk and my yield was slightly over 3 cups of greek yogurt. I used cheese cloth because I didn’t (yet) have the bullion strainer, but maybe I will order one now. (You should get a cut!!) It is in the fridge now, and we will see what the verdict is when my husband digs in. It is quite a process, and really I started too late in the afternoon. I ended up having to get out of bed to start the straining process at 4 AM, but when I opened my oven and pulled out a semi solid from the bowl, it was all worth it. Next time I will time it for a completely overnight incubation. Thanks again!

    1. I have forgotten about mine and left to incubate for 24 hours. Didn’t smell bad at all. No harm done.

  269. Hi! Thanks for the recipe. It came out pretty good the first time I tried it (which was about 3 months ago), and as time goes by my recipe keeps getting better and better. I play around with the straining times to get different consistencies. I read Robert Johnson’s comments, and would like to offer some advice if I may. Robert, try this: first of all, try doing a small batch (1 liter or so) so you don’t feel like you’re wasting milk in case it doesn’t work out, and also so incubation time will be shorter. Once you’re ready to incubate your milk, preheat your oven to warm (no need to use a thermometer, I don’t even own one). Put your milk + yogurt mixture (in a glass pyrex bowl with cover hopefully) in the oven, close the door, and a few seconds later turn your oven off. Check your oven again an hour or so later (opening the door to see if it is still warm in there). Close the door again, and turn your oven to warm again just for a few seconds (30-60) and then off again. Most ovens stay warm inside for several hours if kept unopened (even mine, which is like 20 years old!) but if you feel that it loses the heat easily, keep rewarming it for a few seconds every hour or so without reopening the door the rest of the times. Of course, you need to do this on Saturday or Sunday, or on a day when you’re home for several hours. When I do this, my yogurt sets even faster (in about 8 hours or so, as opposed to 12 or 16 hours the first few times I tried). I hope this works for you. If it doesn’t, the trouble might be in the pre-oven preparation. If it does work, then you’ll know that the temperature was the problem. Good luck! Don’t be discouraged because it really will work one of these times, and when it does, you’ll be saving lots of money.

  270. You can use whey for anything that asks for water or milk… I use it when I make any type of bread, substitute the water when making rice, in my shakes/smoothies, oatmeal/steel cut oats… just about anything, like I said… (Think of it as a type of “broth” that can be used either sweet or savory.)

    1. Melanie, thinking of whey as a type of “broth” is a great idea. Thanks for taking the time to write.

  271. Flo Allen says:

    Thank You so much for your immediate reply.. I will just make sure to eat it all next time! I wonder if it has enough protein, etc.. in it to live on? That seems to be where I am headed lol

    Again, huge thanks to you.
    Flo

  272. Flo Allen says:

    Hi! My first ever yogurt batch was a success, Thank You! However, I went on a trip before I ate it all. Now there are blue spots of mold on the inside of container. I didn’t notice any in yogurt, but gave it to chickens anyway..Would this have been safe to use for the next starter? Even if there HAD been mold in yogurt?

    1. Flo, that’s a tough call. If you could manage to get some yogurt from the middle that wasn’t touched by the blue stuff then maybe…..maybe, you could use it. HOWEVER, this would normally mean your yogurt is not too fresh and probably wouldn’t work very well anyway.

  273. barb kelly says:

    I am a little late to this party but I wanted you to know that I made this last night and it was a huge success!! It’s delicious! I am ordering a chinois today 🙂 I didn’t think I would ever find a yogurt that I liked as much (or better) than Fage but this has!!

    I thank you and my wallet thanks you!!!

    1. Congratulations on your success. I plan to do a post in the next few weeks about straining yogurt and some of the various strainers available. Thanks for writing.

  274. Robert Johnson says:

    Sigh!

    I think I’m done wasting milk because out of four different tries at different times, I’ve only had good success on the one try. I believe the problem is my oven doesn’t have a low temp setting and will only go as low as 175 degrees. Therefore I can’t keep the even heat long enough.

    I will probably save money by just buying greek yogurt at Sam’s club because I won’t be wasting all the milk that doesn’t form a yogurt. Far too much milk for me to drink and nobody else in the family will drink it.

    Wonder if a slow cooker would work?

  275. Robert Johnson says:

    I re-heated the milk and went through the process. Next morning there was a lot of whey at the top. Straining it gave me a cheese like substance. Hm? I’ve been wanting to make some cheese and now I have a crumbly but spreadable type of cheese. It has a slight tart yogurt taste.

    So what have I made, yorgrt cheese or some form of regular cheese? I guess I’ve just had an interesting experiment in cheese making. 🙂

  276. I have a question: 64 ounces of milk produced 32 ounces of yogurt and 20 ounces of whey. Where did the remaining 12 ounces of material go?

  277. I placed my two and a half quart Pyrex casserole under the stove’s warming light, wrapping the dish in a towel and leaving it there overnight. Next morning: perfect yogurt, although the towel was a bit scorched. I think next time I’ll top it with a silicone oven mitt to keep it insulated but prevent burning.

    I mostly use yogurt in smoothies so I think I’m going to try freezing the whey in ice cube trays so I can pop a few into the blender with the other ingredients. Might as well put it to good use, and I can’t imagine that freezing would destroy all the nutrients in the whey, would it?

    1. Hi Sharyn, Congrats on your perfect yogurt. Using the whey in smoothies sounds good. About the 12 ounces? Not sure on that one. Have never weighed everything. Maybe somebody else will have an answer for you.

  278. Robert Johnson says:

    Oops I forgot the powdered milk last night and looking this morning I see a yogurt that is not very thick. Can I re-heat and try again or just let it sit in the oven? Brings up a question and that is “how long can it sit outside the refrigerator?” I need to leave for the day and I’m going to just let it sit and allow the bacteria to grow.

    1. I rather doubt if forgetting the powdered milk is the reason your yogurt isn’t very thick. I never add it to mine any more and it’s as thick as ever. Yes, you could reheat and try again with fresh starter. If you have stirred or messed with your yogurt in any way, that is your only hope. Regarding time out of the fridge, I have let mine sit in a warm oven for 24 hours with no harm done. Didn’t mean to–just forgot it.

  279. I make homemade yogurt sometimes too. I do mine right in mason jars and use a pasta cooker (pot with insert) right on the stove. After i pasterize, cool and add the starter I screw on the lids and cover with beach towels. The only thing i have to wash is a spoon!

    1. Gloria, Thanks so much for taking the time to write. Your method is genius–especially if you don’t plan to strain it.

  280. Greek American reader says:

    I appreciate this post and I have just acquired a bouillon strainer (per your advice) to take my yogurt making to the next level – extra thick.

    Your method is similar to mine, but I bring the milk to a full boil on the stove, stirring frequently, using my nonstick Scanpan saucepan and a silicone whisk. Then after cooling, I run it through a sieve to make sure there are no bits of skin. Incidentally, the old Greek ladies I know didn’t have thermometers, so they gauged temperature by how long they could hold their forefinger in the hot milk.

    My way of thickening is to place plain white paper towels on top of the bowl of yogurt, starting with right after it finishes setting up. I change these towels every so often during the chilling time as well. This doesn’t get it as thick as I suspect the bouillon strainer will, but it does drink up quite a bit of excess liquid and it’s very low-fuss and low-mess.

    1. The finger thermometer. Works well for experienced cooks. Always handy too.

      Have never tried sopping up the whey from the top. Sometimes I have no visible whey on top, other times there will be a nice layer. Not sure why. I suspect you will be amazed and surprised at the amount of whey that strains out of your yogurt with the boullion strainer.

  281. Robert Johnson says:

    On my second attempt I think it worked.

    The first time I didn’t add the dried milk, instead of a towel I used a lid. Plus I opened the oven several times.

    This time I used the towel, the dried milk, didn’t open the oven and left it sit in the oven for 14 hours.

    I don’t see much whey sitting on the top. I don’t have time to strain and will place in the refrigerator to strain later in the day.

  282. Schauermann says:

    I was raised by “hippie” healthy parents. Before I was born they worked a dairy and drank raw milk (whole). As children we always drank whole milk. While living at home my siblings were healthy and thin (all thirteen).

    I had some lactose intolerance issues during college (I’m sure brought on by stress) and avoided milk for several years, later turning to acidophilus milk.

    Four years ago I was teaching nutrition in my classroom and realized that I had never “dieted” for weight loss, but was trying to teach my students to do this… I decided I would lose five pounds in three months, as an experiment. I found a website to help me track my calories. I planned my days to consume between 1800-2000 calories (I exercise). However, I decided that anytime I was hungry I could have milk…..and I wouldn’t count the milk calories.

    I ended up losing 8 pounds instead of 5. It wasn’t very hard. Later I began finding articles explaining that there are chemicals in milk fat that satisfy hunger. This made perfect sense, anytime I was hungry I’d drink some milk. Without even knowing it, I was telling my brain that I wasn’t hungry.

    About four months ago I was chatting with a girlfriend about her meals. She regularly got a coffee in the morning. I asked what kind and she rattled off a five word description including “fat-free”. Curious, I asked whether she was full after drinking a twelve ounce drink. She replied, “No, it’s like I haven’t had anything, I usually eat something mid morning because I’m still hungry.” I told her what I know about milk and suggested she try getting her drink with regular milk. The next morning I got a text, “I can’t believe it, I got regular milk and haven’t been hungry all morning”.

    Side note to the whole fat concept. I recently starting buying raw milk from a local farmer. My previous digestive issues with milk don’t occur when the milk hasn’t been cooked. Plus, making butter is delicious!!!

    Hope I haven’t bored you 🙂

  283. Schauermann says:

    I encourage you to try some “with-fat” yogurt recipes! I am a health teacher and have over the years seen many published journal articles pointing out the benefits of consuming bovine milk fats.

    One great benefit for women is the bodies reaction to suppress further hunger, a great way to maintain a slim body! Here is an article I just pulled up online, but there are many more out there. http://www.ncbi.nlm.nih.gov/pubmed/17925824

    Our bodies need healthy fats and yogurt is a great way to incorporate this into your diet.

    1. Interesting. I did a post on my blog some time ago about the slimming benefits of milk. I first discovered it for myself when I was pregnant and drank a ton of milk but weighed less after baby than before pregnancy. Really satisfies. But I have always stuck with skim milk. Perhaps I should reconsider. However I find even 2% downright decadent and too rich for my tastes. I can only imagine how luxurious yogurt made with whole milk would taste.

      Do you always use whole milk yourself? What is your personal experience regarding weight loss benefits?
      Paula
      Sent from my iPhone

  284. fajas colombianas says:

    wont this become sour because of the whey?

  285. Robert Johnson says:

    My first attempt didn’t work. It sat 9 hours in the oven with the light on and before placing in the oven I pre-heated it for 1 minute. I can’t keep my gas oven on because it doesn’t go as low as 100 degrees. My oven is 5 years old and the lowest temperature is 200 degrees.

    So I sat it in the refrig and will place it back in the oven today. I stirred through it and I saw that I have some little nodules at the bottom.

    1. Robert, I just saw your post and wanted to let you know that I make about 3 gallons a week. My oven is about the same age as yours and has the same problem (only goes to 200). I always preheat the oven about 1 minute and then turn it off and put the yogurt in. Yesterday’s batch took nearly 13 hours to set up…and at hour 11 it still looked like milk. Next time you try it, make it at night and just pop it in the oven over night. (I have good luck making it about dinner time or right after I put my kids to bed and it’s perfect by the next morning).

      I do have a dual sensor thermometer that tells me both the food temp and the oven temp. Preheating and then leaving the door closed usually will maintain the temp for 12-15 hours but if I am really impatient and open the oven a lot to check I have had to turn it back on for about 30 seconds to get the temp back up enough to keep the yogurt around 110. Good luck!

      1. Robert Johnson says:

        Thanks for the idea.

        I just threw out my first batch of “milk” not yogurt. Not sure if it was the temp problem (no 100 degree setting on stove ) or it was forgetting the powdered milk. I’ll try again, preheat the oven and make it overnight as suggested. Total time mine was in the oven was probably 15 hours and I wasn’t going to eat/drink sour milk.

  286. Paula, I am still planning on trying to make FroYo with the yogurt I make, but I’ve gotta get my family to slow down on consumption of it first. So far I am up to making a gallon of milk at a time 3 times a week. I just wanted to share my “cheap” strainer. A chinois is not currently in my budget, but I am a DIY addict so had several things that I experimented with and found the perfect cheap solution. Paint Strainers! Lowes, Home Depot, Sherman Williams, etc all carry cloth strainers that can be washed and reused. I slip on over a regular strainer and fill it with the warm yogurt. You can pick them up for about $3 for two of them. I buy the 1 gallon size and they work beautifully!

    Also, I have one other “stir in” to add to your list. NUTELLA! 1 tbsp to 1 cup and you have something that tastes like chocolate hazelnut cheesecake! I’ve even put chocolate wafer cookies in the bottom of a muffin paper and topped with Nutella yogurt for a “healthier” dessert. Yes, there is sugar and fat in the nutella, but a little goes a long way and compared to regualar ice cream or cheesecake you can’t beat it!

    1. You are BRILLIANT. The paint strainers are a great idea I never thought about and good for people who aren’t sure if they will be making yogurt very much.

      I’ve considered Nutella but haven’t tried it. Do you whisk it in or how do you make it smooth? The chocolate wafer cookie idea is inspired. Thanks again for writing.

      1. Despite the very thick consistency of Nutella it blends beautifully with yogurt. You can whisk it in but all I’ve ever used is just the spoon I used to get it out of the jar. Even my 8 year old can stir it in, (though it’s a little “marbled” when she’s done instead of thoroughly mixed in.)

  287. Have been dieting for the past six months and have lost 75 pounds thru exercise and a lot of yogurt! I have been making my own yogurt since the first of the year, but thanks for the tip of straining through a chinois. I meant to pull my yogurt from the strainer just before bedtime but ended up falling asleep. The next morning it was SUPER thick. Thought it would be too thick, but it actually ended up tasting just like the Siggi’s brand Icelandic yogurt that my grocery store sells for $2.49 per 6 oz. container.

    Made your yogurt balsamic dressing. Excellent! Thanks for the recipe.

    1. Andrea, What a great testimony for making your own yogurt. Congratulations on all the weight you’ve lost.

  288. Hi!
    Just wanted to comment on two things that might be of help. If you use powdered milk (and for us low fat works better than regular, yielding a “creamier” yogurt). Try using an excess (extra powder mix) based milk instead of liquid supermarket milk and the result will be a creamier product with almost no whey. We have also experimented in adding the powdered milk after we heat the water and whisk the starter yogurt. Extra powdered milk does make a difference but you will have to experiment as different brands yield different results.
    As you mention, temperature (and time) is key, and if you experiment with them, you will end up with thicker, crumbly, acidic, and slightly different flavours & textures. Have also tried sour cream as a starter, added sugar, brown sugar, honey, as well as herbs & spices to the base milk for dressings, dips, cheese, etc. with great results, It thickens just as well.
    Good luck!, Great site,

    1. Sour cream? Really? Good to know. Will have to give it a try. Not sure what you mean by “excess based milk”. Braum’s nonfat milk, sold here in Texas, is supposedly fortified in a way that makes it taste richer and creamier. It also has more calories so I avoid it.

      Sounds like you are having lots of fun with your yogurt. I plan to keep trying more things with it. Did you see my pie crust with yogurt? It’s amazing!

      1. Hi Paula;
        what i meant with “excess based milk” is to use more powdered milk than is required to make “standard milk”. You start with a thicker mixture made with an increased powder to water mix ratio and it works really great and it yields a thicker,creamier yogurt without much or no whey.
        I live in South America (Venezuela), and what we get down here varies in quality …a lot! so one needs to experiment to get it right. Commercial low fat milk looks like watered down milk over here so I use powdered. (Braum’s is not available).

        I’m certainly going to try try your pie crust!!! (I’ll process some very ripe bananas with yogurt and experiment with the results) tks!.

        By the way, if you have some friends or neighbours that are into weight lifting and use those “Protein Shakes”, some are Whey based and people pay a lot for them. maybe they’d like to use “the real thing” or even add it tho their mix for some extra proteins.
        Really enjoy your page and reader comments.

  289. WOW! That was easy – the yogurt came out delicious. I followed your steps and the steps from Dr. Fankhauser on yogurt-making. His standard yogurt is made the old-fashioned way (on the stove) and the microwave method saved me a TON of time standing over a stove. Thank you! And yes – homemade granola and local, Florida strawberries on my Greek yogurt is my breakfast tomorrow… 🙂

  290. Hi Paula!

    It’s me again! You’re probably sick of me! Just a report back on my yoghurt. It came out FAB! I left in in the oven for the rest of the day and when I got home, I strained it with the kitchen cloth and colander. Worked like a charm ;). I tasted it and it is the smoothest, wonderfully thick, best tasting yoghurt I’ve ever had (and that was when it was at room temp. I can just imagine it cold from the fridge tomorrow morning in my bowl of cereal… Ahh… 🙂 )! Thank you for the great article and your wonderfully quick responses and support :). It’s one of the most rewarding things I’ve ever done. 🙂 🙂

  291. Thanks so much for your quick response!!! 🙂

    Thanks for the advice… I hope I didn’t spoil it now by having a taste… Right now the texture is more like a drinking yoghurt, so I am going to leave it and check it again when I get back from school! I really wanted yoghurt for brekkie, but now that is a dream for tomorrow! 🙂 I am nervous now that I took a spoon of it, will it continue to incubate? I cannot wait!!! 🙂

  292. Hi there again!

    I have come around to making my own yoghurt now and it has been going for 11 hours now and has become slightly gelatinous like you said, but there is no whey on top?? Should I leave it a little longer or strain it now? I’m scared to stir it too… And I also wanted to know if you think a kitchen cloth can work to strain the yoghurt? The finest sieve I have is an icing sugar sieve…

    Thank you! 🙂

    1. Mine does not always have whey on top. That is when it’s the best!! When you dip a spoon into it, does it hold it’s shape like mine does in the picture on my post? If so, it is done, go ahead and strain or refrigerate as is. Once you stir, the incubation is over. You can let it go as long as 24 hours if necessary. Re: the sieve, yes, you can try the kitchen cloth (not terry cloth) although it sounds a little messy. I’ve also tried a coffee filter inside of a regular sieve. It will work too but you can’t do much at one time. Let me know how it goes for you. Honestly, it often takes several tries before you get it just right. Don’t be discouraged.

  293. It WORKED!!! Thanks for sharing. Can you please tell me how you verified the nutrition facts? I work for a health club and plan on sharing your recipe with others, but want to make sure I have the nutrition correct. 6 oz is 1/2 cup…right?

    1. Hi Kristi, I still get excited when it works. Seems like a little miracle every time.

      About the nutritionals: The numbers on my post are taken from Fage 0% yogurt–the 6 ounce size, which is closer to 2/3 cup. (Actually, I think they may have changed their numbers since I originally posted so you might want to check yourself). I have never paid to have mine scientifically analyzed. Even if I did, the numbers would be inaccurate. My yogurt is a little different every time and it would be different from everybody else’s too. We all use different brands of milk which can vary in calories, some add powdered milk, some do not, and the amount of whey drained off to make Greek yogurt varies with each batch. Some people add milk back in (like me) and that varies according to how thick it was when I strained it. So you can see there are way too many variables here to come up with solid numbers.

      You might check out this link I wrote in answer to a question somebody wrote about the protein in this yogurt. It has more nutritional information. https://saladinajar.com/a-discussion-about-protein-in-greek-yogurt

      Glad you asked. paula

  294. Hi there! The bug has bitten me… I am dying to make my own yoghurt!!! Thanks for the post :). Just wast to inform you that this exact post is on a wordpress blog (ShareItFitness) word for word… I don’t think it is meant to be like that so check it out. Thanks again! Will let you know if I pass or fail! 🙂 🙂

  295. Julie Heck says:

    Thank YOU so much for this recipe. My family and I love greek yogurt. I make a large batch 2-3 times a week. I thought that I would share what works best for me. I have a glass casserole bowl with a cover that holds about 3/4 of a gal. I heat the milk in the microwave to 160 -180 degrees ( about 20 min in my microwave) then let it cool to 110 -115 degrees. Stir in about 2 tsp of my starter yogurt and put the lid on. I set it on a heating pad (mine is not adjustable it only has off and on) with 2 layers of a bath towel under it and I cover the rest of the bowl with the remaining towel. It keeps it at 105 – 110 degrees. I make it before going to bed, I check on it if I wake up for some reason, but in the morning before work I have a nice big batch of yogurt, I work full time so I just put it in the fridge until I get home then I line a colander with several layers of cheese cloth and 2 layers of flour sack towel, place that in a large bowl and pour in the yogurt, refridgerate it for several hours and before long we are enjoying greek yogurt with fresh fruit , drizzled with honey. I have never had a batch not turn out. Its AWESOME The flour sack towel makes clean up alot easier then just using cheese cloth. Thanks Again I can’t tell you how much I enjoy your site. Julie

    1. Hi Julie, Love the tip about the flour sack towel. Since I use the bouillion strainer, I don’t need any cheesecloth or towels but not everybody wants to invest in one of those so it’s good to have this method up your sleeve. And thanks for explaining how you use a heating pad. Just one more option for people who may not have a good setup with their oven.

  296. Thank YOU so much for this recipe. My family and I love greek yogurt. I make a large batch 2-3 times a week. I thought that I would share what works best for me. I have a glass casserole bowl that hold about 3/4 of a gal. I heat the milk in the microwave to 160 -180 degrees ( about 20 min in my microwave) then let it cool to 110 -115 degrees. Stir in about 2 tsp of my starter yogurt and put the lid on. I set it on a heating pad (mine is not adjustable it only has off and on) with 2 layers of a bath towl under it and I cover therest with the remaining towel. It keeps it at 105 – 110 degrees. I make it before going to bed, I check on it if I wake up for some reason, but in the morning before work I have a nice big batch of yogurt, I work full time so I just put it in the fridge until I get home then I line a colander with several layers of cheese cloth and 2 layers of flour sack towel, place that in a large bowl and pour in the yogurt, refridgerate it for several hours and nest thing I know we are enjoying greek yogurt with fresh fruit , drizzled with honey. I have never had a batch not turn out. Its AWESOME

  297. I was wondering what do do since I do not have a gas oven, a low enough preset point, or an oven light. Any suggestions? Thanks!

    1. Amy, If you have time, you might read through the comments on this post for some ideas. A crock-pot or a heating pad are just a couple I’ve read. Is it warm in your water heater closet? You may have to get creative. Let us know what you come up with.

  298. THANK YOU THANK YOU THANK YOU! My kids have discovered my secret stash of FAGE yogurt and what used to last me 4 days now only last me one. I found your website and made your version today as a way to hopefully keep my kids happy and away from my “little indulgence” and instead have determined I will never buy store yogurt again!!! The yogurt I made was smooth and creamy with no bitterness. I’m planning to add some chocolate syrup and put it through my ice cream machine as a way to finally have a substitute for the ice cream I don’t let myself have because “if it is ice cream worth eating, it’s a diet buster.” I shared some of the yogurt I made today with a neighbor and she agreed it was almost like eating cream. I think the biggest challenge for me is going to be able to make enough of it at a single time that I’m not having to make it daily! 😉 Right now I’m on my second batch of the day!

    1. I’m anxious to hear how you make ice cream with the yogurt. Sounds wonderful!

  299. I would like to know how many calories 1 cup of fat free yogurt made this way ? I am doing weight watchers and need to know specifics. It is a wonderful treat with peaches and blueberries. Thanks

    1. Carolyn, that is actually not an easy question to answer accurately. It can vary depending on how much whey you drain out of the yogurt and whether you add any milk back to it. Every batch I make is slightly different and I’m sure yours is different from mine. I used the nutritionals listed on Fage Non-fat yogurt on this post based on a serving size of 6 ounces. That would mean an 8-oz serving of non-fat yogurt is approximately 120 calories. That’s only a guess. Sorry I can’t be more specific. I figure it’s a lot less than 8-ounces of my favorite ice cream so I just enjoy.

  300. I notice you only use 1-2 tsp. of yogurt culture for 2 qts. of milk. all other recipes say 2 Tpbs. for one quart of milk. I have lots of trouble with it becoming gelatinous enuf in the oven even with it on at 110 degrees. I havae tried many times. Why is not more yogurt the answer?

    1. My scientifically unproven theory is that when your starter is extremely fresh and the bacteria are lively, they need lots of food and will reproduce quickly when they have the right atmosphere. If they are old and sluggish, not much happens whether you have a few or a bunch. 2 Tablespoons is really not excessive and should work fine. Actually, I never measure–just swish a little bit in there. I would try a different starter. Not sure if it matters greatly but I turn my oven to 100 degrees.

      Another question I have is your definition of “gelatinous enough.” A lot of commercial yogurt has gelatin added so if that’s what you’re going for, you might be disappointed. On the other hand, my yogurt is fairly gelatinous and seems to get more so the more batches I make using previously made yogurt. I wish you lived next door so I could watch you make it. I think we could get it figured out.

  301. I’ve been making your yogurt recipe with the powdered milk for a couple of months now with excellant results until yesterday. My yogurt came out grainy! It doesn’t need to be whipped, it’s actually grainly like it had the powdered milk suspended in it. The tatste is very good, it’s just the grainy texture that is unpleasant. Any ideas on what happened?
    The only thing different was I had cooled it a bit too much and reheated it then cooled it down again, can reheating cause this?

    Thanks for any help,
    Marie

    1. Can’t say I’ve ever experienced graininess. Maybe the milk is not warm enough when you added the dry milk? Did the milk mixture develop a skin while cooling that broke up when you stirred in the starter?

      Was the graininess before or after straining? Mine sometimes LOOKS grainy after I strain it- like ricotta cheese– but after I whisk in a little milk it turns out as creamy as sour cream.

      Have you tried it without dry milk? As I noted, I like it much better without. I’ll eat a little more Spinach to pick up that extra calcium. 🙂

      Hope this helps. Has anybody else experienced graininess?

      1. Thanks for your quick response Paula.
        I always add he powdered milk when the temp is around 180, nothing diiferent than before, and no skin on the milk.
        The graininess I didn’t notice until after I strained it.
        I think next time I will make it without the powdered milk because I’m thinking this is the culprit.
        The funny thing is the taste is good, but the texture is just off, grainy and pasty. But I’ll be making more this week, I will not be discouraged!

  302. i buy this wonderful homemade greek yogurt from a tiny local restaurant and it is expensive but the best i have ever had! i have a yogurt maker and have tried to make it myself, but i cannot get the same flavor. the one that i buy tastes like sour cream almost. much more sour than fage or any of the other store brands. i do strain mine, but the flavor is just not the same. when i make it it is thick but it tastes like regular yogurt. i have even started it with the yogurt that i buy! how do i get it to be sour? and can i follow your directions up until the point where you put it into the oven – i just put mine into the yogurt maker?

    1. Debbie, I would love to try the yogurt you are buying at the little restaurant even though I’m not a fan of really tart yogurt. You did what I would have suggested-use the beloved yogurt as your starter. Perhaps you might try letting it incubate longer than usual–maybe even 24 hours (I’ve done that by accident)– and your yogurt should not be spoiled, just more sour. Please let me know if you try it and it works. You also might play around with different types of milk used to make the yogurt, i.e. goat milk.

      And yes, you are right about the yogurt maker. Follow my directions up to the point of putting it in the oven. A yogurt maker is a perfectly controlled environment for incubation. Now if somebody would just come up with one that makes 2 quarts at a time for the home cook. Ah-ha! I think you’ve indirectly given me an idea for an invention.

  303. I am already making my second batch! Thanks for the recipe. It is so easy and will save us quite a bit of money as we eat this often. I lined a strainer with two layers of paper towel and it worked really well. And you can through the towels away when you’re done straining it.

    1. I do like the idea of paper towels rather than cheesecloth if you are using a regular strainer. Thanks for the tip for my readers who haven’t invested in a bouillon strainer.

  304. Hello: I’ve spent most of the evening in search of ‘making your own Greek Yogurt’ and finally came upon yours – thank goodness! After asking local grocers for over a year to bring in Greek Yogurt, (I’ve been straining purchased yogurt), it’s finally arrived. We had our first taste this evening and my husband and I are hooked on the taste and creamy texture and APPALLED at the price. Hence the search! I’ve been wanting to make my own yogurt for some time – so here we go!
    I have a few things to purchase; a thermometer with beeper (who knew?), some jars and for now, coffee filters to strain. I’m not sure of the availability of the strainer you mention in Canada, so further sreearch is necessary.
    I’ve been trying to be as natural as possible in our food choices and preparations for the last 5 years, so I won’t be heating the milk in the micro but rather on the stovetop and will use the ‘oven method’ you explain. I was intrigued by the crockpot method as listed in the posts, but if you’re only left with ‘half’ the amount of yogurt when straining, I’ll want to make larger batches or I’ll be spending even ‘more time in the kitchen’. 🙂
    I have a couple of questions:
    1. We use litres in Canada, and our fluid measurements differ from the US. Will a few extra ounces of milk ‘ruin’ the fermentation process, or will I have to do the trial and error method to find the correct ratio of ‘starter’ to milk?
    2. I’m so glad you list the nutritional properties on your site, what a bonus! You don’t mention the calcium content and since I’m trying to increase those levels in our diet, I wondered if you had that information. (I realize you added powdered milk in your original recipe and I’ll be doing the same, again to increase the calcium content).
    Thank you for the time and effort you’ve put into this recipe, I’ve added your link to my favourites and can’t wait to check out the rest of your site.
    D

    1. Hi Debra, I’m glad you found me. Answers to your questions:
      1. A few ounces of milk +/- will not affect the final product. I never measure the milk or the starter anyway. Eyeballing is good enough.

      2. Check out this link to see statistics on 8 ounces of Fage Yogurt Total 0% which is nonfat.
      http://caloriecount.about.com/calories-fage-usa-total-0-i108278
      Mine should be fairly close to this although I doubt if they add dry milk to theirs. Be sure to consider serving size.

  305. I made this successfully once, but I’ve been having some issues. My oven doesn’t have a good seal to keep it around 100*. This time when I made it I realized after the fact that it’s been incubating around 120*. Is my batch ruined or is there anything I can do to save it? Thanks for your help!

  306. I’m so glad I found your website. This yogurt is an instant hit. For the incubation I put the lid on my pyrex container and wrapped it in a towel. Then I put it on top of my computer router, put a 40-watt bulb in a desk lamp and put that about 6 inches from the top of the towel-covered pyrex. I put an oven thermometer on top of the towel so I could monitor the temp. It read just under 100 degrees. I left it overnight–about 12 hours or so, and it was of perfect consistency! I then placed a gold coffee filter inside a collander and spooned the yogurt into it. It mostly all fit. I let it strain for an hour, then put the yogurt in a plastic container with a lid on in the frig for the day while I was at work. I had some wonderful Greek yogurt for dessert. Yum-very creamy. I will need to figure out how to make a bigger batch–it’s THAT good!! Thanks again!

  307. I can not say enough of a thank you for the best directions that included trouble shooting. I make it a gallon at a time, and all it needed was a little longer set time. I heat my milk on the stove and then transfer it to my crock pot for the oven time. That way if there is any scalding, it is left in my original stainless steel pot. The pictures were amazing and extremely helpful. I had no idea that there were digital thermometers and have been using a candy one, until I saw your photos. I also put the digital in the oven and was able to keep the oven set at 100 degrees, with the help of the digital. The one minute preheat on warm, was perfect. What a time saver and takes the guessing out of it. I also use cheese cloth inside a strainer. The best was the sink full of ice for a quick cool down! Thank you, thank you, thank you! My yogurt is perfect, delicious and very creamy.

  308. I was a little nervous all night and woke up several times thinking about how my 1st batch was going. It turned out perfect. I used tripple layered cheese cloth to strain it .Iove it ; I love it ; I love it . Thank you so much. I will sleep much better next time.

    1. Carolyn, You made me laugh. Can’t say I’ve never done that myself and I still get a little thrill from opening the oven to find perfectly set yogurt in the morning. It’s a miracle! Love hearing the success stories.

  309. Does it matter if the mixture is left at room temperature overnight ? Since I do mine after I get home from work ,Would the culture die ?

    1. I leave my yogurt to incubate overnight all the time. But it must be warmer than room temperature or nothing much will happen. I use my oven set to 100 degrees. If you read through the comments, you will see lots of other ideas about how to keep it between 100-110 degrees for hours.

  310. Stephanie says:

    Success on the very first try! But I want to try to find a better way of incubating, as the process is long and ties up the oven. Think I will find a crockpot with a “warm” setting and donate my old one to my parish kitchen (we always seem to need them for nachos, puzzle, etc.). I thought mine was a little runny, but it tastes fine right out of incubation and I have it straining now. I am using a regular strainer, but I think I need a chinois. My husband is a cooking junkie anyway, so we always have room for another gadget.

    Expect more traffic to your site as I have just sung the praises of your recipe on Facebook and in the Weight Watchers forums. A wonderful, but seasonal, treat is to mix in some of Trader Joe’s pumpkin butter into yogurt – it’s great! But I say seasonal since I am not sure if they always have the pumpkin butter on sale.

  311. I also forgot to preheat…

  312. I made some yogurt today following the recipe. It was thick when I took it out of the oven. As I poured it into the strainer I noticed it was rather “gooey” instead of gelatinous. I strained it for 3hours, scraping the strainer a few times but not as much whey drained out as in previous batches. It is ok, but not as nice as usual. Any ideas? Is my starter too old? I also added 1cup powdered milk. Is that too much?

    1. Funny you should write. I had the same experience with a batch I made yesterday. But I know why. I forgot to turn the oven on so it would be slightly warm. It still got thick but not gelatinous. So I decided to stir in more “starter” and reincubate at 100 degrees. Didn’t work. I think once the yogurt bacteria are disturbed (I stirred it), they give up and quit. Had to throw it out.

      1 cup of of powdered milk sounds like a lot to me. I no longer add any. But not sure if that had anything to do with your fail. It’s possible your starter was not fresh enough. Older than 10 days? Works best if not over a week old. Try again using the newest yogurt you have.

  313. Just tried your recipe today! After a few tries of finding a place where the temp stayed the most consistent my crockpot won out. On warm with a water bath surrounding a smaller bowl (I only tried a half batch to see if I would like it or not) it stayed a consistent 103*ish. It was pretty thick after only 5 hrs and had pretty much separated out from the whey and not as creamy as yours looked so I decided to strain it. Even strained it was still the texture of ricotta cheese instead of greek yogurt so I was wondering if you had any tips. I tried mixing in a little milk and whey which helped a little but not much. Maybe stirring while the milk was heating would help? Any thoughts would be appreciated!

    1. Whitney, About the creamy texture: I whip the strained yogurt with a whisk AFTER straining for about 45 minutes. (Before whipping, I have already drained it down to half the original volume–sometimes a little more. Then I throw away the whey. The texture is indeed like ricotta cheese at that point.) I add milk and whisk till it is creamy and the consistency I like–similar to sour cream, whisking well as I go. It will become quite a bit firmer when it is chilled. Does this help?

    2. Tried a second batch again today finally and it did the same thing. It was getting nice and thick and then about an hour later it had separated with the whey on top and same ricotta cheese texture. I tried whisking with milk but that texture just doesn’t seem to go away. Any more ideas?

  314. I use a sous-vide water bath to incubate yogurt at 113 degrees – worked great overnight.

    1. Wow Tim! How sophisticated and cool.

      1. [chuckle] That goes into the book: first time I’ve *ever* been associated with the word, “sophisticated” – truth is, this ‘sous vide’ water bath is one I made using a bucket heater from Tractor Supply and an old Igloo water cooler, and sits under the dining room table in our trailer in the hills of Appalachia. Still, I *am* able to fix wonderful steaks and hamburgers for my wife (from our own farm), and the yogurt I did a couple of days ago came out perfectly. And I would have done the Greek Yogurt trick here, except I inhaled nearly two quarts of the regular stuff this weekend. Next batch will be Greek… and thanks for your great website!

        If anyone is interested in building a lab-quality water bath, see http://seattlefoodgeek.com/2010/02/diy-sous-vide-heating-immersion-circulator-for-about-75/ and http://qandabe.com/2011/02/21/70-diy-sous-vide-universal-controller/ for the basic instructions. But using this for yogurt was overkill: more along the lines of, “I have a +/- 1 degree water bath – what can I do with it?” than being a true requirement. A cooler filled with 113 degree tap water, perhaps with a blanket over it, would probably do a fine job a lot cheaper.

        Not wishing to hijack the thread, of course, but sous vide cooking really is a hoot: see http://www.douglasbaldwin.com/sous-vide.html for a great intro and great info.

        Now back to your regularly-scheduled discussion.

        1. Hey Tim, You just burst my bubble. But your way sounds kinda fun–except for the part where you keep it under the dining room table. Glad you are enjoying the yogurt.

  315. The consistency and taste was very much like cream cheese. I do not have a photo. The cheesecake is good, not like a full fat restaurant cheesecake, but much lower in fat, and sugar (substituted half the sugar for French vanilla sugar free syrup), and higher in protein. I’m happy with the results. Hopefully next time I want cheesecake I will just strain my yogurt to cream cheese consistency.

  316. Paula can I use chocolate instant pudding and mix it in the yogurt? My grandson loves everything choco.ate and I know if he finds this and it taste good he will eat it all up. By the way he is only 5

  317. Made another batch of yogurt for this is the 3rd time and it turns out perfect everytime. My microwave must be pretty high for iwhen I put the milk in their I go for 8 and 1/2 minutes only for it is at the correct degrees, everytime I make it it gets easier.Love it with crushed pineapple and freshh coconut yummmm

  318. Ned Miller says:

    I made my third batch last nite. Awsome and tasty. I blend in 1 tsp of van. and 2 tbl of Stevia Extract in the Raw to the whole batch. Then to each 1/2 cup 1 tsp homemade blueberry syrup, 1tsp of my own honey and a handfull of walnuts. Sometimes I can’t stop and make another 1/2 cup! I’m hooked. I’ve been puting it in the oven overnite with a 100w bulb with the door cracked a little and the temp stays at 105-110. So far every batch has been a success. Thanks I enjoy the website. I’m going to make my second batch of your Red Beans and Rice this weekend.

    1. Homemade blueberry syrup?? Please send asap. My address is 1234 Mapl….. Just kidding. But that sure does sound good. And do you have your own bees? Glad the yogurt is working for you. Mine gets better all the time as long as I keep using starter from the yogurt I make myself.

      1. Ned Miller says:

        Yes my honey is from my own bees (three hives it’s a great hobby). I’d be glad to send you some for hooking me up with this yogurt. I’m hooked. Can’t help with the syrup, it came from a friend near Grand Marias, Minn. near the Boundary Waters Canoe area. She sent one bottle in exchange for honey. Only a few drops left 🙁 .
        FYI. I’m making a batch of yogurt today w/o the dry milk to try that. Thanks for the tip.

  319. I accidentally set my oven temp at 140 instead of 100. The result was a thick cream cheese consistency floating in whey. I went ahead and strained it. It was very thick and creamy. Not sure if I could reproduce this but I have a cheesecake in the oven now that looks perfect. Can’t wait to taste it.

    1. Interesting…let me know how it tastes. Did you take any pictures?

  320. Hi! I left the heated milk on the porch to cool and forgot about it while watching a movie! (oops)–do I start the process over by just heating it up again in the microwave? Thanks again for this recipe…..nancy and husband Tom and kids who love it, too!

  321. WOW – it worked first time! We have been spending a fortune on greek yogurt since my wife’s doctor put her on the Dukan diet and I went on it to support her and lose some weight also.

    Was not sure if it would work for me so spent minimum on first attempt. Though I did buy a new digital BBR/Oven temperature device as I needed one for other cooking.

    What I used:
    I am in NSW australia, so I used Woolworths skim milk at $1.25 per litre (2 litres).
    As all yogurt in my local supermarkets and delis is adulterated with all sorts of added junk, I went looking in an Indian smallgoods shop and found Sharma’s Kitchen premium yogurt which only has milk, non fat milk solids and live culture listed as ingredients.

    Heated milk in microwave and added two teaspoons of the yogurt when it cooled to 120F.

    Next, how to keep warm! Saw another reader’s microwave and pad idea. No pads, so used wheat bags we regularly use for muscle strain/pain. Heated the bags and wrapped around bthe owl which was covered in alfoil. Then covered in two small towels making sure door side of microwave was well insulated with towelling.

    8.5 hours later the microwave was still nice and warm and lo and behold I had lovely yogurt with no strong tang. Just very yummy.

    Next problem was straining. So with no cheesecloth or suitable strainer I lined a large colander with a single layer of rinsed new chux type cloth (got this idea from a site for straining my seafood stock). Left for 2 hours and then spooned and scraped yogurt into bowal and whisked to find I had two 500 gm tubs for $2.50. Supermarket price for same $6.70.

    Now off to buy a bouilon strainer for the next batch while I work out what to do with all the whey as we do not eat bread etc on this diet.

    ‘THANK YOU’ for a showing how easy this can be and all the other ideas from other yogurt makers. Next challenge is ‘fromage blanc’ which we cannot buy here at all.

    1. I’m so glad you wrote of your experience. Lots of ideas in here for others who may not have the same resources I do. Will be interested to know what you come up with for all that whey. paula

  322. I just tried some of the yogurt after making it lastnight it turned out so perfect yummy thank you so much for the recipe .No problems I have some fresh grapes so going to put them in it and take some to my neighbor after a bit.

  323. I’m excited about making some this weekend can’t wait. I went to the store earlier to try thr greek yogurt well I fell in love with it, it taste so much better I just can’t wait till tomorrow to start making it. I’m glad I found your recipe on the net will let you know how it turns out. Thanks a bunch.

  324. LOVE the tips here. I love making yogurt and used a yogurt maker with about 8 oz cups until now. A friend of ours makes his yogurt in quart jars and wraps the warm jar in towels and then puts it in an ice chest. Using commercial starter this method only takes about 4 to 5 hours. I used the commercial and then save yogurt from each batch to add to the new. I have also taken starter from store bought yogurt and have had real success with that also. This just goes to show that you don’t need sophisticated equipment to make your own yogurt. Thanks so much!

    1. You are so right about the expensive/sophisticated equipment. Not really necessary. Glad you are enjoying all your yogurt.

  325. Hello there! I just want to say the both me and my wallet thank you- I have made two batches- both successful and I incubated the bowl in front of a long burning pellet stove! If you are a little bit handy- I have another trip for straining- Buy some of those cheap splatter shields that you place on top of frying foods and pry off the frame, bend in to a funnel shape and curve down the edged.. I wonder if window screen would work?? Anyway thank-you again!

    1. A long-burning pellet stove? You must live in a cold place. Whatever works. 🙂 Thanks for the hint about splatter shields. Re: window screens, mine are not nearly fine enough but I suppose they vary. Thanks for taking the time to write. Love to hear the success stories!

  326. WOW! I have not made yogurt in 30 years (with an electric appliance w/little jars)….this recipe not only worked for my limited brain, but was DELICIOUS! THANK YOU from my whole family!!!!! I will pass this recipe on to other family members.
    Word of caution: We used a heating pad on the first round which had an automatic shutoff (something we didn’t realize before starting the process)–the yogurt did not get thick overnight! We added more starter (from a small container of nonfat Fage plain Greek yogurt) and found another pad in the house (lucky!) which didn’t shut off at all. We have had a great experience with this yogurt and will make it often! Agave syrup sweetens it beautifully (also a new discovery as an alternative to sugar), as well as fruit and granola. YUM! Thanks from our family!

    1. Agave syrup? I’m going to give it a try. Thanks for writing.

  327. Paula,
    As for the size of the colander, I use a large pasta one. Most of the gal fits in. The remainder I can add after 10 mins or so. The cheese cloth is large enough to drape over the sides of the colander. Every so often if I am around I will pull up the sides like a bag and fold the yogurt on itself. In about 1-2 hours it is at the consistency that I like. Looking online at Amazon they have a “Euro Cuisine Yogurt Cheese Strainer” for $5.99 that will do the same thing and holds a gal. It is made of cotton. Cleans up beautifully.
    As for the stove top method- I do have a gas stove. Off to eat YOGURT!!!
    Nadine

  328. One more thing… in using the cheesecloth layers lining the colander, it does not become messy. Actually the strained yogurt plops out and the cheesecloth is almost as clean as it starts. A little swish in a dishpan, hang to dry and you are ready to go!

  329. Paula,
    This is the first time EVER that I have posted to comment to anyone. I absolutely LOVE this recipe. I had much trepidation on trying this. I make a lot of my own food at home. This recipe has now become one of my favorites. First time trying it came out perfect! I was amazed. I have since graduated to making 1 gal of fat free milk (with the addition of 1/2c. of nonfat dry milk) twice a week. I love this yogurt! I find that 1 gal of milk makes 2qts. and little bit more after straining. I strain in a large colander layered with 2 layers of cheesecloth. You are right in saying that once you get it down , it is very quick to make. I also heat the milk on the stove to heat it up to temp. (It goes a little quicker.) Then I incubate with a light on in the oven overnight! It is awesome! Thanks for taking the time to share with everyone! You are the best!
    Nadine

    1. Hi Nadine, So nice to hear from you. I love the success stories. I am wondering where you buy a colander big enough to hold a gallon of yogurt (before straining). You make the cheesecloth sound like no big deal–impressive. I found it a mess to keep up with but whatever works for you is good. Also surprised that heating the milk on top of the stove is faster. Either you have a gas stove (I do not) or maybe it’s faster than microwaving a whole gallon of milk. I am normally working with two quarts at a time.

      I no longer add the nonfat dry milk. Find it unnecessary as the texture is even better without it. My yogurt cultures are so fresh (using my own yogurt every 3-4 days as a starter) that it sets up unbelievably firm. Of course the dried milk does add calcium so that is a side benefit.

      Look forward to hearing from you again soon even if you don’t usually comment. (I feel honored.) pr

  330. This was so fun!! It is so easy. My gas oven did not stay hot enough with the pilot light on. I got our cooler out of the garage and put a heating pad in the bottom. I set it at med. heat. Wrapped the bowl in a beach towel, and set it in the cooler with the lid on. Next morning (12 hours) I have the most yummy stuff ever. Question- I drained the whey off that was on the top and just put it in the fridge. Not sour at all and plenty thick. Just wondering how long this will last? Also is there any reason I need to drain it more than this?

  331. Personal Trainer says:

    This is great but for me I know being busy and all I’d rather go to the local organic market and pick me up a tub of it. Greek Gods brand is by far my favorite.

  332. The Yogurt Man says:

    I got hooked on making my own greek yogurt as my grocery bill was enormous going through 5-6 750 ML containers of regular yogurt a week.

    Now All I do is buy 3 bags of 4L milk (12 L) for about $12 (Can) at Costco and I can make a 2 week supply of greek (not regular) yogurt on that (beats spending $30-35 every 2 weeks).

    Instead of microwave, i fill a double boiler (or my ghetto solution, a 4L pot inside a 6L stock pot with water) with milk and heat it to about 180’F. then set aside in containers filling them about 1/4 each, I then repeat this 2 more times with the other 2 4L bag sets and when each one gets to 180’F i fill the containers again 1/4 full til they’re each 3/4’s full. I then wait about 50 mins for the containers to cool to the necessary temp of 110-120’Fish.

    After that I pour some of the milk (which is right temp into a new container), add a container of yogurt to it and mix it all up then pour that into all the yogurt containers and mix them.

    While I am waiting for this to happen, I set up a regular camping cooler, and I put one plastic container in it which I fill with 2 kettle fulls of boiling water, then seal container/cooler right away. When yogurt is ready I put all the containers inside the cooler (where the boiling water makes it the pefect sauna and maintains the temperature you need) and let it sit for 7-8 hours and then it’s ready.

    I cool containers in fridge and then strain. My ghetto strainer is a mixing bowl, with a pasta strainer on top (with large sized wholes, then I put 2 layers of thick bounty paper towel and poor all the yogurt in, when it’s strained for 4 hours it gets all the liquid through and the paper towels easily separate from the yogurt if you strained it enough

    1. Yogurt Man, Thanks so much for writing about your technique. Love the “ghetto strainer”.

  333. Hi Paula, love your website. Do you know of any issues with leaving the mixture for say 15 hours. Will this cause the yogurt to go bad?? It took a while for it to come together and now Im afraid it has spoiled. It looks great but want to get your advice before I eat it.

  334. I am addicted to greek yogurt but it has really been taking a big chunk out of my budget. I really wanted to try to make my own to cut costs but I was super nervous. After reading your directions and all the comments, I finally decided to just go for it and hope for the best. I am pleased to say that it was a complete success! I was really worried about keeping it at a constant temperature of 100 but then I discovered that my oven has a “proof” setting on it (for proofing homemade bread) and it kept it at the perfect temperature! I did some math and discovered that my greek yogurt costs a fourth of the cheapest store bought. Thank you so much for your easy to follow directions! Im so ecstatic!!

  335. I have a question. When you strain it, how much yogurt do you lose?

    1. Nancy, I lose very little yogurt– maybe 1-2 teaspoons of solids. The rest is clear whey.

      If you are losing more than that, there are two possibilities:
      1. Your yogurt is not thick enough. Maybe it needs to incubate longer or your starter was not fresh enough (even though you may have just bought it).
      2. Even more likely is your strainer is not fine enough. It is very important you use a bouillon strainer–sometimes called a chinoise— which is extremely fine. What you find at the grocery store will not work. I bought mine at a restaurant supply and there is a link in my post to buy it online. Otherwise you must use cheesecloth if you have a strainer with larger holes. YUK! What a mess to clean. I think that is too much trouble. The more expensive chinoise strainer is well worth the money if you make a lot of yogurt.

      1. Many thanks! I have not tried to strain it yet; just ate it with the whey and it was still very good. I was just curious how much whey there was in yogurt.

  336. So I kinda combined two different recipes… I am using yours without the dried milk, but I used 1/4 c of starter… Is this why my yogurt is still liquid? Other recipes call for this amount of starter for the same amount of milk… can I remedy this without wasting a second batch?

  337. Thank you so much for the recipe. I tried a crockpot recipe recently and it just did not work as well as this one.

  338. LindyLambChopsNZ says:

    Am sure I saw on one of your recipes you wanted suggestions for using whey…..WHEY FLUFF
    1oz. Gelatin
    1/2 cup cold water
    2 cups whey
    3/4 cup sugar
    1 cup grated raw carrot
    rind and juice of one lemon
    1-2 egg whites
    Soak gelatin in water, add whey and sugar. Heat till gelatin melts and sugar dissolves. Add lemon rind and juice. When beginning to set, beat and when thick and fluffy fold in raw carrot, and stiffly-beaten egg-whites. Pile in serving dish. Serve with cream or soft custard.

    Source: Whitcombe’s Everyday Cookery for New Zealand. Price on cover 3/- (three shillings) Haven’t tried it myself, but looks interesting.

  339. I also buy only raw milk. Do you think there will be a difference in your process with raw milk?

    1. Connie, I’ve never tried raw milk so can’t speak to that with any authority. Good luck–and let me know how it goes.

  340. I use they whey from making Quark, a fresh cheese in my French bread. It is delicious!

  341. Hi, these are great directions, I have now made two batches, and both have been perfect. I do have a two quart yogurt machine for the “baking portion.” My question is this, does it matter if it incubates for longer periods, i.e, through the night if you make it after dinner? Thanks, A.

  342. LaNette Bendix says:

    Why does the milk have to be heated to 175-180 if the milk has already been heated during pasteurization….just curious?

  343. I found your recipe when I googled “how to make nonfat greek yogurt” and I love it! I really want to try it out but there is one thing I wasn’t sure of. I know you’re supposed to preheat the oven for a minute and then put the yogurt in the oven for 6-10 hours, but is the oven on and set at 100 degrees for that period of time as well?

  344. debra taylor says:

    Thank you for the info on the Greek yogurt. I’ve been making yogurt for over a year now, and love it, but haven’t tried the Greek style yet. I use the whey for my oatmeal. Instead of using boiling water, I just boil the left over whey and use it. I also add the yogurt to my oatmeal, instead of milk. I flavor my yogurt with dried fruit – doesn’t add any more liquid, actually absorbs some, and has a much more concentrated flavor so you don’t need to add very much. I particularly like Trader Joe brand mangoes, blueberries, and bananas. They are only the particular fruit, no additives, or preservatives. I’m going to try drying my own fruit also, just bought a dehydrator at a yard sale and anxious to try.

    1. Great ideas Debra.Thanks for your input. Wishing I had a Trader Joes in the area. Haven’t tried much dried fruit other than raisins in my yogurt but blueberries sound especially good.

      Would love to hear more about your dehydration adventures when you get it figured out. paula

  345. I’m so glad I found your blog! I was looking for a homemade yogurt recipe, and then found the salad in a jar. Now the #1 item on my Christmas wish list – a Keurig – has been replaced by a Foodsaver!

    I just made my first batch of yogurt and it turned out wonderfully, but I was wondering if I was going to have to dump it out and start over. I tested my oven before I even started heating the milk and found that it would not hold the temp anywhere near 100 degrees even with the light on, so I decided to try the crockpot wrapped up in towels. I set that up last night and hoped it would work. It didn’t. The yogurt hadn’t set up at all and the temp of the mixture was only 80 degrees. So I plugged the crockpot in until the mixture reached 110, preheated the oven for 1 minute, then put the crock in the oven. I then preheated the oven again for 1 minute almost every hour on the hour and was able to maintain the oven temp between 100-120 degrees. After 6-1/2 hours, I had yogurt! I was running late, so I only had time to strain the yogurt for about 35 minutes, but I just checked it after chilling and it is beautiful, thick Greek yogurt and tastes fabulous!

    Next item on my list is a nice strainer like you have so that the whole batch fits in one strainer. I had 3 strainers going because all the ones I have are rather small!

  346. Hello, my name is Tamara and I’m a Greek yogurt addict. 😉

    Thanks for the great tutorial and tips, Paula. I’ve been making yogurt about every other day — it’s fun and easy and I still give a little squeal of joy when I uncover the bowl in the morning and see the magically transformed yogurt. I think that my favorite mix-in has been Ideal Brown Sugar – which is made from the sweetner Xylitol. It has no sugar, few calories and it tastes great.

    A couple of tips that have worked for me — I’ve put foil over the top of the bowl to help retain heat and then double wrapped in dishtowels. I incubate mine in the microwave, because it’s smaller than the oven. I also heat up a microwavable hot pad that will stay warm for hours. That provides the right amount of heat in the small space. I usually put it to bed about 11pm and it’s ready by 7am. Also, OXO makes an 8″ fine mesh strainer (about $20) that will hold the entire contents of a 2-quart batch and strains beautifully.

    I’m planning on making up a large batch to use for the holidays in place of the sour cream that I normally use for dips and dressings.

    Thanks again!

    1. Tamara, I love your tips. Haven’t tried the Ideal Brown Sugar. I’ll look for it. The microwavable hot pad is a stroke of genius. If I didn’t have an oven that heated to 100 degrees, I would definitely be doing that one. I also did not know about the OXO strainer but will check it out. Certainly cheaper than the one I use. Keep in touch. I would love to hear about all the variations your come up with.

  347. Hi! I m soooo excited to try this recipe! My entire family loves yogurt, and I am a particular fan of greek yogurt. It has so much more to offer than the “regular” kind- it’s just so darn expensive to buy it! I am going to make a batch tomorrow and see how it turns out. Hooray for the internet and the ability to find such great pages as yours!

    1. Candace, I hope to hear it worked out great for you but if not, try again. It’s worth it. Email if you have questions.

  348. Hi Paula! Your recipe looks simple, much more than a lot of the ones I’ve read…Definitely going to try it.

    I’m wondering about the nutritional information? How did you figure out how many calories for the recipe? When I build the recipe my calorie calculator keeps running back to 720 cals for 64 oz of milk + 80 cals for 1/3 cup dry milk + 35ish cals yogurt starter = 32 oz. greek yogurt after straining if I reduce the volume by about half = 208.76 cals per 8 oz. serving, 20 grams of protein. I feel like I must not be accounting for the loss of the whey maybe?

    Help me please before I make myself crazy with the numbers! 🙂

    And I love your site. 🙂

    1. I think I found it – USDA Nutritition Data lists ‘whey, liquid’ at 66 cals per cup, so I guess you can measure it and deduct that amount from the total. Makes sense.

  349. I just made my first batch using a similar recipe, didn’t find your site until after I had started the process… I used 2 quarts skim milk, 1/4 cup plain yogurt, no dry milk. Heating and gelling went just fine, but after I strained I wound up with only 19 oz of yogurt from the 64 oz of milk I started with. It is also really thick. Did I strain out too much liquid? Should I have saved some whey to stir back in? (Saw that in another recipe, too…)

    Thanks!

  350. billy carter says:

    Hello
    Glad i found your site,i love greek yogurt,i have been buying Dannon plain yogurt and straining it for several hours then add flavoring.
    That gets expensive buying 5 /32 oz every week.
    My question is i’m planning on buying a yogurt machine,after i purchase one gallon
    of non homogized milk how much yogurt will i have after i make the yogurt then strain and make greek yogurt?
    Thanks in advance
    Billy

    1. Billy, It depends on how long you strain it and how thick it is to start with. I usually end up with a third to a half of the amount of milk I start with.

      Yogurt machines are great but for the amount you are planning to make, I wouldn’t recommend them unless you have access to a really big one (which I have never seen). I would check how much you can make at one time with the model you are interested in. A glass or ceramic bowl and a dependably warm place are all that’s really necessary. Good luck. paula

  351. Just completed my first batch. Amazing. It looks just like the pictures and tastes wonderful! I have to say Paula that your site is the most helpful and complete description of the yogurt making process that I have come across to date. Thank you (and your contributors) for such great hints and troubleshooting advice. I can’t wait to experiment with coconut milk and various flavorings.

    Has anyone tried using the leftover whey in the facial/home made beauty products manner? I’m very curious how it works/feels.

    1. I’m thrilled it worked for you. Watch out. The whole process from beginning to eating is addictive. Have not tried the whey in beauty products. If you find something that works, you could be on to something.

  352. Scottsdale_Fit-Nut says:

    Hi Paula, a million Kudos…!!! I couldn’t believe how EASY your recipe is! I thought for sure I’d have to try more than once, but it was a cinch! I didn’t get to strain my first batch (sadly) since I didn’t have a bouillon strainer or cheese cloth, still it was REALLY tasty, and I did so many things with it (plain, w/ stevia, w/ agave for and friut for smoothies, w/added fruit juice for popsicles, w/granola, sauces for meals etc). I’d like to strain the next batch, do you think a mesh coffee filter would work in substitute for the bouillon strainer? Also, can you confirm (a maybe otherwise obvious detail I think I missed), when you strain the whole batch, how do you do it (since the bouillon is not large enough to fit the entire amount at once), are you pouring smaller amounts from the batch in to strainer (is it a long process – how long does it take usually)? I can’t express you how HAPPY I am that I can make this at home now without all the added sugar and dangerous artifical colors, thanks again!!!

    1. So glad it worked for you. Love to hear the success stories. Now about the straining process. Yes, the coffee filter would work but me oh my. It is so small. It would take me days to filter all the yogurt I make every week. That’s why I don’t do the cheesecloth either. What a mess! The bouillon strainer I use is BIG. I can pour the entire contents of my 2-quart batter bowl in it. No cheesecloth necessary. It’s pricey but well worth it. I strain it straight out of the incubation process because it gives up more liquid (whey). I usually let it sit at least an hour but less if I don’t have time and more if I forget about it. No big deal either way. I will usually get at least one quart of whey. The strained yogurt will resemble the consistency of ricotta cheese.

      THEN, I whisk it good and thin with some milk to the perfect consistency for my tastes. It is perfectly creamy and dreamy when I get done–about the consistency of sour cream. Hope this helps. paula

  353. I love yogurt, especially Greek yogurt, and I tried to make my first batch yesterday with organic milk and a little bit of store-bought Greek yogurt for starter and I checked on it this morning…..and it’s basically just semi-gelatinous milk. Should I leave it in the oven? Since I’m in a dorm, I don’t have access to a glass bowl so I used a plastic one….does this make a difference?

    Thanks!

    1. It makes sense. I’m impressed that you would try it in your dorm room. I assume you had some way to heat the milk before letting it cool down and adding the yogurt “starter”. First, no reason to let it continue to incubate. Something’s not working. I’ve never done it in a plastic bowl but I seriously doubt if that is the problem. I suspect the yogurt you used for the starter is the culprit if everything else was done right. Often, it is just not fresh enough. Here is what I would do. Put some of the semi-gelatinous milk in the fridge for your next batch as long as it doesn’t smell spoiled. Heat another batch of milk and add some (maybe a cup) of the original batch. Then try some different yogurt from the grocery store for your starter–be sure it is fresh as possible with no flavoring or preservatives and it should claim to have live cultures. Coupled with your previous batch (that should have some very fresh “bacteria”) and the new grocery store yogurt, it might come out better. In a nice warm place, it should thicken within 5-6 hours.

      Cat, this is a tricky process at first. Do not get discouraged. Try different things. Once you figure it out, it is well worth it and will take you very little hands on time. Now that I am using my own yogurt as the starter, I do not have “fails.” It’s only when I buy yogurt from the grocery store that I am disappointed. And just like sourdough starter, the more times I make yogurt from my own homemade stuff, the better my cultures.

      Please write again and let me know how it turns out if you decide to try again. paula

  354. Thank you so much for the recipe! I made my first batch of Greek yogurt last night and tried it this morning–it was amazing! I can’t wait to make more and play around with the consistency and texture. I never realized making yogurt was this easy or delicious!

  355. Great post about yogurt. I used to make my own yogurt all the time when I was in college and on a budget crunch.

    As far as the whey goes: with whey from both yogurt and cheese making, you can use it as the liquid in pizza dough, and it adds a wonderful flavor to the crust. It’s hard to describe, but give it a shot some time and see whether you like it! (I LOVE it)

    1. Paul, I make LOTS of pizza dough so I’m definitely going to try your idea with the whey. Thanks for sharing.

  356. I’ve been making my own yogurt for a few years now. Like you, I can go through a couple (or more) 2 quart batches per week. Food of the Gods!

    I own a Yogourmet — decided it was a worthwhile investment to make sure the temperature during incubation was consistent. I was successful at making yogurt in the crock pot — wrapped in a towel and placed in the oven, or in the corner of my dining room on a small table positioned over the heat vent (in the chilly Chicago winters!). The crock itself helps to retain the heat for quite a while, but if your room temperature is too cool, after 12 hours you will still have a runny crock full of milk.

    Re: Uses for Whey

    I use it to boil pasta, in place of other liquids when baking — gives breads, pancakes, etc a nice sourdough-ish taste. Its heavenly in anything with chocolate in the name. Sometimes I mix it half and half with iced tea — sort of an “Arnold Palmer without the lemonaid.” If I’m cooking I’ll grab my container of whey any time a recipe calls for chicken broth, or even as a replacement for wine in some cases. Use it to thin out a batch of homemade hummus or pesto. Use it to cook rice or quinoa. Boil your oatmeal in whey. Top with dried Montmorency cherries reconstituted in (you guessed it!) whey. I’m dying to try using whey as the base for a brine for my Thanksgiving turkey — an interesting experiment if you think about it. So many recipes call for marinating chicken in milk…why not turkey in whey?

  357. cj thomas says:

    I have used whey for boiling noodles, for cooking rice, baking bread and when I have too too uch, I feed it to my outdoor plants, tomatos particularly need and benefit from the extra calcium. I have been using the crock pot for yogurt, heat the milk for 3 hours, let it cool for 2(or more if it is still too hot), add the starter and bundle the crockpot up in a quilt in a warm corner for 10-12 hours, it works better than my Salton ever did and I only have the one container to clean up…and I can make half gallon -1 gallon at a time. Thanks for the straining lesson, I am anxious to try this.

    1. What great ideas for the whey! And thanks for your take on making yogurt. Heating the milk for 3 hours and then letting it cool for 2 is too fussy for me (I would rather do it quick in the microwave) but the crockpot idea is a possibility for those who don’t have or want to use their oven.

  358. LaNette Bendix says:

    What brand of timer do you have? I have bought two, and returned one so far, because it doesn’t sound the alarm when I am attempting to cool down my milk, only when I am heating it up. Am I not figuring out how to use them correctly, or is the cool down feature not found on most temperature alarms? Thank you so much for your help!

  359. Hen & Chickens says:

    If I need to stir in more starter, can I do it at the 100 degrees or does the temperature need to be raised? And should the starter be at room temperature? Thanks!

    1. Hen and Chickens, Yes, you may stir in starter as long as milk is below 120 degrees F. It is not necessary that starter be at room temperature although I have seen it printed that way. I mix it in straight out of the fridge and it works great.

  360. My understanding from a nutritionist is that the whey contains a lot of nutrients, including calcium (1/2 cup has 25 percent of the RDA for calcium), so if you want to retain more of the nutrition but still have a thicker yogurt, you can use some gelatin to thicken things up a bit and still have a very similar product to greek yogurt. I add the gelatin to 1/2 cup cold milk and stir in 1/2 cup hot milk, then add the dissolved gelatin and milk to about 3 cups of finished yogurt. If you want it thicker, just use less milk or more gelatin.

    Whey can be used in baking and soups, it could be added to the liquid for preparing rice, noodles, etc. I wouldn’t toss it down the drain. At 25 percent of your RDA for calcium, add it to just about anything for a little extra of this hard to get mineral.

    Something else the nutritionist told me that I didn’t know … you can only absorb about 500 mg of calcium in a single setting. Or about the amount of calcium in 1.5 cups of milk. Any more than that is not absorbed by your body, so those insanely high (and expensive) calcium supplements are not a very good value for your money. Buy the ones with less calcium per tablet and you can save a little bit, and get more of the calcium you need.

    1. Hen & Chickens says:

      Thanks for sharing the various ways to use whey. The only thing I had thought of using it for was smoothies. Also interesting about calcium and its absorption levels. Another thing to be aware of with calcium is to make sure one is taking enough. My friend was taking 1 capsule a day without realizing she needed to take multiple capsules to get 1,000 mgs.

  361. Thank you, Romaine, for the wonderful instructions. My mother has a recipe that comes out perfectly for her, after 4.5 hrs in her incubator. She uses 1/2 gallon of 2% milk, 1/2 cup of powdered skim, and 1 cup of non-fat yogurt. I really want to use skim milk, so I’ve experimented with my own variations, and after discussing my attempts with Mom, I have some questions:
    1) Does adding powdered milk to skim milk reduce the amount of whey strained off for making Greek yogurt?
    2) Recipes that I see calling for much smaller amounts of starter all seem to incubate for much longer. Does the shorter incubation time that my mom uses (4.5 hrs) need the larger amount of starter that she uses (1 full cup)?
    3) Does it make any difference if you use Greek yogurt for your starter?
    4) You are straining your yogurt as soon as it finishes incubating. Do you put it into the refrigerator to strain, or leave it on the counter?
    5) I read somewhere else that when the yogurt is finished incubating, if you stir it vigorously and refrigerate it, it will halt any further fermentation, which prevents it from becoming as tart over the next few days.
    If you have time to answer any/all my questions, I would be so grateful. I LOVE homemade yogurt, and I especially like adding organic powdered recipe envelopes to the Greek yogurt for making dips for vegetables & chips. But my favorite way to eat yogurt is with stevia, almond extract, poppy seeds, and fresh strawberries or blueberries!!!!!

    1. Laurel,
      You pose some great questions. I will attempt to answer based on my experience but I’ve noticed that this whole yogurt making process tends to vary from house to house and what works for one may not work for another and I can’t always figure out why.

      1. I don’t think powdered milk reduces the amount of whey. It just makes it a little richer which is good especially if you are using skim milk.

      2. I do not have good luck when I use too much starter–seems to be too much competition for the “food”. If fact, I have made a half gallon of yogurt by scraping out the last of a jar–probably less than a teaspoon. Is your mom using her own yogurt as a starter? When it is fresh, you don’t need as much as using what you buy from the store. I usually ferment over night so 4 1/2 hours is a little short for my lifestyle. 🙂

      3. No, not in my experience. Again, it just needs to be fresh. Those little bacteria don’t live forever.

      4. Very good question. I strain my yogurt immediately–on the counter. Once you chill the yogurt, it takes MUCH longer to drain and won’t whip as smoothly. My goal is to reduce the finished yogurt by at least half when I drain the whey off. Usually takes an hour if you do it immediately. If you chill first, it can take many hours.

      5. Cold temperatures will halt fermentation. I drain my yogurt till very thick and add milk back in to make it the thickness I like. Whisking vigorously after adding a little milk makes an extremely creamy, velvety smooth product that does not separate much and sends me over the moon every time I eat it. It also is not very tart because I have removed so much whey, which is just the way I like it.

      Happy yogurt eating!

  362. I have finally gotten up the nerve to make my first batch! I have it in the crock-pot as other reader has done and I “borrowed” the hubby’s infrared thermometer. We shall see how it goes. I am super excited to see how it turns out! I have been buying tubs of this little pricey must have for a while and I never knew that it could be done with just a few little items that were already in the house. 🙂 Thank you for your blog!! It is great! 🙂

  363. Thank you for listing this recipe- I’ll have to try it out.

  364. Hi, Romaine – I just discovered your website, am anxious to explore more . . . it looks as if you do many of the things I do, and I hope to learn some new shortcuts from you! I make two to three batches a week of greek yogurt – have a nice little Salton yogurt maker, and use adams’ peanut butter jars for my yogurt. I always use only nonfat dry milk, and use a greek yogurt starter. The brand differs depending on what grocery store I’m in when I need starter, but all of them make such a nice thick yogurt, I never need to strain (I do drain off the whey for my husband) – unless I want yogurt cheese, that is. My husband just absolutely loves the yogurt I make, the flavor is wonderful, and it is so thick, we eat it every day. I substitute it on occasion for mayonnaise or for sour cream in cold dishes, haven’t been brave enough to cook with it. I also culture my own buttermilk – it is even easier, because you don’t need the heating step, nor does it need to culture at 100-110 degrees – it will culture in a jar on the kitchen counter – room temp is fine, eight to twelve hours usually does it, sometimes longer – it “gels” in the jar, and you can easily tell when it is done. Buttermilk is one of my husband’s favorite comfort foods, and he is very happy with the home cultured product. One of my tricks for both my yogurt and my buttermilk cultures is to freeze the culture (newly cultured yogurt or buttermilk) in ice cube trays, pop them out and keep in freezer containers, and thaw a cube in the jar before adding the milk. (Don’t forget to label the containers, the cubes look the same!) I, too heat my yogurt milk in the microwave – in my mw, it takes 13 minutes at .8 power. That varies, of course, with the power of the microwave. Each person can determine for themselves how long, at what power, their microwave will bring the milk to 180 degrees.

    1. Hi Vicki, Sounds like we may be kindred souls. Have never tried making buttermilk. We don’t drink it around here and I’ve found I can substitute yogurt for buttermilk in my baking. But will definitely give it a try. Thanks for commenting.

  365. If you are feeling the budget crunch, and don’t mind fat-free yogurt, you can use only powdered milk and it works. Of course, you can probably taste a difference between the cheap powdered milk and the good brand(s). I, however, can’t taste a difference between real milk and the Similac powdered milk.

  366. LaNette Bendix says:

    I love your website and appreciate all your expertise in making greek yogurt. I spent the money on the strainer and intend to buy the thermometer with the timer. The cost of these items will soon be paid for with the savings I get making my own yogurt. I make a double batch each week and figure I easily save $12.50. I use my electric roaster oven (which I rarely used before) to incubate my yogurt. I tested the oven with a thermometer to 108 degrees and made a little mark with a Sharpie. No need to wrap in towels and my yogurt is perfect in 6 hours….love it!!!!!!

    1. Linda Farina says:

      That’s a good idea! Do you put water in your oven?

      1. Water? No. Why do you ask?

  367. The Errant Cook says:

    Hi! I’ve made yogurt 4 or 5 times now thanks to your instructions, and it’s fantastic. I set the covered bowl on top of a heating pad on low, check it frequently with an infrared thermometer (a lovely gadget from my husband), and after about 11 hours, it’s ready to go.

    I made about a quart of yogurt the other day from a half-gallon of milk I got for $0.99. (Take that, expensive grocery store brands!) I’ve been eating it for breakfast (and dessert!) sprinkled with some brown sugar, fresh blueberries, and homemade honey-walnut granola. Yum!

    1. Infrared thermometer?? Do I need one of those? I think I might. So glad to hear you’re doing well with the yogurt. It is so addictive!

      1. The Errant Cook says:

        My thermometer is not a cooking gadget per se, but Alton Brown used one on his show a few times and then my computer-guy husband bought me one as a gift. It’s fantastic. I use it for the yogurt, frying oil, you name it. Apparently, they’re used in the food service industry to check walk-in temperatures and such. Genius!

        http://errantcook.blogspot.com/2009/07/my-new-toy.html

  368. LaNette Bendix says:

    I have been dying to make greek yogurt so I ordered a strainer, and I’m not sure if it is fine enough,. It is a double mesh strainer, the outer mesh openings are approximately 4mm X 4mm and the inside mesh is about
    2mm X 2mm. Is this fine enough? Thanks!!!

    1. Lanette, I am skeptical. The mesh on mine looks like metal fabric. It is very, very tightly woven. Here’s the link. http://www.acemart.com/prod9922.html

      I have no experience with any other strainer except the one above. The spaces in mine are way less than a millimeter. If you put your hand inside, you can not see it through the mesh unless you hold it up to a window and then you can only see a shadow.

  369. I have a question.. please email me the answer….

    I have been making yogurt this exact same way for some months now and it comes out ok, but I only let it set 4-6 hours. Will it be thicker if I let it set longer, or just tarter? I like the taste of my yogurt, but it can be a bit thin… I use fat free milk and do not add any powered, although I am thinking of trying that next batch. Thanks… will be looking for an answer in my email.

  370. I’ve been straining regular lowfat yogurt to mimic greek yogurt. I was wondering how to estimate the amount of calories and the serving size. The yogurt definitely is reduced in size (I poured off more than 1 cup of liquid from 4 cups of yogurt) but I’m not sure if the end product is more calorie dense or less. I guess my question is what is the caloric value of the strained liquid?

  371. Bridgette says:

    Thanks so much for this wonderful recipe. I’ve always loved yogurt but never realized how easy it is to make nor how expensive it is to buy (especially the greek style!). I was happy when my first batch turned out perfectly and am now looking forward to experimenting with some of the flavors you suggest.

    1. So glad to hear it worked for you. Enjoy!

  372. Why the non-fat dry milk? Can I leave it out?

    1. Yes, you can leave it out. I sometimes forget to add it and it works fine. It does make your yogurt a little richer (and more nutritious) which is nice, especially if you are using non-fat milk.

  373. Margaret Catherine says:

    The whey can also be used in baking. (Or as a facial treatment, but I haven’t tried that one myself.)

    1. Facial treatment? Considering how much of this stuff I pour down the drain, I should have no wrinkles at all if I could figure out a way to to use it on my face. 🙂

  374. Meal Plan Mom (Brenda) says:

    I have been wanting to try making my own yogurt for some time now and this looks great. I have been intrigued also with all the talk about Greek yogurt. This is on my summer cooking to-do list for sure! Thanks!

  375. Great site! The whey has many positive health properties and can be added to soups etc.. Also, the whey can be used to stir back in at the end of the process if yogurt has become too thick.

  376. I’ve got yogurt!! Staining now! Woo hoo!
    I followed the temperature instructions to a Tee, but may have put too much yogurt in as a starter. I popped in a dehydrator at 100 degrees overnight and in the morning I had warm milk and a skin. hmmm…pulled off the skin, added some probiotics and popped it back in the Deyhydrator again for the day. Got home late and..yes! I have yogurt. So I don’t know if it was too much yogurt starter OR the cultures in my yogurt weren’t actually live. ??? I was using Oikos organic plain so I’d be surprised if it wasn’t active. Since it was so late when I got home last night I popped the whole thing in the fridge but I already had another firm skin which I peeled off before straning. And yes, I stirred while it was heating. Still happy with the outcome. Thanks!!

  377. Gwen Howard says:

    If Greek yogurt is plain yogurt with the whey removed and whey is 100% protein, then why is Greek yogurt higher in protein than plain yogurt?

  378. Elizabeth says:

    I’ve been using your recipe in my crock-pot. Works great.

    I have a ‘warm’ setting on my crock. I heat my milk in the crock in the micro, let it cool to 115, add my starter and place it in the heater base(unheated, NOT turned on at this point).

    I use a thermometer with an alarm that sounds at a preset temp(100). When the milk gets to 100, I turn on the crock (to warm, not low) for just a few minutes, watching the therm. Takes just a few minutes to get it up to about 103, then I turn the heater off. I maybe have to do this every hour or so. The therm lets me know.

    I’ve not lost a batch yet by this method. I get good whey in about six hours, sometimes I let it go longer, though. A bit of babysitting, but very much worth it, esp when you add a bit of honey to the finished product along with some newly picked ripe strawberries!

    1. Great to hear the crock-pot works for you. Are you picking those strawberries yourself? YUM!

      1. Elizabeth says:

        Yes indeed. They are terrific this year, but we are about through with the crop. We’ll have to wait on the raspberries.

  379. I finally hooked my husband on yogurt with fruit and granola, but now our grocery budget is taking a big hit. I was looking for a way to make my own, and this sounds great. I was wondering though, have you tried using a crock pot instead of the oven? Would that work, or does it get too hot?

    1. Magi, I have not tried the crock pot myself but hear it works great. Since I make mine in 2 quart batches, it’s easier in the oven. If you try it, come back and let us know how it works. You would need a warm setting that will last at least 6-8 hrs.

      1. This summer is just speeding by! It seems like I was either out of yogurt starter or low on milk every time I went to make yogurt. Finally got it all together today.

        My crock pot only has a low and high setting. I tested it, and the low was too high to maintain the right temp, so I used your oven method.

        So far it all looks good. I strained it for a little over an hour. The texture was perfect after I whisked it, and the flavor is good. Can’t wait to try it in the morning after it has chilled.

        Thanks for the recipe and method.

        1. Congratulations on a successful batch. Most of the time it works perfectly for me but I still have the occasional fail when I don’t get my temperatures just right or my starter isn’t quite as fresh as it should be. The more you do it the easier it becomes. You will soon be totally spoiled with your own homemade yogurt.

          1. Had it for breakfast with a spoonful of cherry preserves I canned two weeks ago and a handful of Trader Joe’s granola. It was delicious and a big hit with my 4-year-old. Thanks again!

          2. Congratulations! You did it. Hope you enjoy as much as I do.

  380. diana henretty says:

    I’ve been making my own yogurt for 20 yrs. now. So far the best recipe is adding 2T. of honey and 2 T. of vanilla to 2 qts. of milk.
    Also, for a thicker, creamier yogurt, add l cup of powdered milk per qt.
    of milk. Or a pkg. of Knox’s gelatin (mixed with water before adding to yogurt) added before you put in a machine works great.
    I worked for Head Start, got strep throat every 6 weeks until I faithfully ate 2 c. of yogurt a day, now I never get it. Also, you can pick up the older Salton machines at thrift stores or yard sales, most of the time for about $2.

    1. Thanks so much for sharing your experience. I have always added dried milk but never that much. I will try it. Do you use skim milk to start or something else?

      Your story is a great testimony to the health benefit of yogurt.

  381. you can use the whey to ferment food. my friend makes great sauerkraut, fermented bean dip, beets, etc and the whey helps the fermentation along with some salt.

    1. Thanks Holly, great idea.

      1. I’ve just discovered “The Complete Idiot’s Guide to Fermenting Foods” by Wardeh Harmon. The author has a Jersey cow and makes yogurts and cheeses all of the time (recipes in book too), which leaves her a lot of whey, and this book is nearly entirely filled with a wide variety of recipes for healthy pickles, krauts, and everything you can imagine deliciously fermenting – using whey, which also allows you to use less salt in the process.

        1. Iris,
          I’m not into fermenting food, at least not yet but I have readers who are so I greatly appreciate this information. Thanks for taking the time to write.

  382. The Errant Cook says:

    After a night in the fridge, I returned my bowl to the microwave. After about 8 minutes, it had separated to half whey and half curd. I drained it (a large tea strainer worked well) and wound up with about 2 cups of a texture similar to fine ricotta. (I started with almost a half gallon of whole milk.) I added a little milk back to it and blended with an electric mixer.

    It’s not quite smooth, but it’s very mild and good and the curd is barely noticeable. I think I’ll use this batch for some homemade ranch dip- garden-grown fresh chives and parsley, plus garlic, should do nicely. Next time it should be better for fruit! 🙂

  383. Errant Cook, Yes, you are correct. Temperature should reach 175-180 after you stir the milk. Sorry I did not specify originally. I have added it to the instructions.

  384. The Errant Cook says:

    I’m making this now and I’m worried- ten hours in and no gelling yet. Reading other blogs leads me to believe I didn’t get the milk hot enough in the beginning. I followed your instructions and got edge bubbles, but my instant-read infrared thermometer registered around 148…other sites say 180 to start. Here’s hoping the next 3-4 hours provide some good goop!

  385. Bread and Beta says:

    Thank you for sharing the easy yogurt recipe. I’ve found a good bread recipe that uses whey – see my recent post on Italian Feather Bread. I’m not sure if it’s part of the skinny diet, but it is really delicious.

  386. Romaine,

    I made the yogur this weekend.. It turned out great. I let it strain for 24 hrs very thick and creamy. Next time I may not strain for as long. Instructions were very clear and easy to follow. Thanks for sharing!
    Regards
    Donna

    1. Thank-you for reporting back on your success. 24 hours is a very long time. Sounds like you had cheese. I usually drain for about 1-2 hours. No matter, if you add a little milk and whip it with a whisk, you will have the smoothest, creamiest yogurt ever.

  387. Romaine,

    Please forgive but I just want to clarify how much milk you started with. It states to use a 2 quart container; is that the amount of milk I would need? I would like to make my own yogurt to save money.

    Thanks so much!
    Donna

    1. Yes, fill the container with 2 quarts of milk.

  388. Dianna Lord says:

    Yes I had strained it… muslin cloth. After being refrigerated it is nearly like a thick ricotta cheese, or a textured cream cheese. I think there may have been a little skin on the top since I didn’t cover it… it cracked on the side and the whey was around the sides. It has a good flavor… I think the next batch will do well. I will let you know. I probably won’t sweeten it, hubby is a newly diagnosed diabetic, hates the taste of the stevia, etc… I have already used it as a substitute for mayo in our chicken salad… dill for him and curry for me… and it is fabulous! Thanks again!

  389. Dianna Lord says:

    Well… I am truly excited. After reading your “troubleshooting” section, I put my failure back in the oven and this morning Voila! Yogurt! My only issue is the texture which is mostly like ricotta cheese… I think it is probably because it is a do over…. but before I whisked it… it was beautiful…. creamy with no “grainy” look or texture… not sure why the whisking changed that … also… did not cover with a towel… gas oven …worried about fire?? Hoping the next batch, with your instructions, will be creamy and wonderful… any specific instructions for towels in gas oven? and creamy issue? Thanks so much!

    1. Congratulations on making yogurt. But have you strained it yet? That is how you get Greek yogurt, which is much thicker than regular yogurt. After straining (for about an hour) you will have 50% or more whey–which I throw away. Whisk the solids that are left and add only a little milk or soy milk for maximum creaminess. At this point I also add Torani syrup to sweeten. Write back and let me know how it goes.

  390. Dianna Lord says:

    Hello Romaine,
    I just found your delightful website. I was especially pleased to see the scripture on your pages… bless your heart.. I found the site looking for the reason for my utter and complete failure in making greek yogurt. I had found a recipe online from someone with a greek last name and was so excited, I ran to the store, bought the ingredients, and followed the very vague and inadequate instructions… which by the way said 70 degrees for 8-12 hours…. and to my dismay… as I am sure you have already guessed….I still have liquid. After reading your fabuous detailed instructions, I am encouraged and can’t wait to go try again. I look forward to trying some of your other recipes, and maybe have an opportunity to share with you as well… I will let you know how it turns out. Thank you and God bless you.

    1. Oh I do hope it works for you. Let me know. IMHO, it’s worth the effort to try and try again until you get it–if you really like Greek yogurt. Also thanks for your kind words about my website.

  391. stephanie says:

    Thanks for the recipe although we do not have a microwave, I am assuming that heating on the stove slowly until bubbles appear will do just as well?

    1. Stephanie, Heating on the stove works great–but requires a little more attention. Hope it turns out well for you.

  392. kalamazoo says:

    I just bought a yogurt machine at Tuesday Morning for $25; well worth the money. It gets the yogurt to the perfect temperature and shuts off automatically after preset hours. I always warm the milk on the stove using a electronic kitchen thermometer then cool it using the same. My yogurt is perfect every time. When eating it, I like to add some of the sugar free liquid coffee flavorings like vanille, hazelnut, or chocolate. I have added fresh and frozen berries and sweeten with stevia, a natural sweetener. This is the best yogurt I’ve ever eaten. I strained mine with a tea strainer since it’s finer mesh.

  393. Vivian Leventis says:

    Being a true Greek, of course I have a use for the whey from the yogurt. If you like feta cheese, you can buy your favorite when it’s on sale and then keep it fresh by submerging it in the whey. It lasts a really long time like this. The whey keeps it fresh. If you have ever noticed at a Greek deli counter, the feta is always in a yellowish water. That’s what this is, the whey from the yogurt.

  394. eeks! this looks like way too much work for me!

  395. After a few attempts making this yogart, with only moderate success, I finally made a great batch the last time. Yeah! What I learned along the way was the importance of temperature, temperature, temperature. My first two attempts were fairly decent, but then I moved to a different house, different oven, different microwave, etc. things didn’t go as well. Then I discovered while I was making candy for Thanksgiving that my candy thermometer had a place marked at 150 degrees for scalding milk. So armed with my thermometer and a new 2 qt. heavy glass mixing/ measuring bowl with a tight lid like Romaine’s picture, I microwaved my milk for 16 minutes on high. Wonder of wonders, when I stuck the thermometer in, it was almost right on 150 degrees. Meanwhile, I also discovered that I could set my baking oven on exactly 100 degrees and it would maintain that temperature. Thanks for digital controls! It was very convenient to just clip the candy thermometer to the side of the bowl as the milk cooled, and I knew precisely when the milk reached 110 degrees. After adding the dried milk and yogart culture, I placed the lid on it, forgot to wrap it in a towel, and left it in the oven for 13 hrs. It did perfectly what it was suppose to do. The moral of the story – forget the towel! :+) No, I think it was just maintaining the proper, consistent temperature. My oven just didn’t get hot enough with only the light on, and the heavy glass bowl holds the heat really well. I feel sooooo healthy now that I can make yogart!

    1. If the pilot light doesn’t get hot enough, fill a couple jars with hot tap water, cap them and set them in the oven. It will add a bit of extra heat.

  396. FYI If you use organic milk, it only needs to be heated to 110/120 before adding the yogurt starter. This is because organic milk undergoes UHT (ultra high temperature) processing rather than just pasteurization so all the bacteria are already dead. Just check your milk and if it says UHT, you’re good to go.

  397. I have been making yogurt myself for 15 years now. Keep stirring the milk as you heat it up and do NOT let it boil. Keep stirring it as you cool it down in your sink filled with cold water, that way no skin will form.

    By the way, there are yogurt cultures that do not require heat, so you can make them on the counter top. Google “Fil Mjolk” – I just got my culture and am already making the second batch, but it may be too soft to make strained yogurt with it. Maybe something for your readers?

  398. Thank you for the tips! I eat a lot of yogurt and I make my own with skim milk also. I’m going to look for a fine strainer and give that a try. I use coffee filters and it’s gross to have that soggy paper and try to scrape the yogurt off of it! I never thought of adding milk to thin it out if it’s too thick – another great tip.

    I love mixing in some all-fruit jelly and I’m going to try your suggestion of espresso powder. I haven’t had a problem with skin on the milk. I stir it a couple of times during the microwaving time – not sure if that would help or not.

    1. Really? You never get a skin on the milk? I’m going to try stirring mine next time and see if that does the trick. I usually just put it in the microwave and forget about it. I’ll let you know.

      Something else I’m going to try is steeping some chai tea bags in the milk after it has reached 180 and is cooling down. Think it may have possibilities. Today I put sugar-free lime Torani syrup in my yogurt and crumbled up a gingersnap on top. Very close to Key Lime Pie.

      1. Did the chai tea bags work???? Sounds yummy!

        1. Hi Becky,

          Yes, it did work. But it wasn’t a favorite so I forgot about it. 🙂

          1. Good to know! I might just try using spices to make chai-spiced yogurt. That might turn out yummier 🙂

  399. I am a bit skiddish about making my own, not sure but maybe someday. I do love the greek yogurt but price does keep me away.

  400. I use a simpler method because I don’t have so many appareil available: I heat the milk to about 60-70 degrees, mix into it some probiotic yoghurt, cover the pot with thick layers of clothes all around, let it sit overnight, then let it strain for 45min-1h. I get 70% of greek yoghurt and 30% of whey. though my greek yoghurt (from full-fat milk) has 95 kcal/100g. It’s a great idea to add some milk if it gets too thick, you’re very smart! I’ll see how much thicker it will get this time (I’ve just put it in the fridge). Actually I was looking for another weblog about greek yoghurt but as there are so many entries in google, I was curious to see your page too! Here greek yoghurt is expensive too, 150g (5oz) costs 1.2eur – I bought it once only where there was a special offer 2 for the price of one but I was not too persuaded by it – it was not so tasty but it was very thick, yes. Sorry for such a long comment

  401. Where do you buy Fage Greek yogurt?

    1. I’ve seen it at Krogers, Central Market, Whole Foods and Target. Walmart sells Oikos which my sister likes but I like Fage better.

    2. Costco has a 1000g (35.5 oz) container of it for like $4.59. The best buy anywhere for Greek yogurt.

      1. Thanks for the info Laral. Not everyone likes to make it.

        1. I didn’t realize just what a bargain price this was until I found the exact same size of this brand at Smart and Final this weekend. It was a whopping $8.99! That’s double Costco’s price. I have found that if Costco has what you are looking for, no one beats their price, or their, usually unlimited, return policy. S&F usually has great prices on dairy products too. For instance, they have manufacturing cream (40% fat), which is heavy cream (36% fat) on steroids, for just $6.65 for a half gallon! Heavy cream is $4.99 a quart and that’s actually a good price, since it goes for like $3-something a pint at any supermarket, so you do the math. They usually have good prices and a lot of restaurant type supplies and ingredients, but this time they really struck out. I should tell them. 😉

          1. Hi Laral,
            Love Costco….for more than just their prices.

  402. Barb, you are correct. You just want to take the chill out of the oven.

  403. You mention “Cover milk and place in a conventional oven that has been preheated for only one minute. Wrap in towels. Turn the oven light on”. I have a question about the preheated point. In my oven I have to set the temperature to 350 or 400 or whatever. I’m assuming it doesn’t matter what temperature you pick since it’s only preheating for one minute?

    1. 5 stars
      I am so glad I found your website! I’ve been making yogurt for a bit now with mixed results, but using whey as the starter and less of it has been a game changer! The final product is creamy and has a great texture. Plus using the microwave is so much easier and quicker. When I would make it on the stove it would take forever or scald the bottom. Thank you so much for your thorough information and troubleshooting!!

      1. Yes!!! Abbee, I’m so glad to hear you like using the microwave. Like you said, it is so much easier than using a pan on the stove. Thank you so much for taking the time to write.

  404. Good idea about the protein shakes. But is it a little bitter/sour?

    1. The whey in shakes actually gives it a bit of a buttery taste (like adding cream cheese to a strawberry smoothie!) Also, I use my whey as a substitute for chicken or veggie broth. Works very well in gravies and cream sauces, too! I have also used in in the place of buttermilk for Fresh Ranch dressing.

      1. Good to know, Christy. Thanks!

  405. We use the whey in protein shakes. it is very healthy. i sometimes drain the whey off for 48 hours, making a low fat yogurt cheese. this can be used for a low fat cheesecake.

    1. Hi Peggy,

      Can you explain more about your comments? I didn’t understand what you meant by draining the whey off “for 48 hours”. Did you mean that for the first two days after making a batch of yogurt you drain the whey off? Why for 48 hours? Does the whey itself then automatically turn into a “yogurt cheese”? Thanks for explaining!